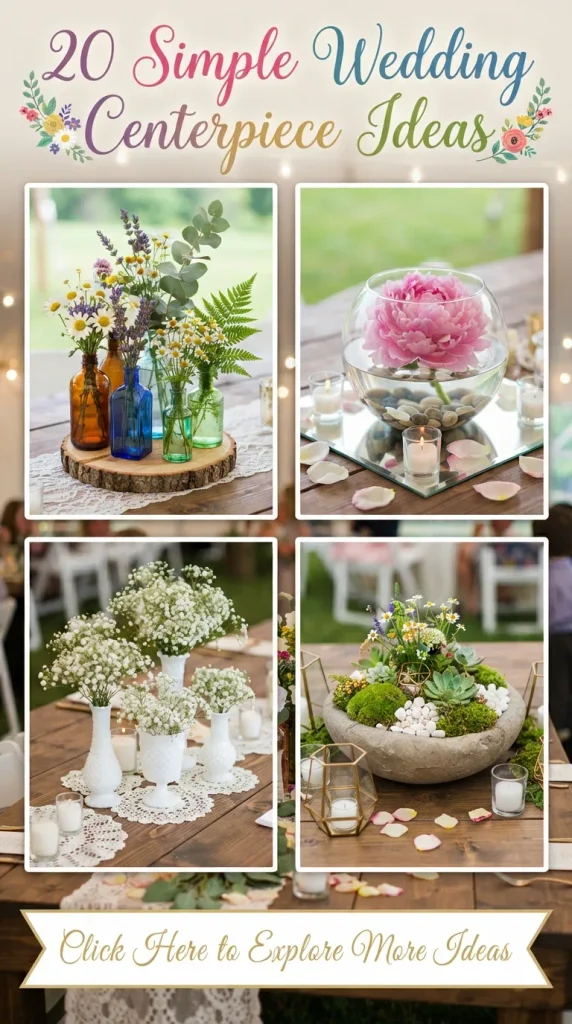
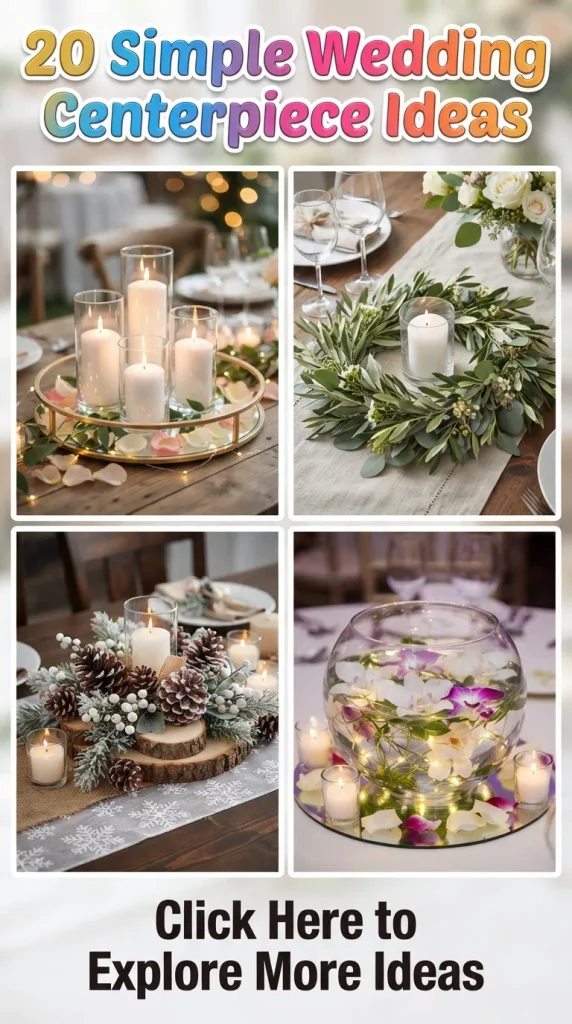
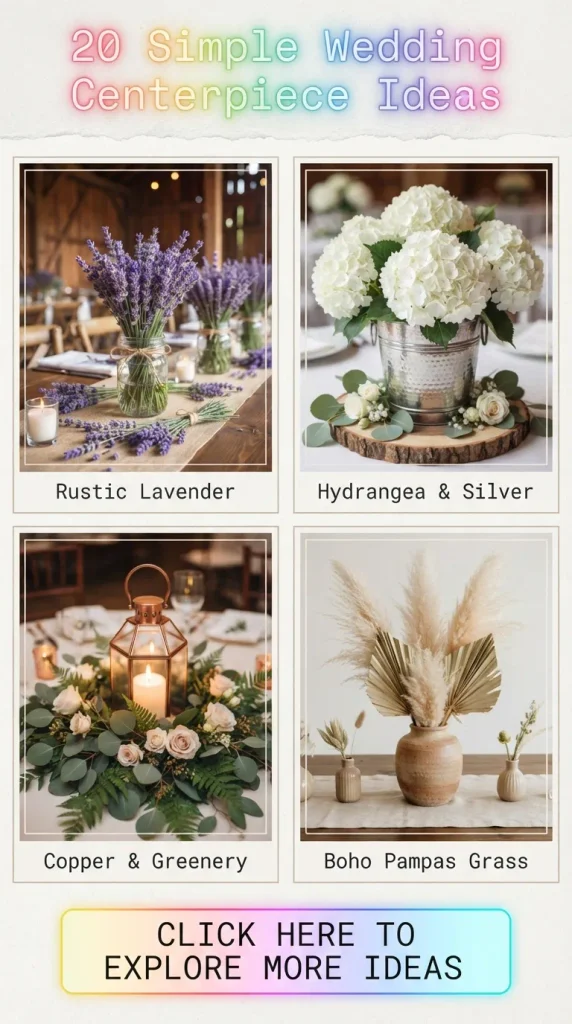
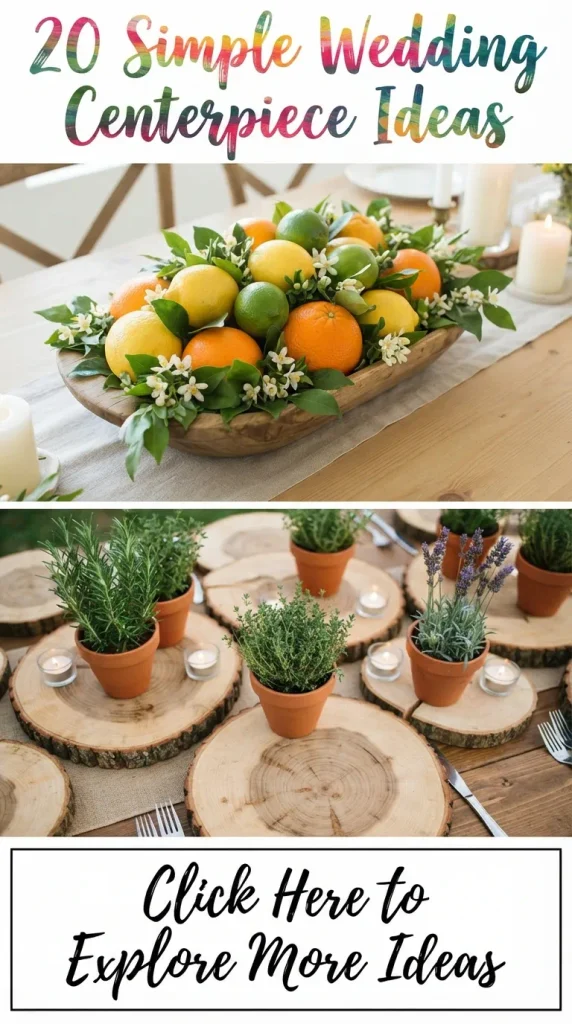
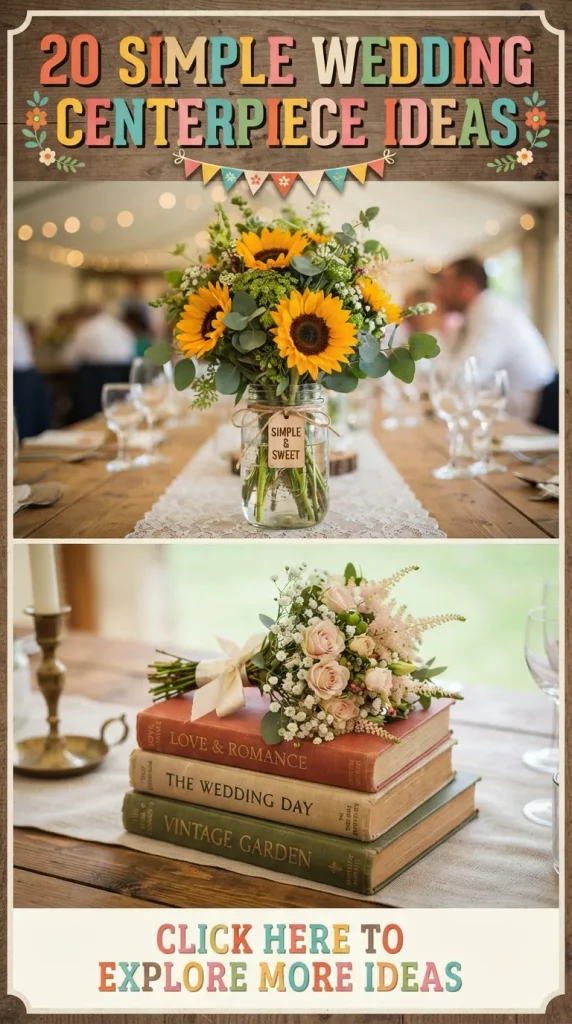
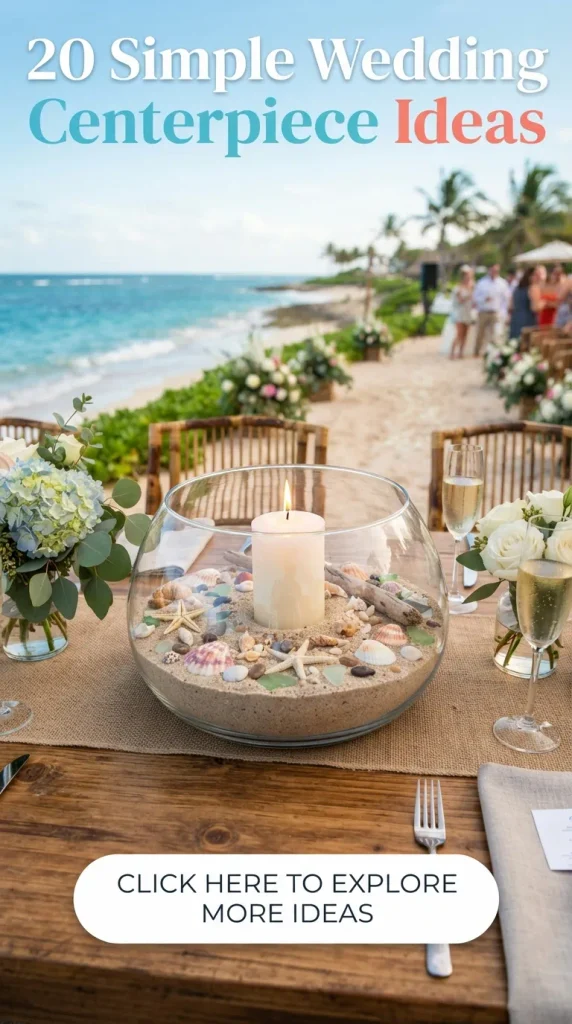
20 Simple Wedding Centerpiece Ideas
Your wedding day is a reflection of your love story—a curated chapter of your life where every detail whispers your personal style. Among the myriad elements that weave the tapestry of your celebration, wedding centerpieces hold a sacred space. They anchor the visual aesthetic of your reception tables, drawing the eyes of your guests inward and setting the mood for the evening. If you have been searching for a design philosophy that marries minimalist grace with breathtaking impact, you are in the right place.
The modern aesthetic has shifted away from towering, overly complex arrangements that block conversation and overpower a room. Instead, couples are embracing a refined, intentional approach. Simple elegance is the ultimate sophistication. It allows the natural beauty of botanical elements, candlelight, and thoughtful textures to take center stage without feeling overdesigned.
This comprehensive guide explores twenty aesthetic, gorgeous, and surprisingly simple wedding centerpiece ideas. Each concept is broken down with a clear supply list, a step-by-step DIY guide, professional styling tips, and creative variations to help you tailor the look to your unique venue and season. Whether you are planning an intimate micro-wedding in a modern loft or a sprawling outdoor celebration beneath the stars, these ideas will inspire you to create tablescapes that your guests will talk about for years to come.
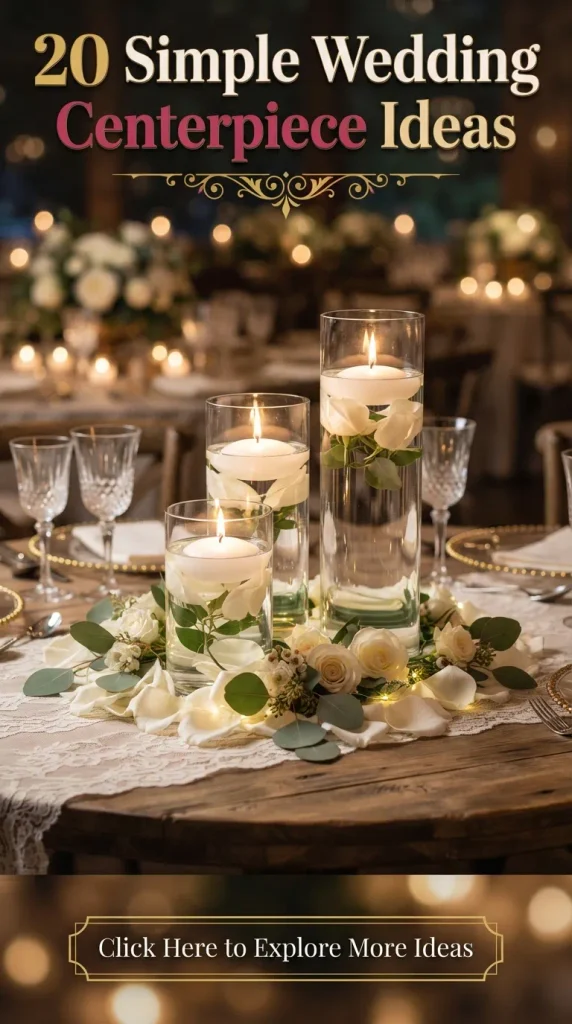
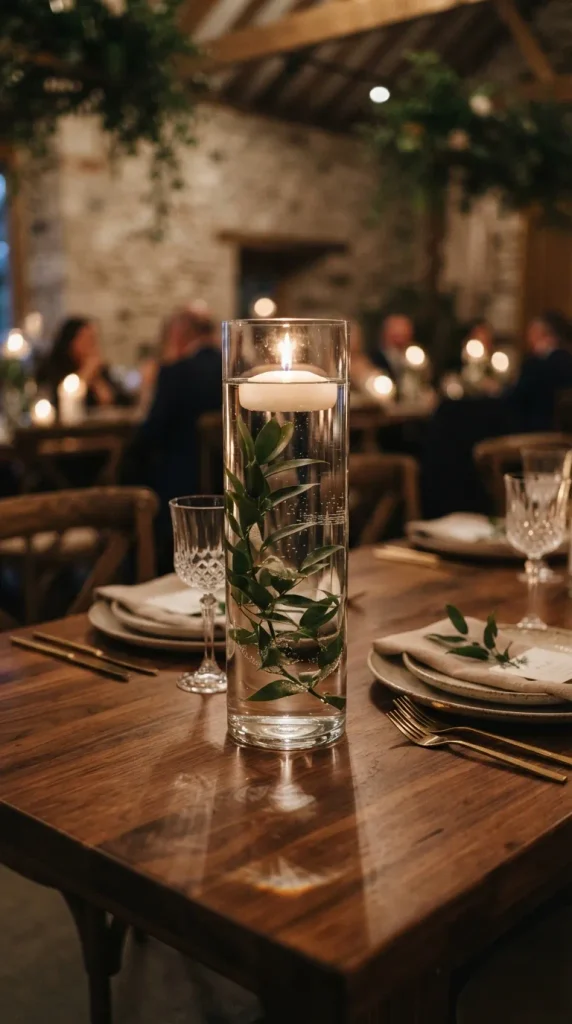
1. The Floating Botanical Cylinder Simplicity often creates the most dramatic visual impact. This design relies on the clean lines of clear glass cylinders, submerged botanicals, and the warm, ethereal glow of floating candles. It works beautifully for modern, minimalist, or contemporary industrial wedding venues.
- Supplies Needed:
- Clear glass cylinder vases in three varying heights (e.g., 9-inch, 10.5-inch, and 14-inch)
- Fresh stems of ruscus, eucalyptus, or monstera leaves
- Heavy clear glass marbles or decorative aquarium stones (to anchor stems)
- Floating white pillar candles (3-inch diameter)
- Distilled or filtered water (to prevent cloudiness)
- Distilled white vinegar (for polishing glass)
- Step-by-Step Instructions:
- Thoroughly clean all glass cylinders inside and out using distilled vinegar and a microfiber cloth to ensure a crystal-clear finish.
- Place a small handful of clear glass marbles at the base of each cylinder. These will act as anchors to keep your greenery from floating to the top prematurely.
- Insert your botanical stems, bending them gently if necessary so they coil naturally against the interior walls of the glass.
- Slowly pour distilled water into the cylinders, filling them up to about two inches below the rim. Pouring slowly prevents air bubbles from clinging to the leaves.
- Gently place a floating candle on top of the water. Light the candles just before guests enter the reception space to create an instant romantic glow.
- Expert Styling Tips:
- Vary the heights of the cylinders across the table to create dynamic visual rhythm.
- Place a round, rustic wooden slice or a simple linen runner underneath the grouping to ground the design and add textural contrast.
- Creative Variations:
- Substitute green leaves with long-stemmed white orchids or delicate single-stem proteas for a dramatic, high-end botanical look.
- Add a few drops of liquid floral dye to the water for a subtle watercolor tint that matches your wedding palette.
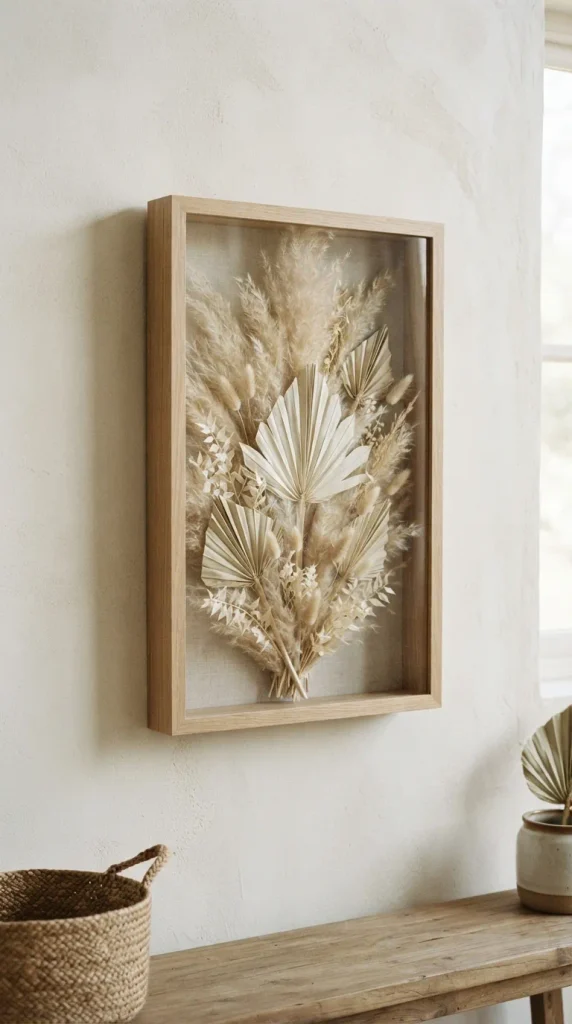
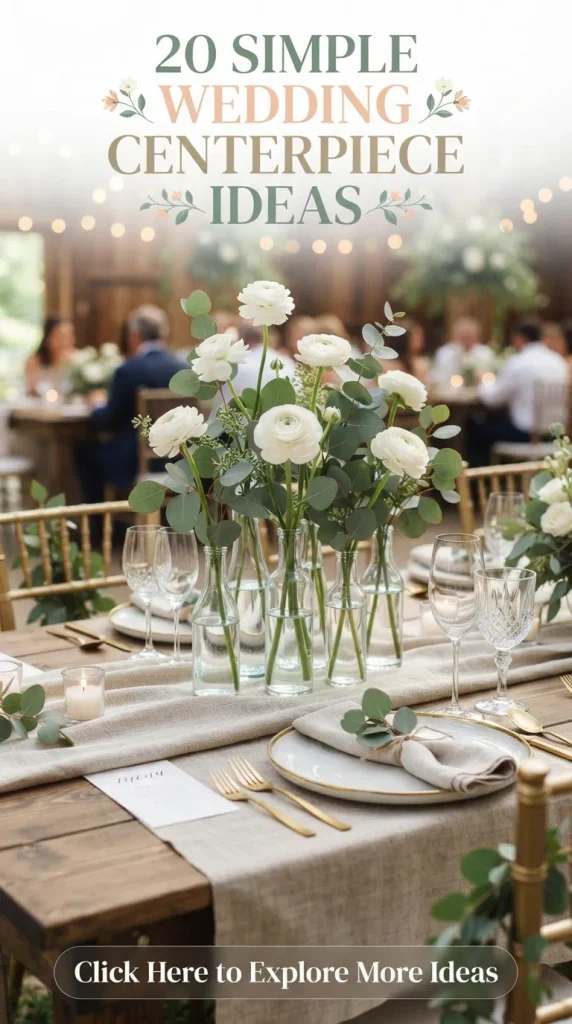
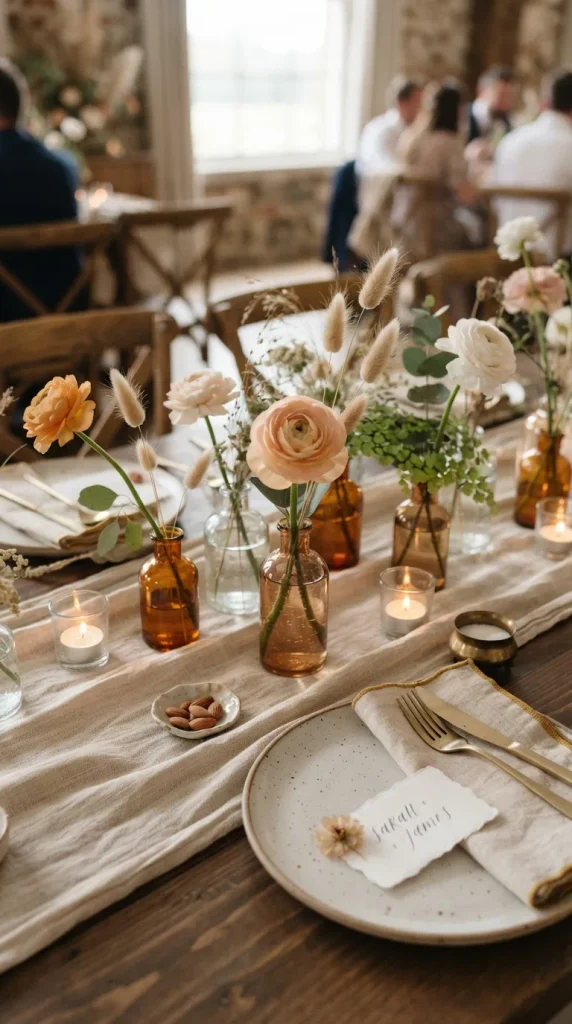
2. Minimalist Single-Stem Bud Vases Grouping mismatched bud vases down the length of a reception table creates a collected, effortless aesthetic. This approach feels organic, deeply personal, and budget-friendly while offering incredible versatility for any floral preference.
- Supplies Needed:
- An assortment of 7 to 10 bud vases in varying heights, textures, and materials (amber glass, clear crystal, matte ceramic)
- A curated selection of fresh blooms (e.g., ranunculus, garden roses, scabiosa, and dried bunny tails)
- Sharp floral snips
- A shallow ceramic tray or linen table runner
- Step-by-Step Instructions:
- Arrange your collection of bud vases in a loose, staggered line down the center of the table. If using a runner, place them directly on top of the fabric.
- Trim the stems of your flowers at a 45-degree angle under running water, ensuring they are cut to heights proportional to each individual vase.
- Place only one or two statement stems in each vase. Keep some vases entirely minimalist with a single textural element, like a piece of pampas grass or a dried palm spear.
- Step back and evaluate the spacing, ensuring the arrangement looks balanced and airy rather than overcrowded.
- Expert Styling Tips:
- Stick to a strict color palette of three colors maximum to keep the look cohesive rather than chaotic.
- Interspersing tiny tea light candles between the bud vases will catch the glass and create a magical evening atmosphere.
- Creative Variations:
- Use all amber apothecary bottles for a vintage, apothecary-chic fall or autumn wedding.
- Incorporate dried elements like preserved ruscus and bleached lunaria for a modern bohemian texture that holds up indefinitely without water.
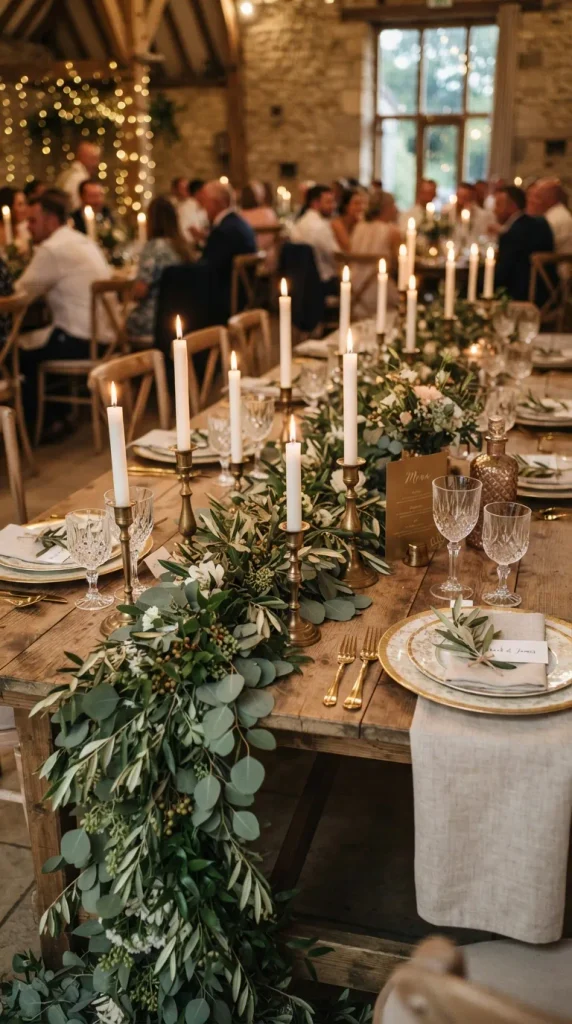
3. Cascading Olive Branch Runners For an organic, Mediterranean-inspired look, forgo traditional structured centerpieces entirely. A lush runner of fresh greenery laid directly on the table creates an abundant, earthy feel that encourages intimate conversation.
- Supplies Needed:
- Fresh olive branches (approx. 5 to 7 long, pliable stems per table)
- Secondary accent greenery, such as silver dollar eucalyptus or Italian ruscus
- Floral wire and green floral tape
- Taper candles in minimalist brass holders
- Step-by-Step Instructions:
- Lay the longest, strongest olive branch down the center of the table as your structural spine, curving the ends slightly for an organic look.
- Weave secondary eucalyptus branches into the spine, tucking stems underneath to conceal them and building outward for desired fullness.
- Secure key overlapping junctions with discreet pieces of green floral wire if certain sections tend to slide or drift apart.
- Weave 3 to 5 brass taper candle holders directly into the greenery, ensuring the flames are safely away from loose dry leaves.
- Expert Styling Tips:
- Mist the olive branches lightly with water every couple of hours if your venue is warm, keeping the foliage looking crisp and vibrant throughout the night.
- Let the ends of the greenery puddle slightly onto the floor if you are using long, dramatic banquet tables.
- Creative Variations:
- Mix in fresh herbs like rosemary and lavender for a centerpiece that not only looks stunning but releases a subtle, calming scent.
- Add clusters of green seedless grapes or ripe figs tucked naturally into the foliage for an Old-World, feast-like aesthetic.
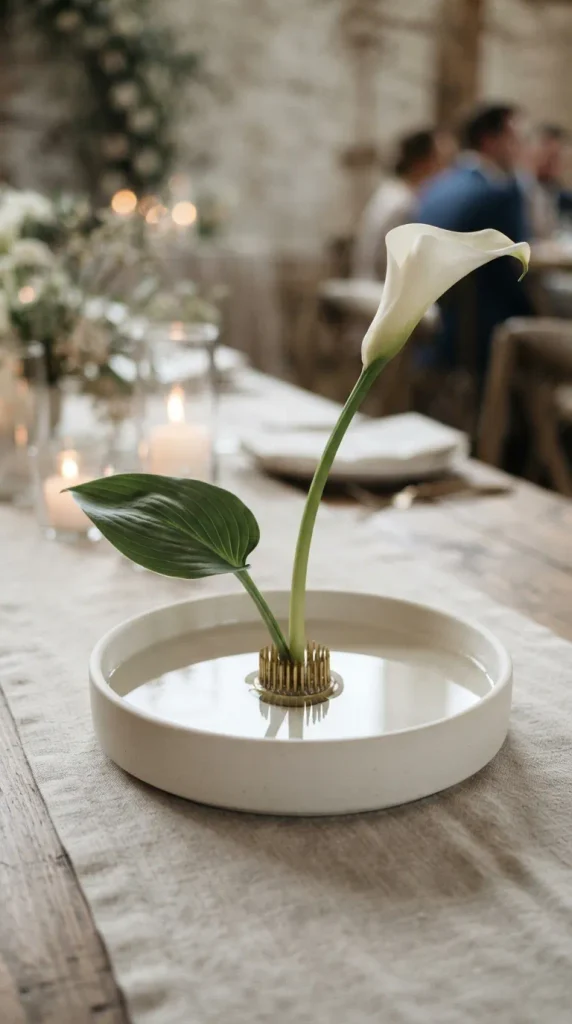
4. The Sculptural Ikebana Dish Rooted in the ancient Japanese art of flower arrangement, Ikebana focuses on minimalism, asymmetry, and the beauty of individual stems. This sophisticated centerpiece makes a powerful artistic statement with very few materials.
- Supplies Needed:
- A shallow ceramic or stone bowl (kenzan dish)
- A heavy brass pin frog (kenzan)
- A few sculptural floral stems (e.g., calla lilies, orchids, or structural branches)
- Small river stones or pebbles to conceal the pin frog
- Step-by-Step Instructions:
- Secure your brass pin frog firmly to the bottom of the shallow ceramic bowl using floral sticky clay.
- Fill the dish with water just enough to cover the base of the pin frog.
- Carefully press the thickest, most sculptural stem into the pins at a dramatic angle (typically around 45 to 60 degrees) to establish your primary focal line.
- Add a secondary, shorter stem to balance the composition, and finish with a low-lying leaf or delicate blossom to cover the mechanical base.
- Arrange small river stones around the pin frog to create a clean, natural finish.
- Expert Styling Tips:
- Place these dishes on square wooden blocks or marble slabs to elevate them slightly and give them architectural presence on large round tables.
- Keep surrounding table decor minimal to let the sculptural lines of the Ikebana arrangement command attention.
- Creative Variations:
- Use stark, dried curly willow branches combined with a single pristine white Anthurium for a striking modern art-gallery vibe.
- Opt for a monochromatic color scheme using shades of blush pink and deep burgundy for romantic warmth.
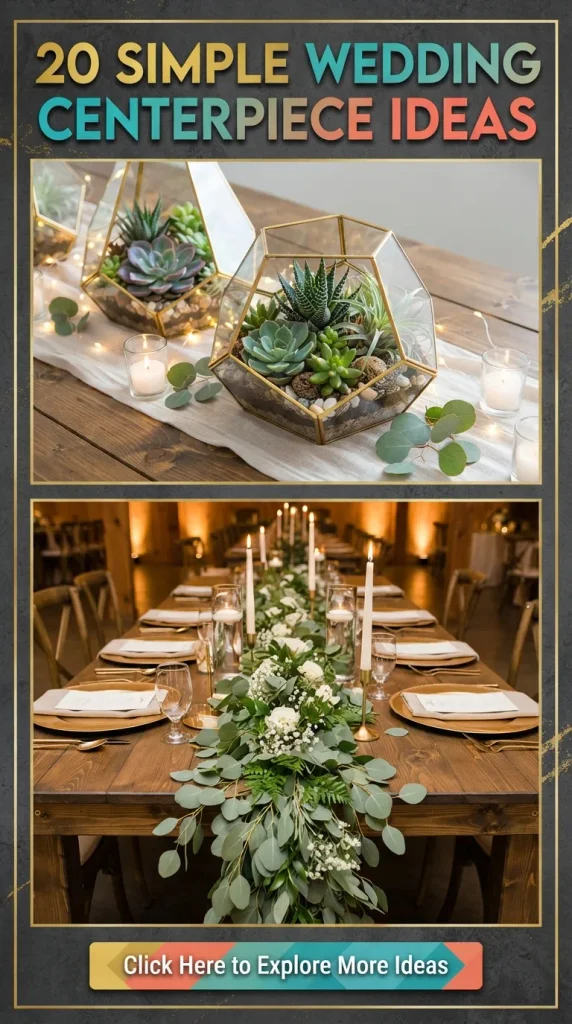
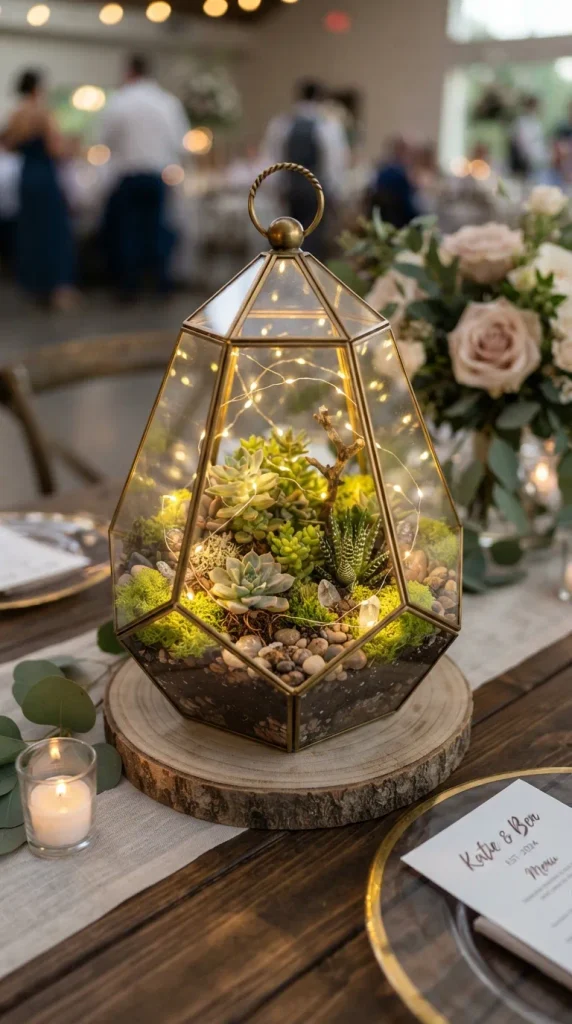
5. Modern Geometric Lanterns with Succulents Geometric brass and glass terrariums offer a contemporary, architectural aesthetic. Paired with hardy succulents and delicate fairy lights, this centerpiece is durable, low-maintenance, and intensely stylish.
- Supplies Needed:
- Geometric glass and metal terrarium lanterns (house-shaped or pentagon-shaped)
- An assortment of small rooted succulents in miniature nursery pots
- Preserved green moss
- Battery-operated micro copper fairy lights
- Step-by-Step Instructions:
- Line the bottom of the geometric terrarium with a layer of preserved green moss, pressing it gently into the corners.
- Nestle 2 to 3 small succulents inside the terrarium, removing them from their plastic pots and tucking moss around their root systems to secure them.
- Weave a string of micro fairy lights loosely through the succulents and up along the metal frame of the lantern.
- Wipe the glass panels clean of any fingerprints or dust using a microfiber cloth.
- Expert Styling Tips:
- Group three different sizes of geometric terrariums together on a mirrored tray to amplify the light bouncing off the glass panes.
- These make fantastic guest favors at the end of the night—invite your loved ones to take a succulent home!
- Creative Variations:
- Fill the terrarium with pillar candles instead of plants for a warm, glowing lantern effect during an evening reception.
- Spray-paint the metal frames in matte black, brushed gold, or copper to seamlessly match your wedding’s hardware palette.
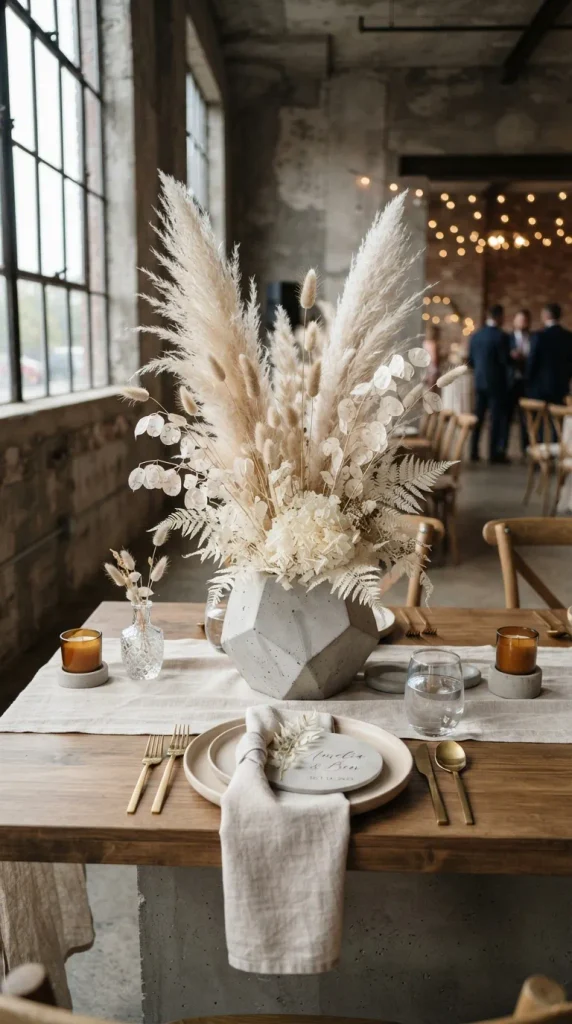
6. Concrete Vessels with Wild Pampas Grass Industrial chic meets bohemian romance in this striking centerpiece. Raw concrete vessels offer a stark, modern texture that contrasts gorgeously with the soft, feathery texture of wild pampas grass and dried bunny tails.
- Supplies Needed:
- Custom or store-bought geometric concrete pots or cylinders
- Tall stems of natural or bleached pampas grass
- Dried bunny tails (lagurus ovatus) and bleached wheat stalks
- Floral foam block (cut to fit inside the concrete vessel)
- Clear hairspray (to prevent pampas grass shedding)
- Step-by-Step Instructions:
- Cut your floral foam block to snuggly fit inside the cavity of your concrete vessel.
- Insert the tallest pampas grass stems into the center of the foam, establishing the maximum height for your centerpiece.
- Layer medium-height dried wheat stalks around the perimeter to create fullness and volume.
- Fill in the base with fluffy bunny tails, ensuring the floral foam is entirely hidden from view.
- Lightly mist the entire finished arrangement with a fine layer of clear hairspray to lock down loose fibers and prevent shedding.
- Expert Styling Tips:
- Pair these raw concrete centerpieces with soft linen tablecloths and matte black flatware to balance industrial edge with romantic softness.
- Because dried florals require no water, you can assemble these centerpieces weeks in advance, eliminating last-minute wedding day stress.
- Creative Variations:
- Dip-paint the bottom half of the concrete vessels in metallic gold leaf or crisp white paint for a refined, two-tone custom look.
- Incorporate dried palm spears cut into geometric shapes for a bold, tropical-boho statement.
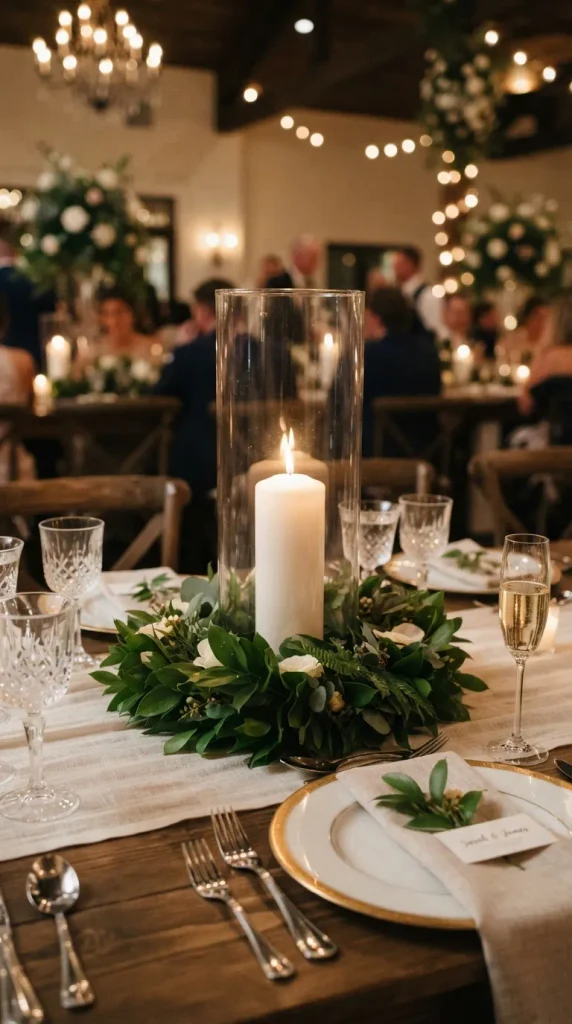
7. Elevated Pillar Candles in Hurricane Glass Height creates drama, but safety and visibility are paramount at wedding tables. Elevating simple pillar candles inside tall hurricane glass cylinders surrounded by a delicate ring of greenery offers timeless elegance without obstructing cross-table conversations.
- Supplies Needed:
- Tall hurricane glass cylinders (at least 12 inches high)
- High-quality white or ivory pillar candles (smokeless and dripless)
- A circular floral wreath ring made of fresh salal or ruscus leaves
- Matches or a long-reach lighter
- Step-by-Step Instructions:
- Lay your fresh greenery wreath flat in the center of the table.
- Carefully place the tall hurricane glass cylinder directly in the center of the greenery ring.
- Insert a pillar candle inside the cylinder, ensuring it sits level at the bottom.
- Light the candle, making sure the flame sits safely below the rim of the glass to protect it from drafts and guest movement.
- Expert Styling Tips:
- Use candles of varying heights across different tables to create a rich, layered look throughout the reception hall.
- Opt for unscented candles so they do not compete with the aromas of your wedding dinner.
- Creative Variations:
- Fill the bottom two inches of the hurricane glass with polished white river stones or coffee beans before inserting the candle for added texture.
- Use colored pillar candles (such as dusty rose, sage green, or deep plum) to tie into your wedding color palette.
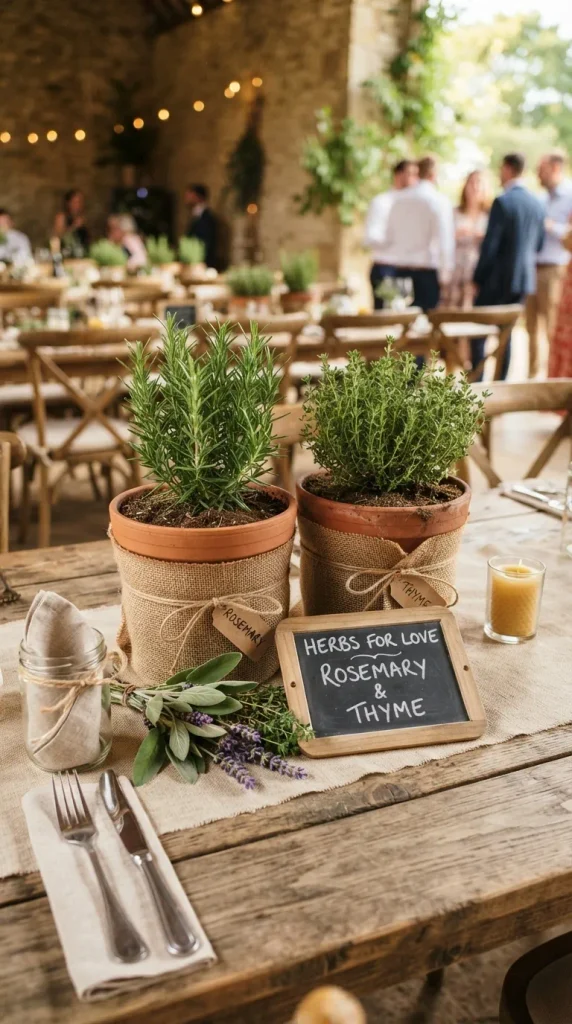
8. Potted Herb Centerpieces in Terracotta Pots Charming, sustainable, and wonderfully fragrant, potted herb centerpieces bring an artisanal, garden-party aesthetic to rustic or farm-to-table weddings. They feel grounded, approachable, and deeply inviting.
- Supplies Needed:
- Clean terracotta pots in varying sizes
- Healthy live herb plants (rosemary, thyme, mint, and basil)
- Burlap fabric and rustic twine (optional for wrapping pots)
- Small chalkboard table signs for labeling
- Step-by-Step Instructions:
- Transplant your live herbs into clean terracotta pots, ensuring the soil is fresh and well-watered.
- Wrap a strip of burlap fabric around the belly of each terracotta pot and secure it neatly with a length of rustic twine tied in a bow.
- Group three pots of differing heights together on a wooden crate or a woven placemat in the center of the table.
- Insert a tiny chalkboard sign into one of the pots labeling the herb name or featuring a sweet handwritten note.
- Expert Styling Tips:
- Water the herbs lightly the morning of the wedding so they remain lush and fragrant all evening.
- Tie customized tags to the pots thanking your guests and encouraging them to take an herb pot home at the end of the reception.
- Creative Variations:
- Whitewash the terracotta pots with a diluted chalk-paint wash for a softer, vintage provincial French country look.
- Incorporate blooming lavender plants for a stunning pop of purple color and an intoxicating floral aroma.
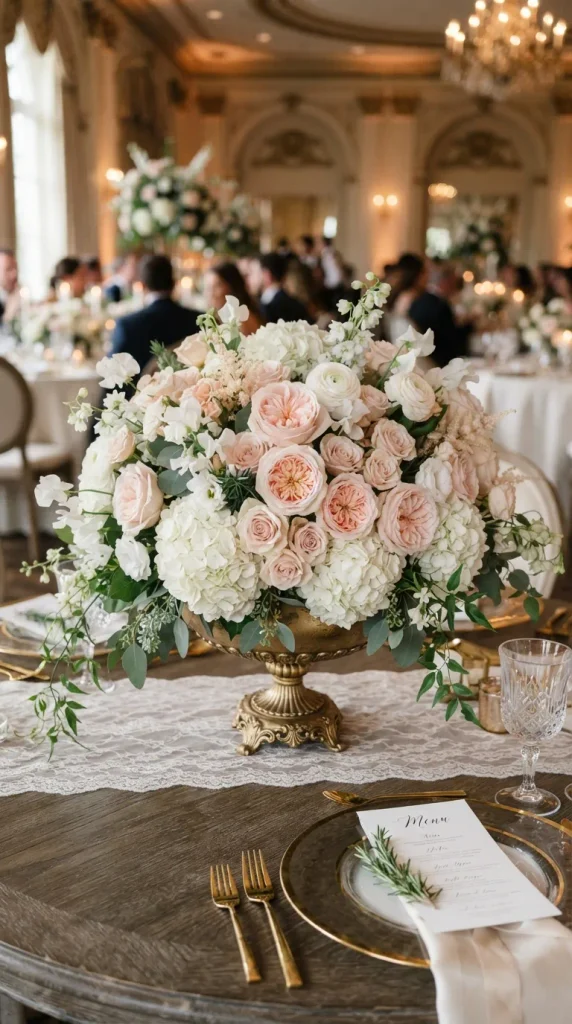
9. Monolithic Single-Variety Floral Bowls There is incredible power in abundance and focus. Using a low, wide compote bowl packed tightly with a single type of flower creates a rich, luxurious statement piece that feels modern yet classic.
- Supplies Needed:
- Low, wide ceramic or footed metal compote bowls
- Floral chicken wire (to create a sustainable mechanics grid)
- 50 to 60 stems of a single flower variety (e.g., lush garden roses, white hydrangeas, or carnations)
- Floral shears
- Step-by-Step Instructions:
- Crumble a piece of chicken wire into a ball and wedge it securely inside the bowl, filling the interior cavity. Pour in fresh water.
- Begin by placing your anchor stems around the outer rim of the bowl to create a wide, skirted silhouette.
- Work your way inward, cutting stems short and packing them tightly into the chicken wire grid.
- Ensure the arrangement is dense and dome-shaped, with no chicken wire or mechanics visible from any side.
- Expert Styling Tips:
- Choose flowers with high petal counts like garden roses or ranunculus to achieve a lush, high-end look with fewer physical stems.
- Keep the overall height of the arrangement under 12 inches so guests can easily converse across the table.
- Creative Variations:
- Use an all-baby’s-breath (gypsophila) cloud arrangement for a dreamy, whimsical, and remarkably budget-friendly centerpiece.
- Create a moody romantic look using deep burgundy dahlias packed tightly into an antique bronze compote.
10. Minimalist Branch and Hanging Tealights Bringing height to a table without visual clutter is an art. A single, gracefully curved deciduous tree branch suspended over or anchored within a sleek vase creates an organic, sculptural woodland masterpiece.
- Supplies Needed:
- A heavy, clean tree branch with interesting branching architecture (manzanita, birch, or cherry blossom)
- A heavy-weighted ceramic urn or tall glass vase filled with stones to anchor the branch
- Small glass hanging terrarium globes with tealight candles
- Invisible fishing line or fine metallic wire
- Step-by-Step Instructions:
- Secure the heavy end of your branch deeply inside a weighted urn or tall vase using large stones and floral foam for absolute stability.
- Suspend small glass tealight globes from the outstretched twigs using invisible fishing line, varying the hanging lengths.
- Place battery-operated LED tea lights inside the glass globes to eliminate fire hazards from swinging open flames.
- Check the balance and stability of the branch to ensure it is secure against accidental bumps.
- Expert Styling Tips:
- Wrap the base of the branch with a lush ring of moss or low-lying greens to conceal the container opening.
- This centerpiece works exceptionally well in high-ceilinged industrial venues or rustic barns, drawing the eye upward.
- Creative Variations:
- Hang delicate crystal teardrops alongside the candles to catch the ambient reception lighting.
- Spray-paint the branch in metallic silver or matte white for a glamorous winter wonderland wedding theme.
11. Monochromatic Dried Palm and Velvet Ribbon Blending earthy bohemian textures with luxurious velvet creates a high-contrast masterpiece. This style is exceptionally durable, making it ideal for destination weddings or outdoor celebrations exposed to wind.
- Supplies Needed:
- Bleached or natural dried palm spears
- Preserved silver-grey eucalyptus stems
- A roll of luxury double-faced velvet ribbon (in a rich tone like terracotta, emerald, or dusty blue)
- A sleek matte ceramic vase
- Step-by-Step Instructions:
- Arrange your preserved silver-grey eucalyptus stems inside the ceramic vase to form a soft, voluminous backing.
- Insert the dried palm spears symmetrically or asymmetrically behind the eucalyptus to create a striking architectural silhouette.
- Tie a generous, elegant bow using the velvet ribbon around the neck of the vase, letting the long tails drape down gracefully.
- Trim any uneven stems so the arrangement feels intentional and balanced.
- Expert Styling Tips:
- The contrast between rustic dried flora and ultra-luxurious velvet fabric creates an instant tactile richness that photographs brilliantly.
- Match the velvet ribbon color to your bridesmaid dresses or groom’s pocket square for a cohesive design tie-in.
- Creative Variations:
- Incorporate dried pampas grass plumes dyed in custom wedding colors to match your theme.
- Use raw brass or gold vases instead of ceramic for an added touch of metallic warmth.
12. The Floating Blossom Bowl Effortlessly romantic and minimalist, a wide glass vessel filled with pristine water and floating individual flower heads creates a tranquil, mirror-like reflection on the reception table.
- Supplies Needed:
- A wide, shallow glass bowl or footed glass trifle dish
- Fresh, open flower heads with sturdy stems removed (e.g., large garden roses, dahlias, or floating orchids)
- Clear glass stones or floating candles
- Distilled water
- Step-by-Step Instructions:
- Fill your shallow glass bowl with distilled water, leaving about an inch of space at the rim.
- Gently place clear glass stones at the bottom of the bowl if you wish to add subtle refraction and weight.
- Carefully float open flower heads face-up on the surface of the water.
- Intermix a few floating disk candles between the blooms to cast a soft, shimmering light across the water’s surface.
- Expert Styling Tips:
- Sprinkle a few floating petals around the base of the bowl on the table linen to tie the entire display together.
- Keep the venue air conditioning moderate to prevent drafts from blowing floating flowers against the glass walls.
- Creative Variations:
- Use delicate cherry blossom blooms for a stunning spring Japanese garden aesthetic.
- Add floating waterproof LED lights beneath the water level for a magical, glowing underwater effect during evening celebrations.
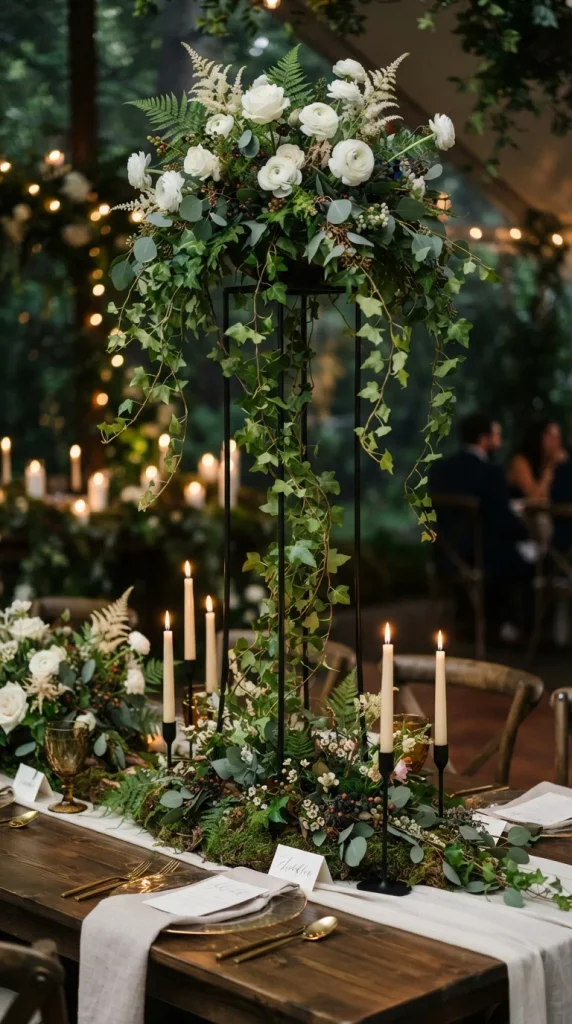
13. Minimalist Iron Stand with Trailing Ivy Vertical structures draw the eye and add sophistication without cluttering the table surface. A slender black iron stand draped with trailing English ivy creates a clean, architectural, and romantic botanical display.
- Supplies Needed:
- A minimalist tall black iron or brass plant stand (approx. 18 to 24 inches high)
- A potted trailing English ivy plant in a simple plastic nursery liner
- A decorative ceramic pot to slip the nursery liner into
- Taper candles in matching minimalist holders
- Step-by-Step Instructions:
- Place your potted trailing ivy inside the decorative ceramic pot and position it on top of or beneath the iron stand depending on its design.
- Gently guide and drape the long tendrils of ivy down the metal legs of the stand, allowing them to cascade naturally toward the table.
- Arrange a trio of tapered candles in minimalist holders at the base of the stand to anchor the display.
- Mist the ivy leaves lightly to give them a healthy, glossy sheen.
- Expert Styling Tips:
- This centerpiece design is ideal for long rectangular farm tables where linear height variation is essential.
- Incorporate fairy lights woven through the ivy vines for a twinkling enchanted-forest ambiance.
- Creative Variations:
- Substitute ivy with trailing String of Pearls or soft trailing jasmine for an exotic twist.
- Use a white-washed metal stand for a light, airy coastal or garden brunch wedding.
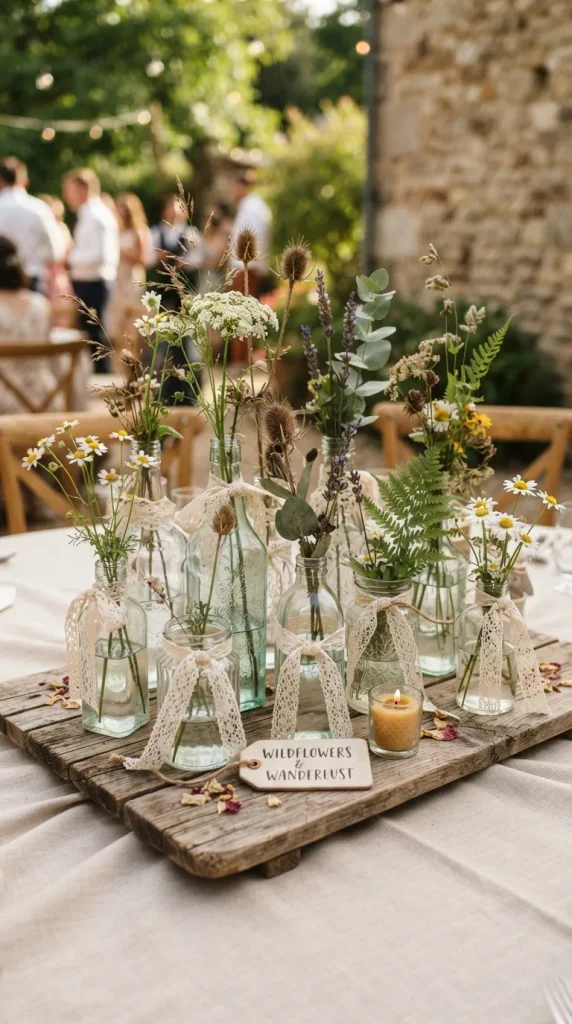
14. Clear Glass Bottles with Single Wildflowers Embracing an eclectic, gathered-from-the-field look, this centerpiece utilizes recycled glass bottles filled with simple, cheerful wildflowers. It is deeply charming, budget-friendly, and perfect for casual barn or backyard weddings.
- Supplies Needed:
- An assortment of recycled clear glass bottles (soda bottles, milk bottles, and spice jars)
- A variety of freshly picked wildflowers (chamomile, cornflowers, yarrow, and sweet peas)
- Twine or lace strips
- A wooden serving tray or crate base
- Step-by-Step Instructions:
- Wash and remove all labels from your collection of glass bottles, ensuring they are sparkling clean.
- Tie a small strip of lace or twine around the neck of every second or third bottle for varied texture.
- Arrange the bottles inside a shallow wooden tray to keep them organized and easy to move.
- Place 1 to 3 wildflower stems into each bottle, trimming the stems so the blooms sit proudly just above the rim.
- Expert Styling Tips:
- Group the tray in the center of round tables, or line multiple trays down long banquet tables for a continuous runner effect.
- Embrace imperfection—the charm of this style lies in its casual, unscripted arrangement.
- Creative Variations:
- Tint your own glass bottles using mod podge and food coloring for a custom pastel color palette.
- Use dried lavender and wheat for a rustic autumn variation that smells heavenly.
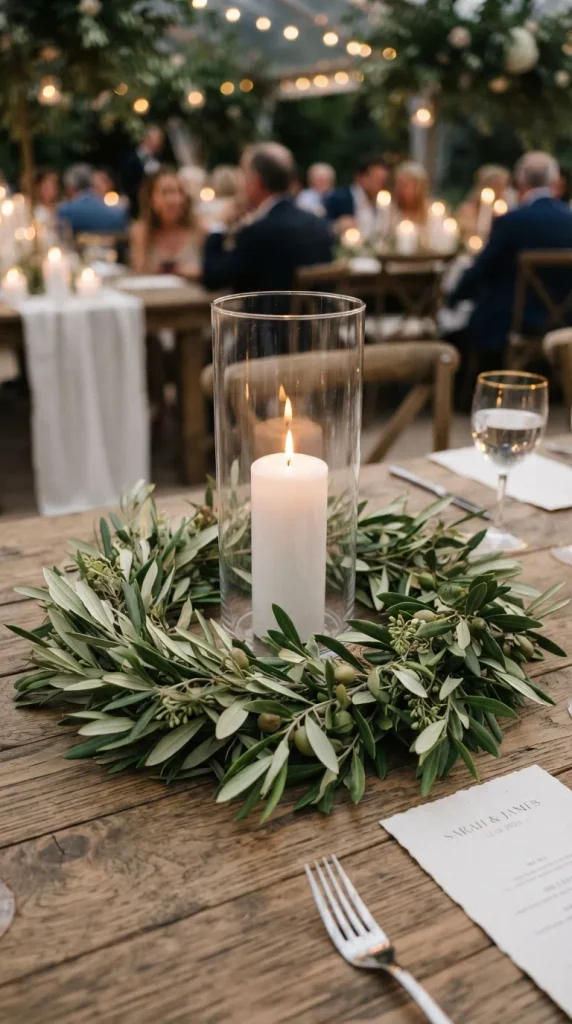
15. Minimalist Wreath with Center Hurricane A clean, circular botanical wreath laid flat on the table creates a powerful sense of unity and completion. Placing a tall hurricane candle in the exact center anchors the design with a warm, comforting glow.
- Supplies Needed:
- A pre-made or DIY flat floral wreath ring made of olive branch, ruscus, or leather leaf fern
- A glass hurricane cylinder (approx. 10 inches high)
- A white pillar candle
- Scattered table confetti or delicate sprigs
- Step-by-Step Instructions:
- Lay your circular greenery wreath flat in the center of the table linen.
- Place the glass hurricane cylinder directly inside the hollow center of the wreath ring.
- Insert your pillar candle into the hurricane glass and light it.
- Tuck a few delicate accent flower buds (like spray roses or wax flowers) directly into the greenery wreath for pops of color.
- Expert Styling Tips:
- Circles symbolize eternity and wholeness, making this centerpiece style deeply meaningful for wedding receptions.
- Pair with round charger plates that echo the circular motif of the centerpiece.
- Creative Variations:
- Use a fragrant eucalyptus wreath mixed with white ranunculus blossoms for an upscale, sensory-rich tablescape.
- Spray the leaves with a light dusting of metallic gold paint for a touch of black-tie glamour.
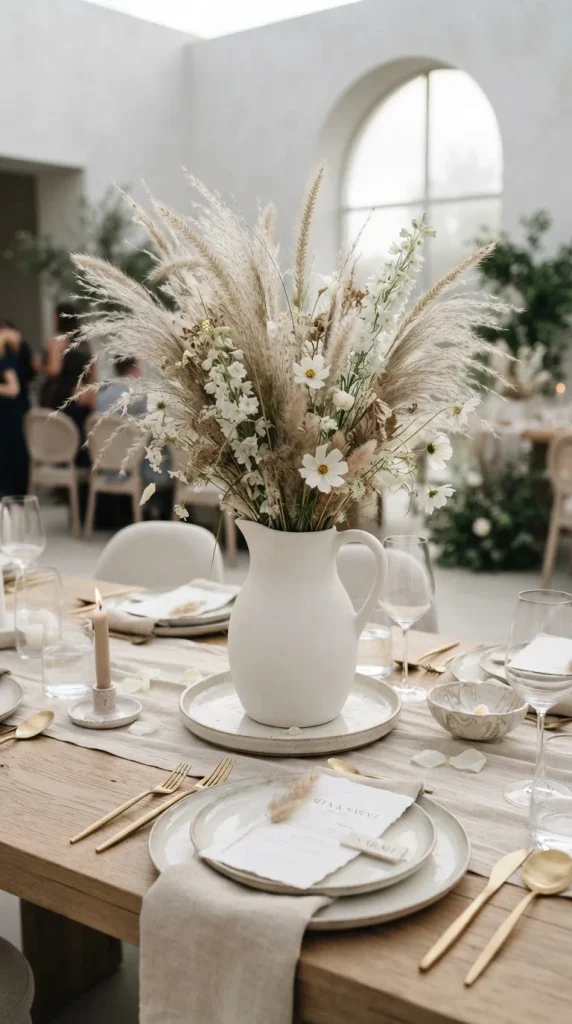
16. Modern Ceramic Jugs with Grass Plumes Clean, architectural ceramic jugs paired with tall, wispy ornamental grasses create a sophisticated, minimalist statement. This style is heavily favored in high-end editorial wedding design for its sculptural purity.
- Supplies Needed:
- Matte white, cream, or terracotta ceramic jugs (pitcher style)
- Tall stems of ornamental fountain grass or bleached feather reed grass
- Floral foam or newspaper packing (to steady stems inside the jug)
- Step-by-Step Instructions:
- Wedge a small piece of floral foam inside the neck of the ceramic jug to hold stems securely in place.
- Insert the tallest grass plumes in the center, building outward with slightly shorter stems to create an organic, fan-like spread.
- Adjust individual stems so the silhouette feels airy, balanced, and modern rather than dense and bulky.
- Wipe down the exterior of the ceramic jug to ensure a pristine finish.
- Expert Styling Tips:
- These tall, slender arrangements work wonderfully in spaces with high ceilings, drawing the eye upward and expanding the room’s visual volume.
- Keep surrounding table elements exceptionally clean—simple glassware and classic white linen napkins complete the editorial look.
- Creative Variations:
- Use matte black ceramic jugs paired with golden wheat stalks for a dramatic, high-contrast modern aesthetic.
- Incorporate tall dried lotus pods for unique textural intrigue.
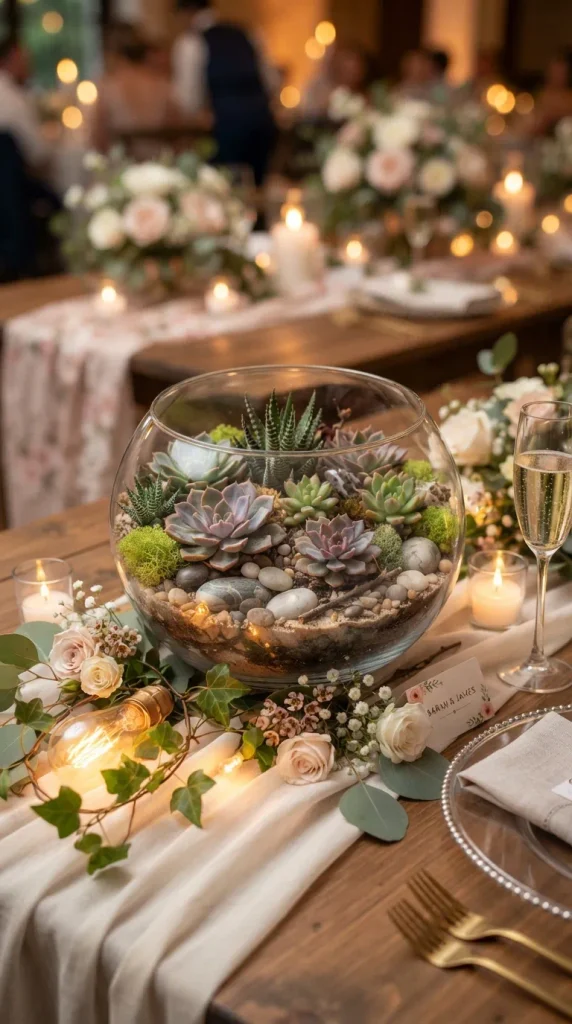
17. The Terrarium Succulent Landscape Creating a miniature living landscape inside a low glass terrarium brings an enchanting woodland or desert oasis feel right to the reception table. It is durable, unique, and deeply captivating.
- Supplies Needed:
- A low, open glass dish or geometric terrarium bowl
- A layer of activated charcoal and small stones (for drainage)
- Cactus and succulent potting soil mix
- A variety of 3 to 4 small, colorful succulents and air plants
- Decorative reindeer moss and smooth river stones
- Step-by-Step Instructions:
- Add a half-inch layer of small stones and a light dusting of activated charcoal at the bottom of the glass bowl for drainage.
- Fill the bowl halfway with succulent potting soil.
- Plant your succulents in the soil, arranging them by height with the tallest in the back or center.
- Fill in any bare soil patches with green reindeer moss and decorative river stones for a polished, finished landscape look.
- Expert Styling Tips:
- Mist the arrangement lightly with water a few days before the wedding so the soil is settled and clean.
- These make incredible, long-lasting keepsakes for family members or bridal party members after the wedding concludes.
- Creative Variations:
- Create a woodland terrarium instead by using miniature ferns, sheet moss, and small decorative toadstools for a fairy-tale vibe.
- Add tiny fairy figurines or geometric brass animals tucked secretly inside the moss for a whimsical touch.
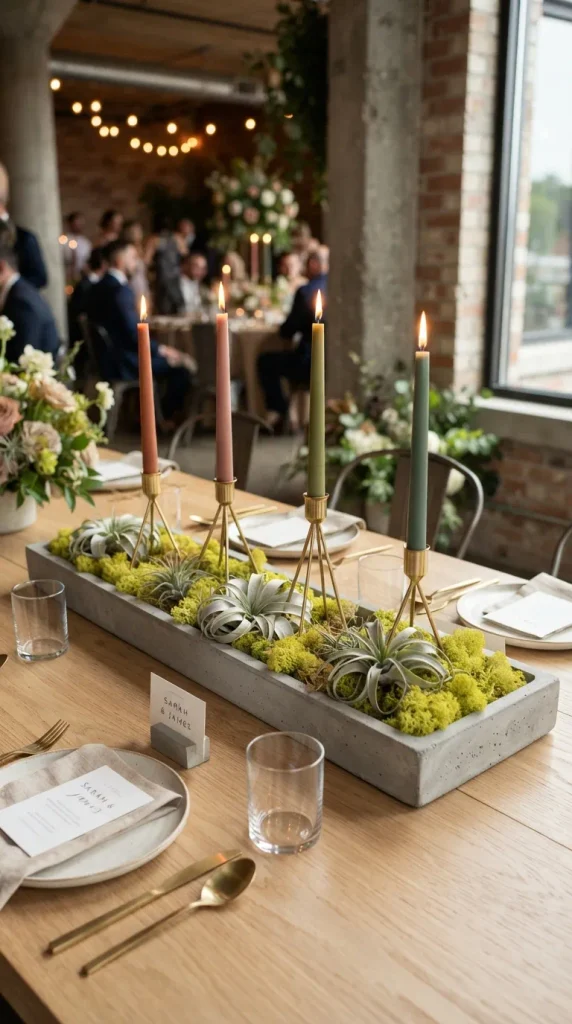
18. Minimalist Concrete Tray with Tapers and Air Plants Industrial minimalism meets organic botany in this sleek centerpiece concept. A cast concrete tray holds a balanced arrangement of brass taper candles and sculptural air plants resting on beds of moss.
- Supplies Needed:
- A rectangular or oval cast concrete tray or dish
- 3 brass taper candle holders with matching colored taper candles
- 2 to 3 unique air plants (Tillandsia species)
- Clumps of preserved chartreuse reindeer moss
- Step-by-Step Instructions:
- Place your concrete tray flat in the center of the table.
- Arrange the three brass taper candle holders asymmetrically on one side of the tray.
- Nestle fluffy clumps of chartreuse reindeer moss on the opposite side of the tray to create vibrant color contrast against the grey concrete.
- Rest your sculptural air plants gently on top of the moss bed, ensuring they are secure and visible.
- Light the taper candles just as the reception dinner begins.
- Expert Styling Tips:
- Air plants require no soil or water during the event, making this one of the cleanest, zero-fuss centerpieces available.
- The mix of raw concrete, gleaming brass, and vibrant green moss hits every major note in modern interior design.
- Creative Variations:
- Use charcoal-grey taper candles for a moody, sophisticated evening wedding palette.
- Substitute the concrete tray with a polished piece of natural slate or marble for an elevated luxury feel.
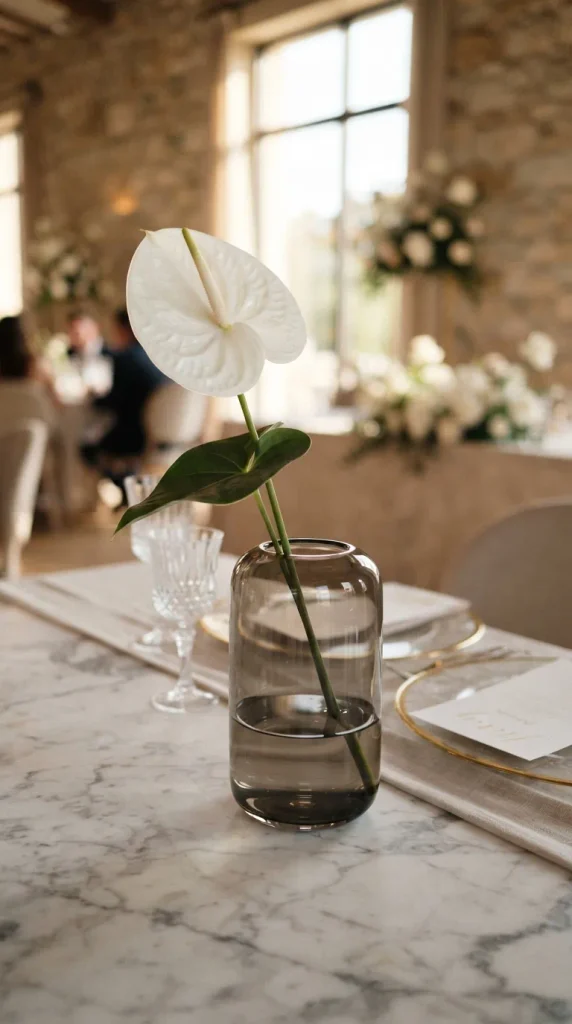
19. Single Stem Anthurium in Sculptural Glass Anthuriums are renowned for their striking, glossy, heart-shaped spathes and unique tropical geometry. Placing a single, flawless Anthurium stem in a modern tinted glass vase creates a bold, artistic masterpiece with ultimate simplicity.
- Supplies Needed:
- A modern tinted glass vase (smoky grey, blush pink, or amber)
- 1 pristine fresh Anthurium stem (in white, burgundy, or soft peach)
- Floral snips
- Fresh filtered water
- Step-by-Step Instructions:
- Fill your tinted glass vase with fresh filtered water.
- Trim the stem of the Anthurium at a sharp 45-degree angle to maximize water absorption.
- Place the single stem into the vase, adjusting its height so the glossy bloom is showcased prominently.
- Wipe down the exterior of the tinted glass to eliminate water splashes and smudges.
- Expert Styling Tips:
- Anthuriums have an exceptionally long vase life, meaning they will look pristine from pre-ceremony setup through the final dance.
- Pair with minimalist stationery and modern typography menus to complete a sleek, high-fashion aesthetic.
- Creative Variations:
- Combine two contrasting Anthurium colors (such as pristine white and deep chocolate brown) in a slightly wider cylinder vase.
- Add a single monstera leaf tucked behind the Anthurium for a lush, tropical punch.
20. Floating Tealights in Wine Bottles Upcycling glass bottles into candleholders is a classic DIY wedding staple. By cutting down wine bottles and utilizing them as floating tealight chimneys surrounded by loose greens, you achieve a warm, romantic glow with incredible vintage charm.
- Supplies Needed:
- Clean glass wine bottles with the tops cleanly cut off (using a glass bottle cutter)
- Floating tealight candles
- Water mixed with a drop of clear dish soap
- A loose ring of fresh olive or eucalyptus leaves surrounding each bottle base
- Step-by-Step Instructions:
- Ensure your cut wine bottles have smooth, sanded rims for safety.
- Arrange a loose, circular bed of fresh eucalyptus or olive leaves on the table surface.
- Place the cut bottom portion of the wine bottle directly in the center of the greenery ring.
- Fill the bottle base with water up to about two inches from the rim.
- Gently float a tealight candle on the water inside the glass cylinder and light the wick.
- Expert Styling Tips:
- The glass cylinder acts as a wind guard, making this centerpiece design exceptionally well-suited for outdoor tented receptions or breezy seaside celebrations.
- Collect bottles over several months from local restaurants, family gatherings, or recycling bins to make this project entirely free.
- Creative Variations:
- Use colored wine bottles (deep emerald green or rich amber) to cast warm, jewel-toned light across your reception tables.
- Add floating rose petals inside the water beneath the candle for an extra layer of romantic detail.
Essential Tips for Wedding Centerpiece Success
- Scale and Proportion: Always consider the size of your reception tables. Round tables require a centralized focal point, while long banquet tables benefit from repetitive groupings or continuous runners.
- Scent Control: Never use heavily scented flowers or strongly perfumed candles near dining tables, as competing fragrances can interfere with the enjoyment of wedding food and wine.
- Sightlines: Keep tall elements above eye level (at least 24 inches up) or low enough (under 12 inches) to ensure guests can comfortably converse across the table without leaning around obstructions.
- Teardown Plan: Designate a family member, wedding coordinator, or bridal party member in advance to pack up or gift your centerpieces at the end of the night so nothing gets left behind.
Creating your own wedding centerpieces is a deeply rewarding experience that infuses your celebration with personal love, intention, and breathtaking style. Choose the design that speaks to your heart, gather your supplies, and enjoy the creative journey of bringing your dream wedding aesthetic to life.
more ideas to come in future addition