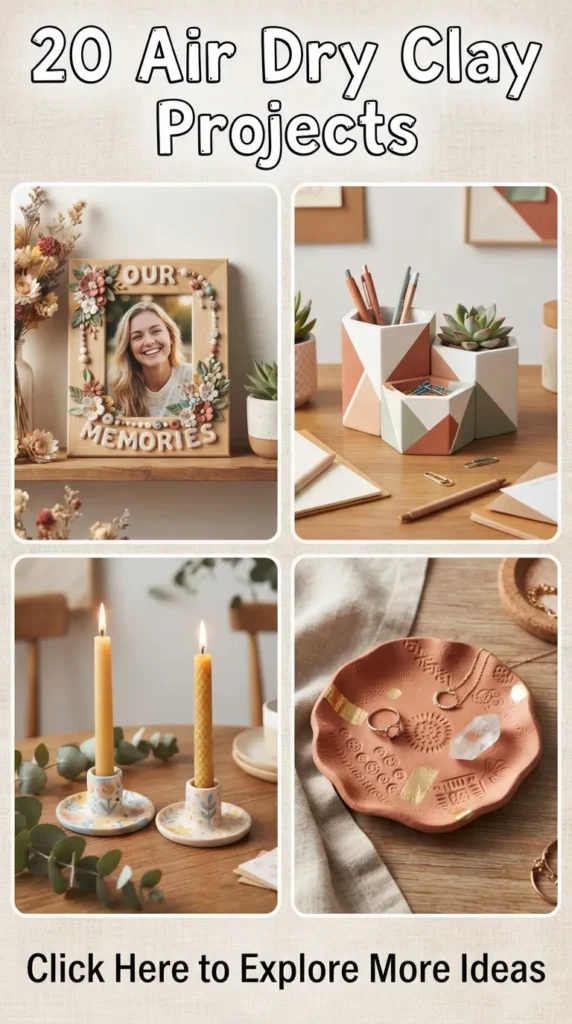
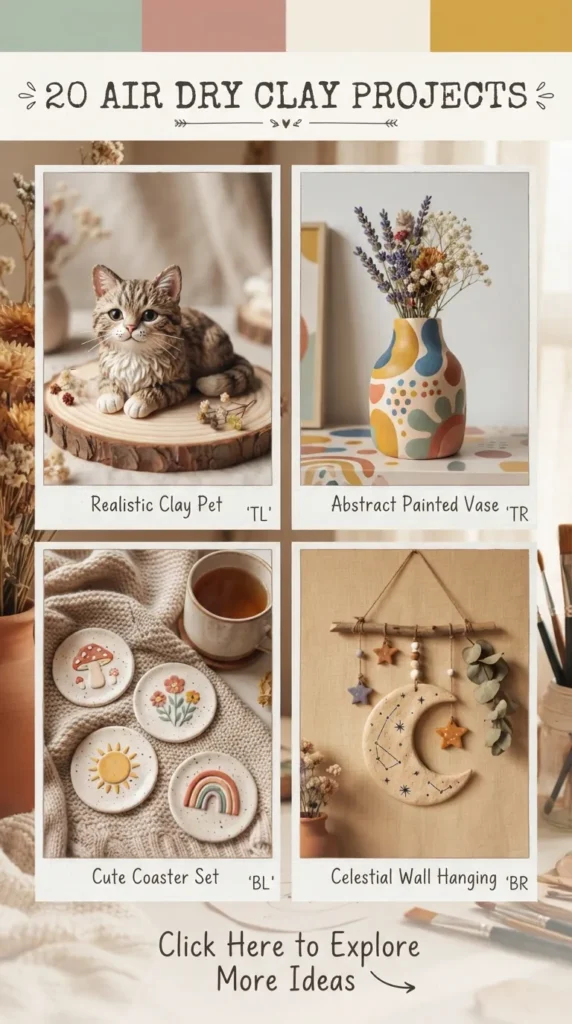
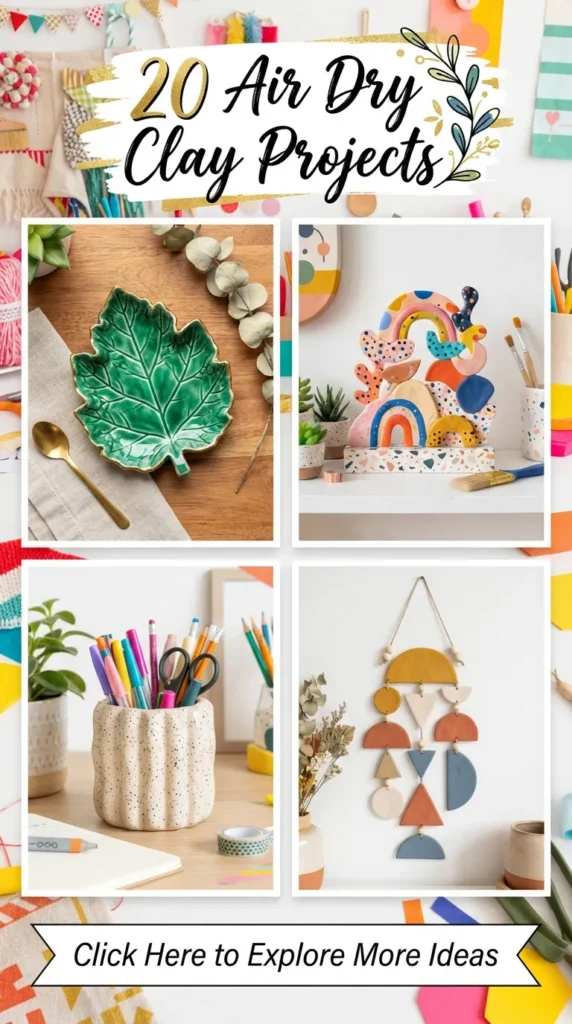
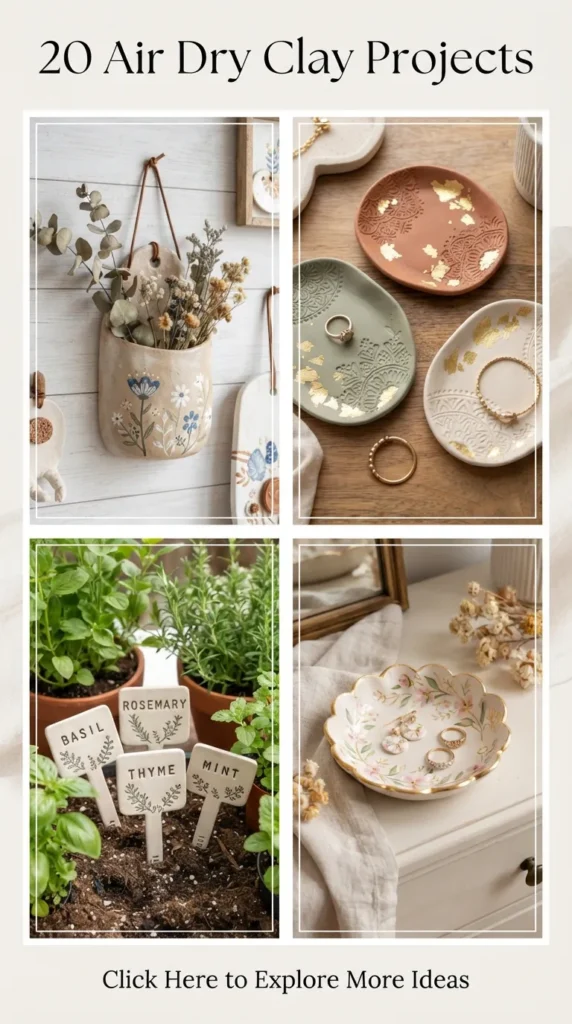
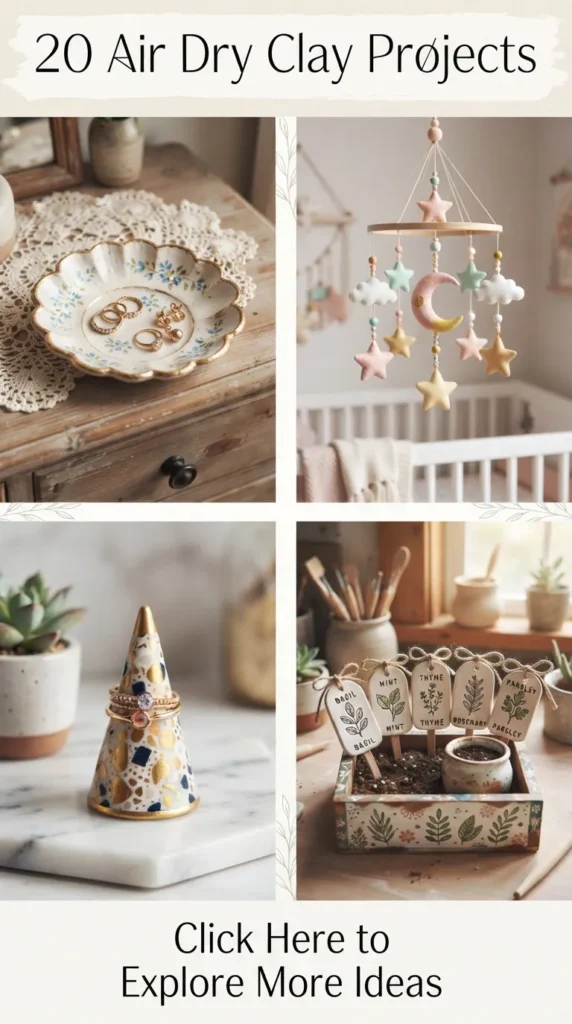
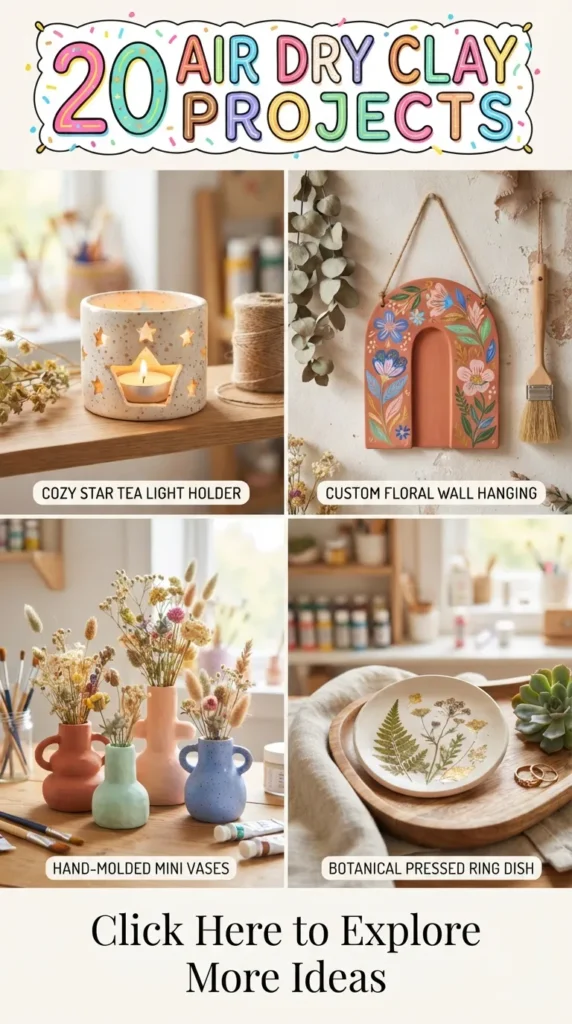
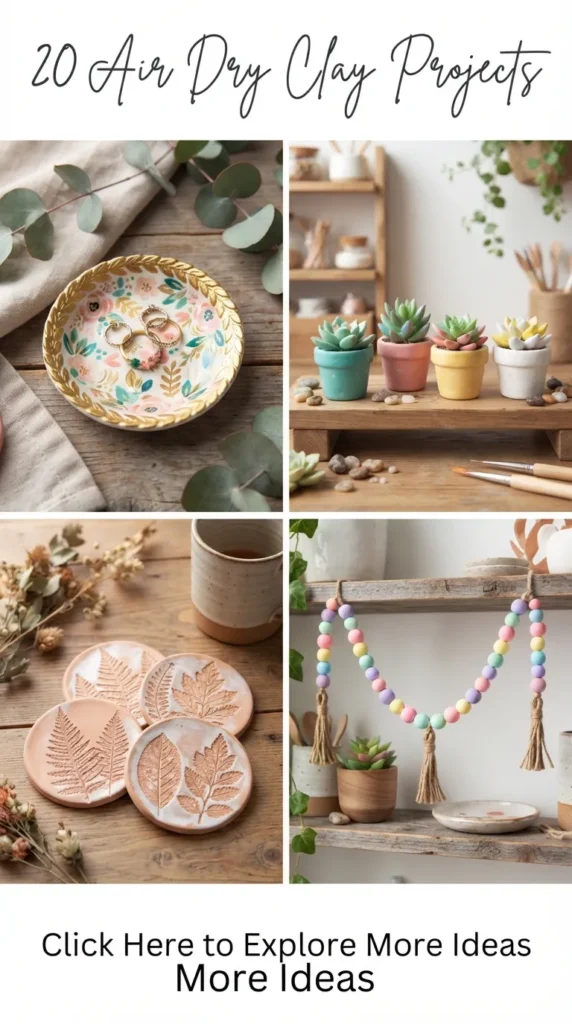
20 Air Dry Clay Projects
Air dry clay has evolved far beyond basic craft-room utility into one of the most versatile, elevated mediums for modern interior styling. With its organic, matte chalk-like texture, natural stone weight, and forgiving working time, high-grade air dry clay offers makers an accessible route to bespoke ceramic artistry without the need for high-fire kilns or specialized throwing wheels.
Contemporary interior aesthetics heavily prioritize tactile warmth, sculptural forms, and muted earth tones. Hand-sculpted clay pieces introduce authentic architectural character, organic minimalism, and artisanal luxury to coffee tables, floating shelving, bedside vignettes, and entryway consoles. Working with air dry clay allows you to produce bespoke decor pieces tailored to your living space’s exact palette and dimensions.
Essential Materials and Foundational Techniques
Before embarking on individual projects, assembling the correct toolkit and mastering foundational hand-building techniques ensures professional, crack-free, and enduring results:
- Clay Selection: Opt for fine-grain, mineral-based or nylon-reinforced air dry clay (such as DAS, Jovi, or Mont Marte) in stone white, terracotta, or warm grey. Fine-grain formulas minimize shrinkage cracking and sand down to an ultra-smooth finish.
- Armatures and Core Supports: For hollow forms, arches, and vertical structures, use aluminium foil, wire mesh, cardboard forms wrapped in cling film, or glass jars as removable molds to prevent structural collapse while drying.
- Joinery (Score and Slip): Whenever joining two clay components, use a needle tool or crosshatch carver to deeply score both contact points. Apply a small droplet of water or smooth clay slip before pressing firmly together to ensure unified bonds that do not separate upon dehydration.
- Even Thickness: Roll slabs between two wooden depth-guide slats or rolling pin guide rings (ideally 5 mm to 8 mm) to maintain uniform wall thickness, preventing warping during the curing phase.
- Curing Process: Slow drying is critical. Keep pieces away from direct heat vents, sunlight, or rapid fans. Dry them upside-down or on wire baking racks to allow complete airflow beneath the base. Turn pieces periodically.
- Finishing and Sanding: Once fully bone-dry (typically 48 to 72 hours), use 120-grit sandpaper for initial shape refinement, followed by 320-grit to 400-grit ultra-fine sandpaper for an alabaster-smooth finish.
- Sealing: Air dry clay remains porous and water-sensitive. Apply multiple coats of matte acrylic sealer, satin polyurethane, or non-yellowing waterproof varnish to protect against moisture, dust, and handling.
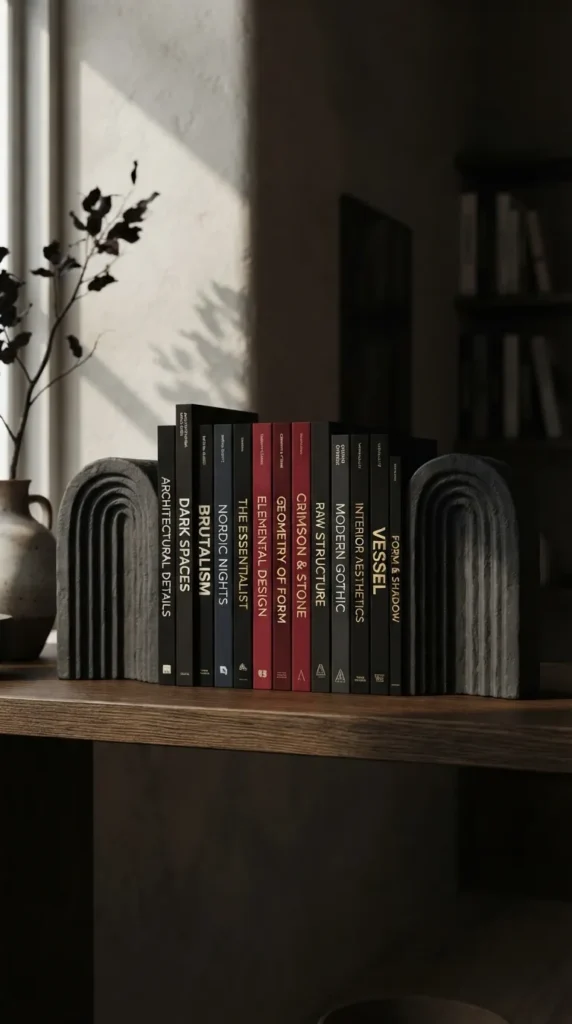
1. Minimalist Ribbed Arch Bookends
Introduction Architectural arches bring soft, classical geometry to modern linear shelving. Ribbed arch bookends combine the clean silhouette of contemporary Scandinavian design with deep tactile fluting, producing functional sculptures that hold heavy hardcovers while grounding a room with refined symmetry.
What This Idea Means This project explores clean structural form, architectural repetition, and weighted balance. It moves away from flat decorative items into functional decor that plays with shadow, light, and depth across vertical grooves.
Materials Needed
- Mineral-based white air dry clay (approx. 1 kg)
- Clay rolling pin with 10 mm guide rings
- Ribbed ceramic texture tool, clay groover, or metal comb
- Cardboard arch cutting template
- Heavy craft knife or precision scalpel
- Lead weights, clean gravel, or flat metal bars (for interior weighting)
- 240-grit and 400-grit sandpaper
- Ultra-matte stone sealer
How to Make It
- Roll out a uniform clay slab to a 10 mm thickness.
- Cut four identical arch shapes using your cardboard template.
- For weighted stability, embed flat lead weights or dense metal plates between two layers of slabs, scoring and slipping the interior faces to fuse them into a single solid 20 mm thick arch.
- Smooth the outer perimeter using a slightly damp sponge.
- Using your ribbed texturing tool or a metal ruler edge, carve consistent, deep vertical flutes running from the top curved apex straight down to the base.
- Check that the base is sliced perfectly flat at a 90-degree angle so the bookend stands completely plumb without wobbling.
- Repeat the steps to create a mirror-image second arch.
- Allow the arches to dry slowly over 72 hours, rotating them twice daily.
- Sand the flat edges and fluted channels smooth. Coat with two layers of matte stone-finish sealer.
Tips and Variations
- Drying Tip: Stand the arches upright between two flat wood blocks lined with parchment paper during the initial 24 hours to eliminate warping.
- Variation: Paint subtle alternating grooves with watered-down beige limewash paint for a tonal travertine aesthetic, or keep the clay raw and seal with dead-flat varnish for an untreated Roman plaster look.
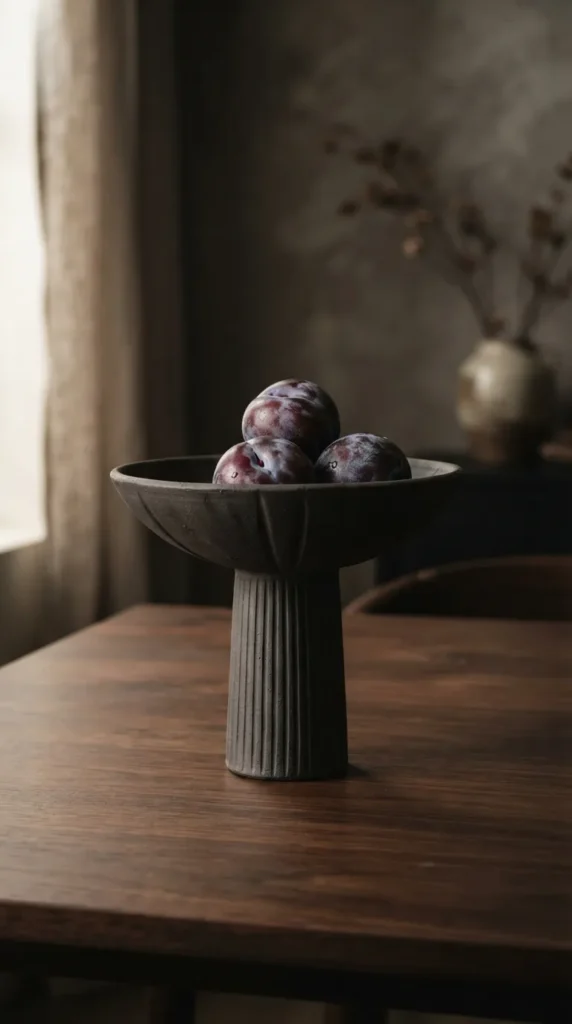
2. Fluted Footed Fruit Bowl
Introduction A raised, footed pedestal vessel adds immediate presence and height to kitchen islands or dining tables. Featuring a flared rim and vertical fluting along the pedestal base, this footed fruit bowl balances organic hand-thrown charm with high-end Parisian ceramic style.
What This Idea Means This concept focuses on structural elevation, compound construction (joining two hollow bodies), and functional centerpiece design that bridges rustic warmth with contemporary minimalism.
Materials Needed
- 1.2 kg White or off-white air dry clay
- Round ceramic mold, shallow bowl, or foam slump mold
- Cylindrical cardboard tube or round cookie cutter (for pedestal base)
- Rolling pin with 6 mm guides
- Flexible stainless steel smoothing rib
- Serrated scoring tool and clay slip
- Matte acrylic varnish
How to Make It
- Roll out a large circular slab to a consistent 6 mm thickness.
- Carefully drape the slab into a shallow, plastic-wrapped ceramic bowl mold, pressing gently from the center outward to eliminate trapped air bubbles.
- Trim the excess perimeter with a sharp scalpel, smoothing the edge with a damp chamois cloth or wet fingertip.
- Construct the pedestal foot: Roll out a thick 8 mm rectangular strip, join the ends into a clean cylinder, and smooth the exterior seam. Alternatively, mold clay around a short PVC or cardboard cylinder.
- Use a small wooden modeling tool to carve even vertical flutes around the exterior of the cylindrical foot.
- Once both components reach a firm, leather-hard stage (approx. 8–12 hours of air exposure), generously score the bottom center of the main bowl and the top edge of the fluted pedestal.
- Apply clay slip, firmly join the base to the bowl, and reinforce the inner junction with a micro-coil of soft clay, blending it seamless.
- Allow the entire assembly to dry fully inside the mold for 24 hours, then demold and dry upside down for another 48 hours.
- Sand all transitions smooth and seal with three coats of food-safe-style decorative protective sealer (decorative dry-goods use only).
Tips and Variations
- Stability Tip: Keep the base diameter at least 45% of the total bowl diameter to prevent tipping when loaded with produce.
- Variation: Create a raw terracotta exterior wash combined with a glossy glazed cream-white interior basin for dynamic visual and textural contrast.
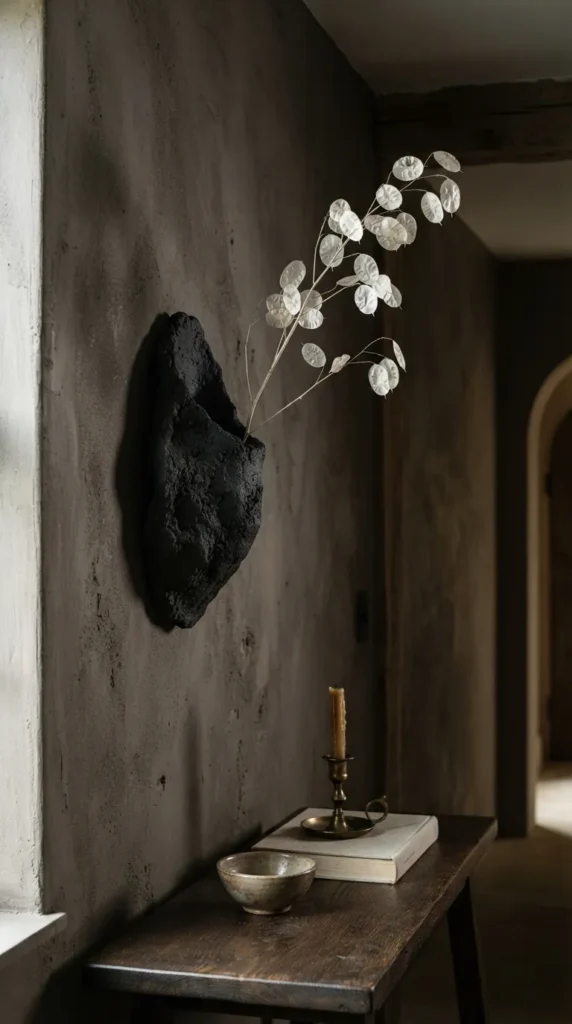
3. Wabi-Sabi Asymmetric Wall Sconce Decor
Introduction Wabi-sabi aesthetics honor imperfection, asymmetry, and raw natural textures. An asymmetric, non-electric wall-hung sconce housing dried botanical stems or battery-operated LED pillar candles brings calm, museum-worthy dimension to bare vertical walls.
What This Idea Means Emphasizing organic irregularity and tactile earthiness, this project demonstrates how deliberate asymmetry and raw textural finishes create elevated, organic modern statements.
Materials Needed
- 800 g Terracotta or coarse-grain sand air dry clay
- Wooden sculpting knife
- Coarse natural sea sponge and crumpled parchment paper
- Wall hanging bracket (keyhole hanger or sturdy copper picture wire)
- Craft scalpel
- Fine clay slip
- Matte stone sealer
How to Make It
- Flatten an irregular, organic oval slab by hand, keeping edges uneven, gently torn, or softly beveled rather than mechanically straight. Thickness should be roughly 7–9 mm.
- Sculpt a hollow, tapering pocket or semi-conical receptacle that will sit on the front face to hold dried floral stems.
- Score the back of the pocket and the front receiver section of the slab, brush with slip, and join securely.
- Texture the entire surface: Press crumpled parchment paper, a wire brush, or a damp sea sponge across the front face to yield a raw sandstone or volcanic tufa look.
- On the reverse side, embed a metal keyhole hanger into the thick upper clay section, securing it with an overlapping patch of scored clay pressed flush against the back.
- Allow the sconce to cure flat on a level, breathable wire mesh or wooden board for 48 to 60 hours.
- Sand high spots lightly to reveal depth in the texture, leaving natural crevices intact. Finish with an ultra-matte, non-reflective sealant.
Tips and Variations
- Weight Distribution: Ensure the top area surrounding the wall hanger is reinforced and slightly thicker (at least 10 mm) to support the weight safely.
- Variation: Rub charcoal powder or dark brown chalk pastel into deep crevices before sealing to accentuate stone-like depth.
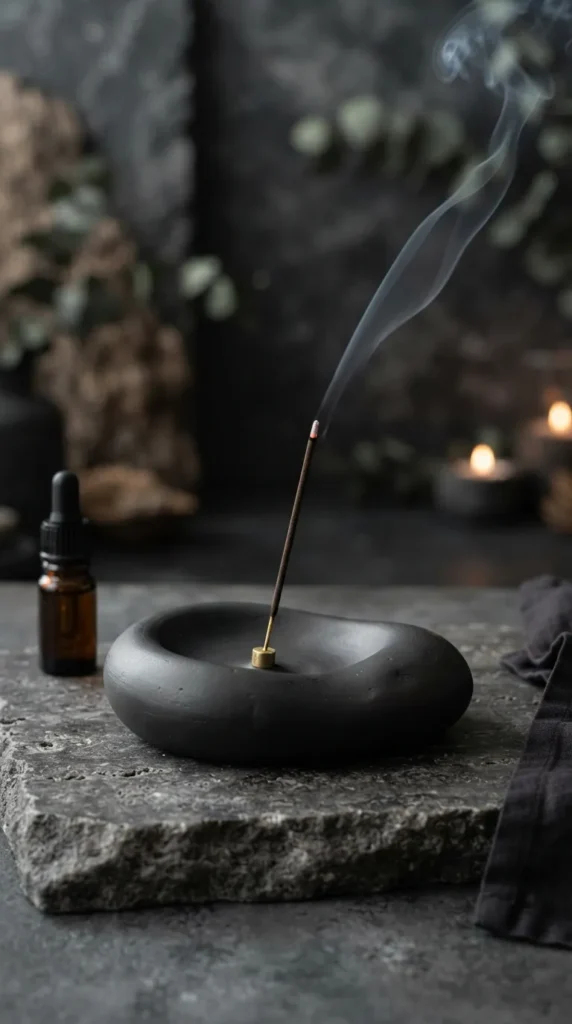
4. Organic Pebble Incense Burner and Ash Catcher
Introduction Streamlined, organic contours reminiscent of river-tumbled stones provide a serene, meditative platform for incense rituals. This low-profile incense catcher incorporates a gently sloping depression to collect falling ash seamlessly.
What This Idea Means A study in fluid, ergonomic form and minimalist functionality. It demonstrates how subtle, flowing curves and high-touch satin finishes can transform a basic utility object into a refined sensory element.
Materials Needed
- 400 g Self-hardening fine porcelain-style air dry clay
- Wooden modeling tool
- Smooth river rock or plastic spoon (for burnishing and forming)
- Sewing needle or 2 mm pin (to size incense holes)
- Sandpaper (240, 400, and 800 grit)
- Satin protective varnish
How to Make It
- Condition the clay thoroughly to eliminate all interior air pockets.
- Shape the clay into an elongated, asymmetric pebble or river-stone silhouette roughly 20 cm in length and 15 mm thick.
- Using the back of a large metal spoon or the heel of your thumb, press an elongated, smooth concavity down the center length of the stone to serve as the ash-catching trough.
- At the elevated end of the pebble, pierce a hole at a clean 45-degree angle using a thick needle or skewer, matching the gauge of standard bamboo-core incense sticks.
- Smooth all contours using a barely damp makeup sponge.
- Burnish the surface while damp with the smooth back of a metal spoon to compact the surface particles, producing an ultra-smooth finish.
- Allow to cure over 48 hours, flipping once after 24 hours.
- Wet-dry sand using progressive grits up to 800 for an alabaster or sea-glass tactile feel.
- Seal with heat-resistant satin varnish.
Tips and Variations
- Angle Precision: Test the stick angle while the clay is wet with an unlit incense stick to ensure the burning tip hangs directly over the catchment well.
- Variation: Drill two or three varied-diameter holes to accommodate Japanese dhoop sticks, brass cones, and traditional Indian incense.
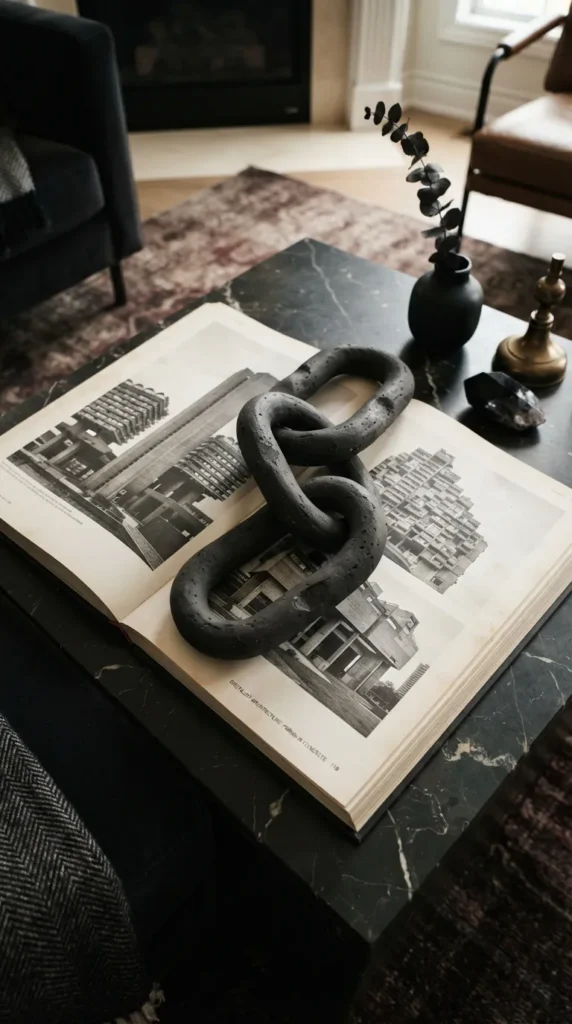
5. Sculptural Chain Link Decor Object
Introduction Interlocking clay chains are a staple of modern interior vignettes, effortlessly draped over oversized coffee table books, nestled inside wooden bowls, or displayed alongside sculptural stoneware. Hand-carving them from air dry clay yields an artisanal, warm finish.
What This Idea Means This project focuses on geometric modularity, mechanical clearance, and handling leather-hard materials without structural fractures during assembly.
Materials Needed
- 700 g High-strength nylon-reinforced air dry clay
- 15 mm diameter wooden dowel or cylindrical pipe
- Sharp craft scalpel
- Fine clay slip
- Sanding sponges (medium and fine)
- Matte chalk-finish clear coat
How to Make It
- Roll out three to five uniform clay ropes (approx. 18–20 mm in diameter and 18 cm in length).
- Form the first rope into an oval link, scoring, slipping, and smoothing the joined seam until undetectable.
- Form the second rope, loop it directly through the center of the first closed link, then join and smooth its seam.
- Repeat this interlocking assembly for all remaining links, keeping the overall chain straight and resting on a sheet of baking parchment.
- Gently prop up alternating links with small folded pieces of parchment or foam wedges so they do not sag or stick together while wet.
- Allow the assembly to cure slowly over 4 to 5 days. Turn each link daily to ensure all interior contact points dry evenly.
- Sand down any flat spots or seam traces using flexible sanding sponges.
- Apply two coats of dead-flat chalk varnish for a tumbled limestone appearance.
Tips and Variations
- Crack Prevention: Never pull, lift, or test the flexibility of the chain links while drying. Let them fully harden before handling.
- Variation: Form links into clean rectangular or softened triangular geometries instead of traditional ovals for a sharper, modern edge.
6. Textured Checkerboard Vanity Tray
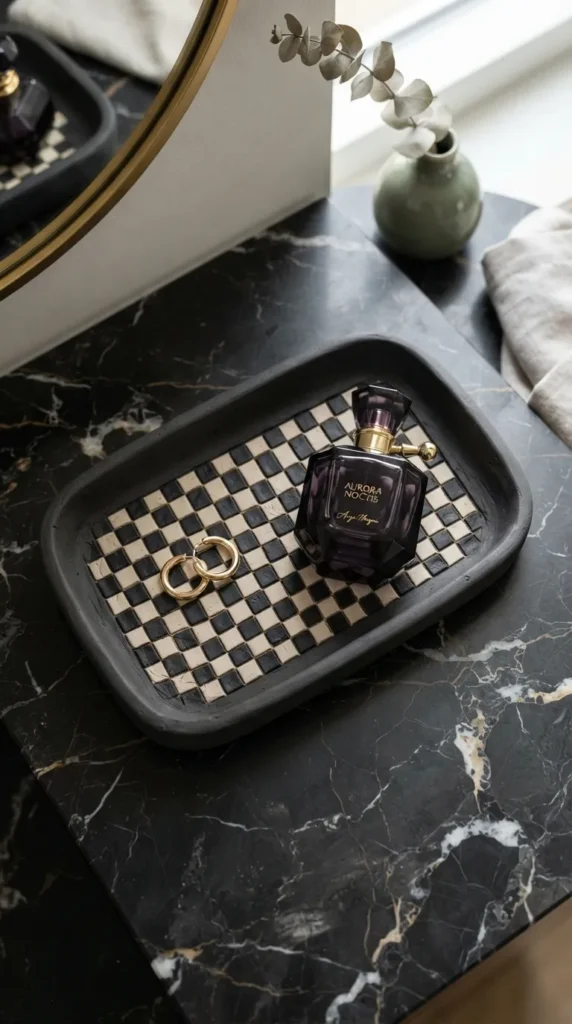
Introduction The checkerboard pattern remains a dynamic design staple, bringing graphic rhythm and playful elegance to bedside tables and vanities. By debossing or painting tonal checkerboards onto a curved tray, you balance structure with handmade warmth.
What This Idea Means A blend of precise geometric grid layouts with organic hand-shaped borders, showing how contrasting finishes elevate simple shallow catchalls.
Materials Needed
- 500 g White air dry clay
- Grid texture plate, metal ruler, or square stamping tool
- Rolling pin with 6 mm depth rings
- Acrylic paints (e.g., Raw Umber, Warm Ochre, or Soft Charcoal)
- Fine-tip angled paint brush
- High-gloss or satin clear varnish
How to Make It
- Roll out a uniform slab to a 6 mm thickness in a soft rounded rectangle or capsule shape (approx. 22 cm × 12 cm).
- Create a shallow perimeter lip by pinching and rolling the outer 1 cm upward, smoothing the contour with a damp sponge.
- Lightly map out an even grid across the base of the tray using a metal ruler and a blunt stylus.
- Paint alternating squares in your accent color (e.g., deep espresso brown against the raw off-white clay base).
- Alternatively, physically deboss alternating squares with a square wooden stamp before drying to create an authentic bas-relief relief grid.
- Dry flat between two sheets of non-stick parchment weighted along the outer edges to prevent corner curling.
- Once cured (48 hours), sand the lip and base edges smooth.
- Seal with a high-durability satin or gloss varnish to protect against everyday cosmetics and jewelry.
Tips and Variations
- Warping Control: Place a flat, lightweight board over the central base during the first 12 hours of drying to keep the bottom perfectly flat.
- Variation: Combine matte white raw checks with high-gloss glazed checks using clear gloss glaze over selective squares only.
7. Pedestal Pillar Candle Holder Duo
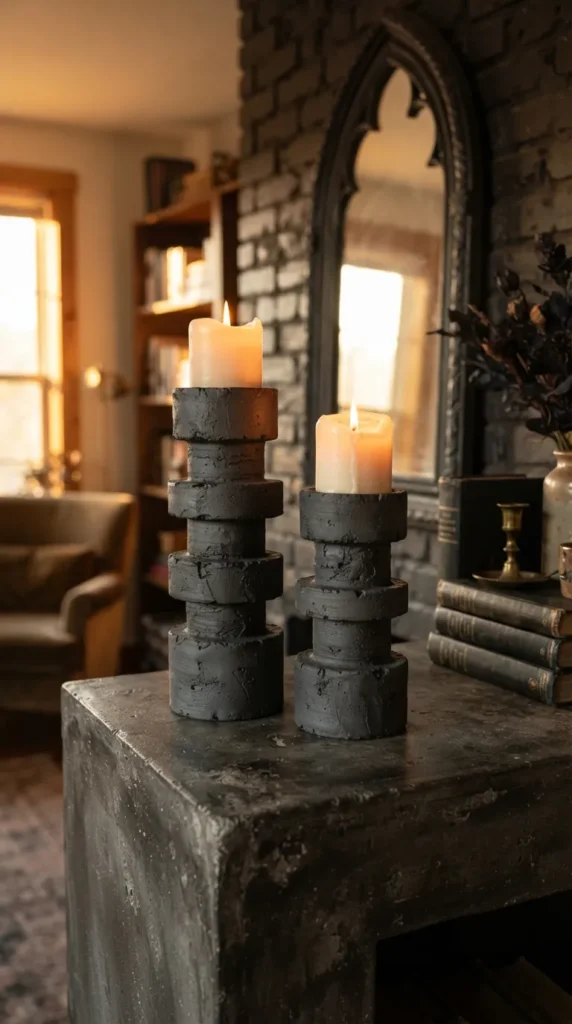
Introduction Tonal, sculptural pillar candle holders bring architectural height and warm illumination to mantels and dinner tables. Designed with tiered cylindrical pedestals and wide drip pans, this duo creates an intentional, balanced focal point.
What This Idea Means This project emphasizes tiered volumetric proportion, vertical stability, and functional heat-safe construction for LED or shielded pillar displays.
Materials Needed
- 1 kg White mineral air dry clay
- Circular cutter set (varied diameters: 5 cm, 8 cm, 10 cm)
- Rolling pin (10 mm guides)
- Clay knife and needle tool
- Scoring tool and slip
- Non-yellowing satin protective sealer
How to Make It
- Roll out thick 10 mm slabs of clay.
- Cut multiple graduated circular disks: three at 10 cm, three at 8 cm, and three at 5 cm diameter.
- Stack and build two tiered towers of different heights (e.g., one taller with 5 tiers, one shorter with 3 tiers) to create a complementary pair.
- Score and slip every interface between stacked disks, blending external seams vertically or leaving deliberate architectural stepped terraces.
- On the top disk of each holder, create a shallow 5 mm rim or recess sized specifically for standard 7 cm wide pillar candles.
- Insert a small metal candle cup insert or aluminum disc into the top bed to provide a fire-safe, wax-resistant interface.
- Allow both holders to dry slowly over 72 hours.
- Sand all stepped edges to crisp geometric perfection. Apply two coats of satin sealer.
Tips and Variations
- Fire Safety: Always use battery-operated LED pillars, or ensure metal candle inserts are embedded into the clay bed if using real flame candles. Never let an open flame touch raw air dry clay.
- Variation: Coat the finished holders in textured granite or sandstone spray paint before sealing for a carved natural stone appearance.
8. Pleated Ceramic-Look Match Striker & Holder
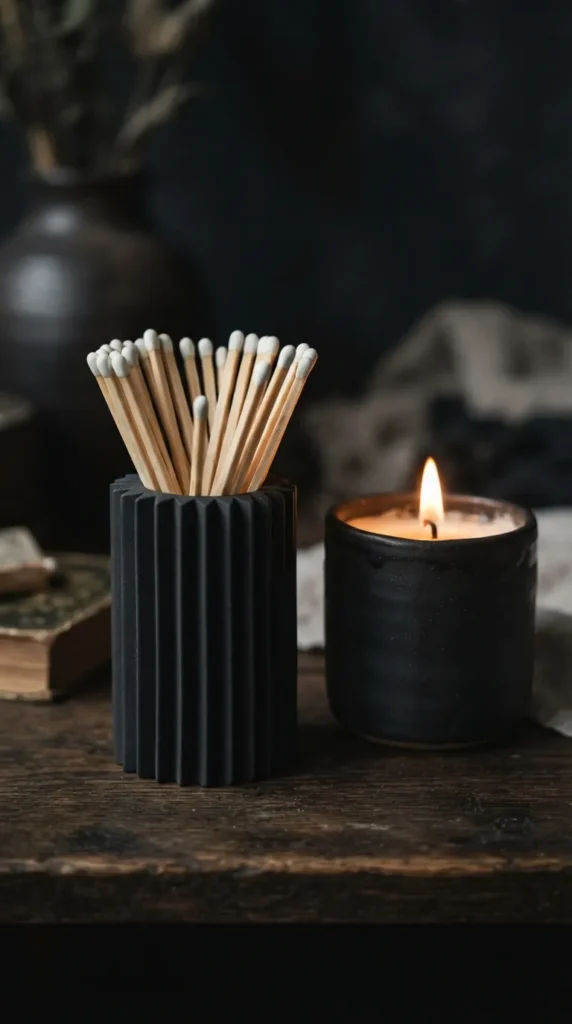
Introduction A tabletop match striker combines form and everyday function. With deeply pleated vertical walls and an integrated base for strike-anywhere match paper, this piece turns an everyday fire starter into an elegant accent.
What This Idea Means Highlights the integration of functional utility with delicate accordion pleating techniques, taking inspiration from classic slip-cast pottery.
Materials Needed
- 350 g Extra-fine white air dry clay
- Pleating mold, origami folded template, or triangular clay strip carver
- Cylindrical hollow form (e.g., small spice jar wrapped in cling film)
- Self-adhesive strike-anywhere abrasive paper rounds
- Precision craft scalpel
- Clear satin lacquer
How to Make It
- Roll a slab to a 4 mm thickness and cut a rectangular strip measuring approximately 8 cm × 18 cm.
- Using a triangular carving tool or precise ruler impressions, form accordion-style vertical pleats down the entire length of the strip.
- Wrap the pleated slab around your cling-film-covered cylindrical jar, joining the back seam cleanly by overlapping one pleat.
- Cut a circular base slab (6 cm diameter, 6 mm thick), score, and slip-join the pleated cylinder to the base.
- Form a small concave circular recess on the side or underneath the base to fit a replacement match-striker pad.
- Remove the inner jar once the clay reaches leather-hard firmness (approx. 6 hours).
- Dry completely for 36 hours. Sand the pleat crests carefully with 400-grit paper.
- Seal thoroughly with satin water-resistant lacquer, then adhere the adhesive striker sheet into the designated recess.
Tips and Variations
- Pleat Precision: Keep a ruler clamped as a physical guide while scoring pleat lines to maintain parallel uniformity.
- Variation: Leave the exterior pleats unpainted matte white, and finish the interior rim with metallic gold leaf paint for an understated warm glow.
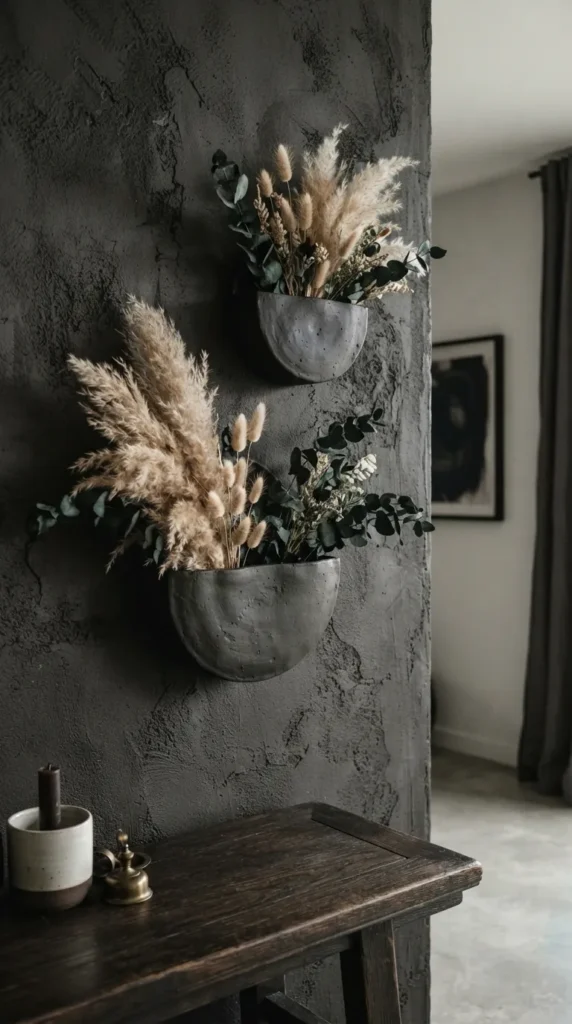
9. Modular Geometric Wall Planter Pockets
Introduction Bringing natural foliage to walls creates an organic focal point. These semi-circular geometric wall pockets are designed to display cascading air plants, faux succulents, or dried botanical arrangements.
What This Idea Means This design focuses on flat-back structural integrity, wall mounting mechanics, and clean, modern geometry.
Materials Needed
- 600 g Fine grey or terracotta air dry clay
- 15 cm circular plate or compass cutter
- Foam hemisphere or cardboard cone (for internal volume form)
- Keyhole mounting hardware
- Sandpaper (180 and 320 grit)
- Heavy-duty matte waterproof sealant
How to Make It
- Roll out a uniform slab to 6 mm thickness.
- Cut two identical 15 cm diameter circles.
- Cut one circle in half to create two semi-circles. One will form the front pouch; the complete circle serves as the flat backplate.
- Drape the front semi-circle over a foam cone or crumpled foil mold to give it a forward-curving, hollow dimensional shape.
- Score and slip the straight and curved joining perimeter of the front semi-circle to the lower perimeter of the backplate circle.
- Blend the seams smoothly with a wooden tool, reinforcing the interior seam with a thin clay coil.
- Punch a 6 mm beveled mounting hole near the top of the backplate, or embed a metal picture hanger into the wet clay on the reverse.
- Dry on a flat board for 48 hours, supporting the front pouch with crumpled tissue paper so it does not collapse.
- Sand the outer seams flush and apply three coats of heavy-duty matte sealer across all surfaces, including the inner cavity.
Tips and Variations
- Moisture Protection: Air dry clay is not naturally waterproof. Use dried botanicals, faux foliage, or insert a tiny removable plastic cup inside if holding live air plants that require periodic misting.
- Variation: Paint a crisp two-tone color block design diagonally across the face with sage green and warm linen white.
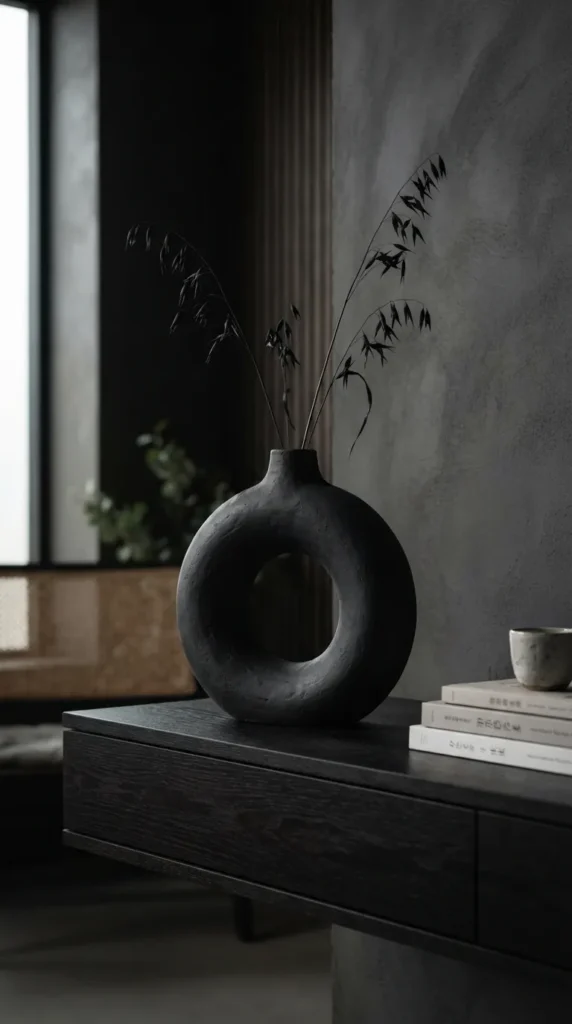
10. Sculptural Donut Vase for Dried Florals
Introduction The hollow circular “donut” or O-ring vase is a signature of modern sculptural pottery. Its central void frames light and space, turning floral styling into an architectural focal point.
What This Idea Means This project requires precise hollow-form joinery, balancing internal air pressure during fabrication, and engineering an upright, weighted stance.
Materials Needed
- 1.2 kg Premium white air dry clay
- Round donut-shaped foam ring or two matching curved bowl armatures
- Rolling pin with 6 mm depth guides
- Scalpel and needle carver
- Sandpaper (120, 240, and 400 grit)
- Ultra-matte exterior varnish
How to Make It
- Roll out two large slabs of clay to a 6 mm thickness.
- Mold each slab over half of a circular donut armature, trimming the interior and exterior circumferences cleanly.
- Allow both halves to stiffen to a leather-hard consistency (approx. 6–8 hours).
- Carefully remove the clay halves from their armatures.
- Deeply score both interior and exterior perimeter rims of both halves, apply slip, and press the two halves together to form a complete hollow torus.
- Seal and blend the outer and inner seams using a modeling tool and wet finger smoothing.
- Slice a small flat section off the bottom circle so the donut stands securely on its own.
- Cut a clean 2.5 cm hole at the top apex and insert a small hollow clay collar to form the vase neck.
- Pierce a microscopic pinhole in an inconspicuous spot to prevent trapped air from expanding and cracking the form during drying.
- Dry slowly over 72 hours. Sand to an even finish and coat with an ultra-matte ceramic-style sealer.
Tips and Variations
- Seam Reinforcement: Roll very thin micro-coils of clay and work them directly into the external seams during assembly to prevent fissures during shrinkage.
- Variation: Texture the surface using a coarse linen cloth pressed into the clay slab before assembly to create an authentic linen-ceramic finish.
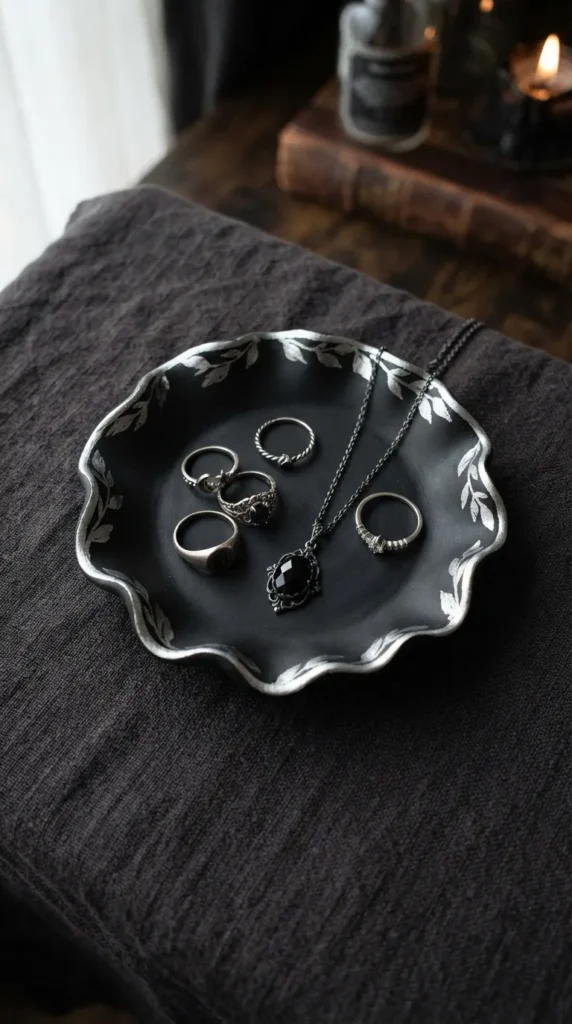
11. Scalloped Edge Jewelry & Trinket Dish
Introduction Soft scalloped edging brings feminine vintage charm to modern bedside tables, dressers, and entryway drop zones. This trinket dish catches daily rings, keys, and accessories within a tactile, wavy border.
What This Idea Means Explores fluid edge shaping, rhythm, and gentle drape forming over shallow convex molds.
Materials Needed
- 300 g Fine white or stone-effect air dry clay
- Circular cutter (approx. 14 cm diameter)
- Small round piping tip or coin (to trace scalloped lobes)
- Shallow bowl or tart pan (for slump forming)
- Fine-grain sanding sponge
- Acrylic gloss glaze or satin finish
How to Make It
- Roll a slab to a 5 mm thickness on non-stick parchment paper.
- Cut out a 14 cm diameter base circle.
- Using the edge of a round pastry tip or coin, cut out continuous, uniform semicircular scallops around the entire outer perimeter.
- Smooth every scalloped curve with a damp fingertip or makeup sponge to eliminate harsh angular edges.
- Gently lower the scalloped disk into a shallow, smooth bowl mold, letting the scalloped edges naturally ride up the sloped sides.
- Allow the dish to dry inside the mold for 24 hours, then pop it out and allow the underside to dry for another 24 hours.
- Sand the scalloped edges with 400-grit sandpaper until completely smooth and rounded.
- Apply two coats of satin or high-gloss protective varnish to replicate fine porcelain.
Tips and Variations
- Even Spacing: Calculate the circumference or use a printed paper template with pre-divided scalloped segments to ensure your wave pattern joins seamlessly without half-scallops.
- Variation: Paint a delicate 1 mm metallic gold or deep cobalt rim line along the crest of the scallops for an artisanal detail.
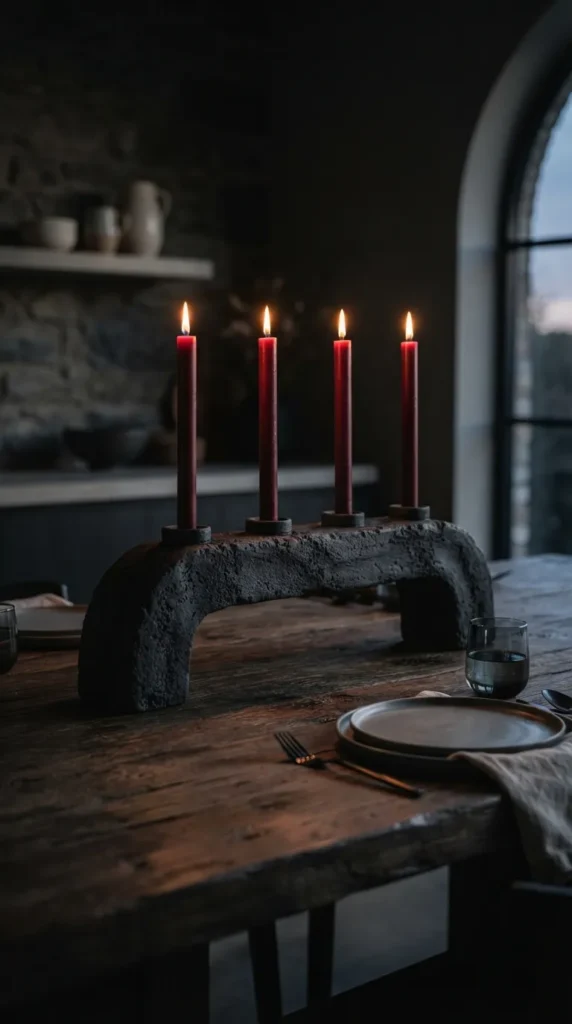
12. Monolithic Arch Multi-Candle Centerpiece
Introduction Taking inspiration from brutalist architecture and clean Mediterranean geometry, this wide horizontal arch candle board holds a row of slender taper candles. It serves as a striking centerpiece for modern tablescapes.
What This Idea Means A study in monolithic mass, linear multi-point alignment, and horizontal structural balance without sagging.
Materials Needed
- 1.5 kg Heavy-body mineral air dry clay
- Metal taper candle socket cups (22 mm diameter)
- Steel ruler and utility knife
- Wooden guide rails (25 mm height)
- Sanding block and fine sandpaper
- Clear matte masonry sealer
How to Make It
- Form a dense, solid rectangular clay beam measuring approximately 30 cm long, 6 cm wide, and 4 cm tall.
- Using a curved carver or large round cup, carve out a shallow horizontal arch from the underside center, leaving the two ends as sturdy supporting pilasters.
- Along the top flat surface, measure three to four equally spaced points for candle placements.
- Press metal taper candle inserts firmly into the marked locations, ensuring they are seated perfectly level and perpendicular.
- Smooth all flat planes using a steel ruler and a damp sponge to maintain crisp 90-degree geometric edges.
- Allow this dense piece to cure slowly for 5 to 6 days; cover lightly with a loose plastic sheet during the first 48 hours to ensure slow, even moisture loss.
- Sand all planar facets flat and crisp using a hard sanding block.
- Seal with three coats of clear matte masonry or stone sealant.
Tips and Variations
- Socket Sizing: Embed metal candle inserts rather than bare clay holes. As clay shrinks 5–8% upon drying, bare holes may become too small or crack under the stress of inserting candles.
- Variation: Add coarse dry sand or crushed terracotta grog into the wet clay mix for authentic limestone or travertine texture.
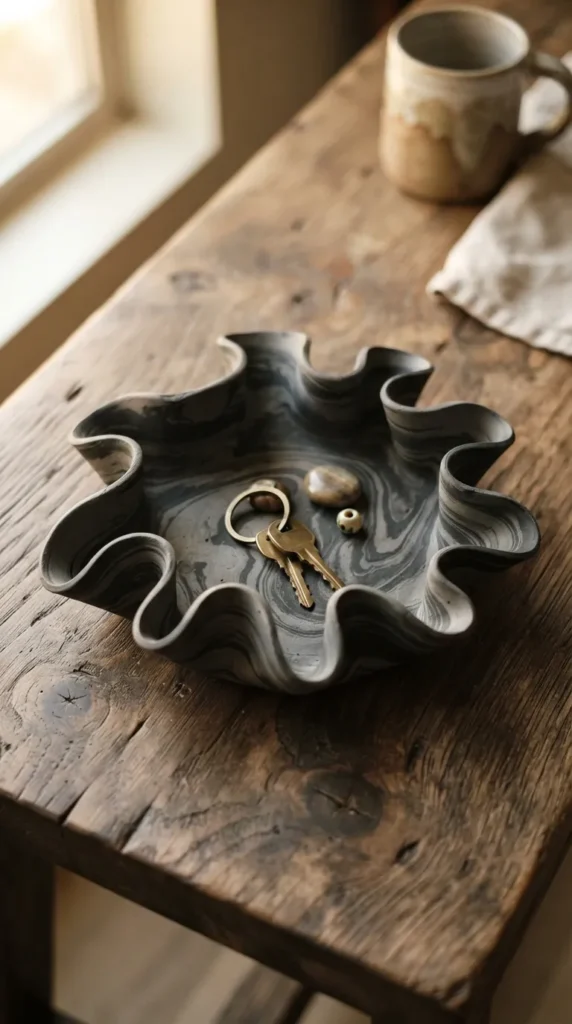
13. Biomorphic Organic Wave Catchall Tray
Introduction Breaking away from rigid geometry, biomorphic design draws from dynamic natural forms—puddle ripples, melting liquid, and eroded coastal stone. This wavy catchall tray features an undulating, freeform rim that adds fluid energy to coffee tables and consoles.
What This Idea Means Focuses on freehand sculptural intuition, asymmetrical balance, and dynamic edge variation.
Materials Needed
- 500 g Off-white or speckled air dry clay
- Wooden modeling tools
- Rolling pin with 6 mm depth guides
- Flexible plastic smoothing blade
- 320-grit sandpaper
- High-satin protective varnish
How to Make It
- Roll out a freeform organic slab (approx. 25 cm × 18 cm) without defined circular or rectangular corners.
- Smooth both flat surfaces with a flexible rib tool to remove all textures and imperfections.
- Freehand carve an asymmetrical, organic perimeter reminiscent of a water puddle or sea kelp contour.
- With your fingertips, gently lift, ruffle, and fold sections of the outer edge upward at varying heights and angles to create a natural wave perimeter.
- Prop up higher wave peaks with rolled parchment paper balls underneath while the clay is wet to preserve the lifted contour.
- Dry undisturbed for 48 hours. Remove the parchment supports after the first 24 hours.
- Sand the freeform curves smooth, highlighting the flowing edges.
- Apply two coats of high-satin varnish for a low-sheen, liquid-stone finish.
Tips and Variations
- Support Stability: Ensure the central base area remains completely flat against the table while the perimeter folds upward, ensuring the tray sits level without rocking.
- Variation: Mix two clay bodies together (e.g., white and terracotta) with 3–4 kneading twists to yield a permanent marbled agate wave effect.
14. Layered Bas-Relief Botanical Wall Art Tiles
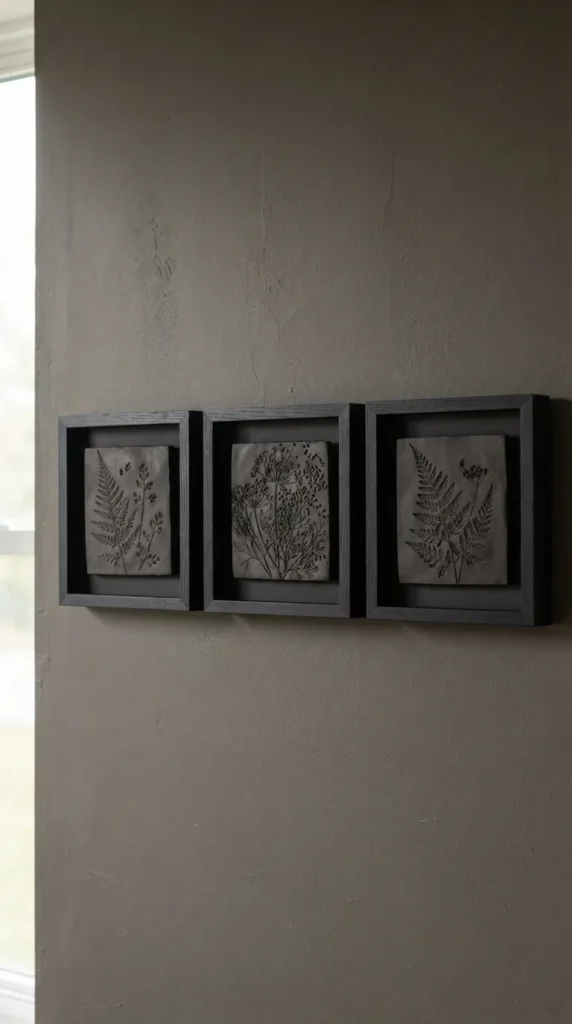
Introduction Bas-relief botanical tiles offer a tactile, archival way to capture the delicate structure of real leaves, seed heads, and pressed flowers. Framed or hung as a gallery grid, these textured plaster-like tiles bring the natural world indoors.
What This Idea Means This project explores tactile impression printing, negative relief casting, and clean modular tile crafting for wall galleries.
Materials Needed
- 600 g Fine porcelain-grade white air dry clay
- Fresh botanical cuttings (ferns, eucalyptus, wild grasses, fennel fronds)
- Square wooden tile frame or cookie cutter (12 cm × 12 cm)
- Rolling pin with 8 mm depth guides
- Metal saw-tooth wall hangers
- Clear ultra-matte sealant
How to Make It
- Roll out a square slab of clay to an even 8 mm thickness.
- Arrange fresh botanical stems across the surface in a balanced, intentional layout.
- Roll firmly over the botanicals with your rolling pin to press them deep into the clay surface.
- Carefully lift the plant stems out with fine tweezers to reveal crisp botanical vein impressions.
- Cut the perimeter cleanly into a 12 cm × 12 cm square using your tile cutter and a metal ruler.
- Bevel the back edges slightly to prevent corner warping, and press a metal saw-tooth hanger flush into the top back center.
- Dry flat between two sheets of porous cardboard weighted at the corners for 48 hours.
- Sand the edges crisp and apply two coats of ultra-matte clear sealer to preserve the raw chalky finish without yellowing.
Tips and Variations
- Fresh vs. Dry Stems: Always use fresh, pliable botanicals. Dry, brittle stems will fracture and tear the clay surface when rolled.
- Variation: Dust an ultra-subtle wash of raw umber watercolor into the deep botanical veins before sealing to accentuate botanical line details.
15. Tiered Conical Ring Holders & Ring Cones
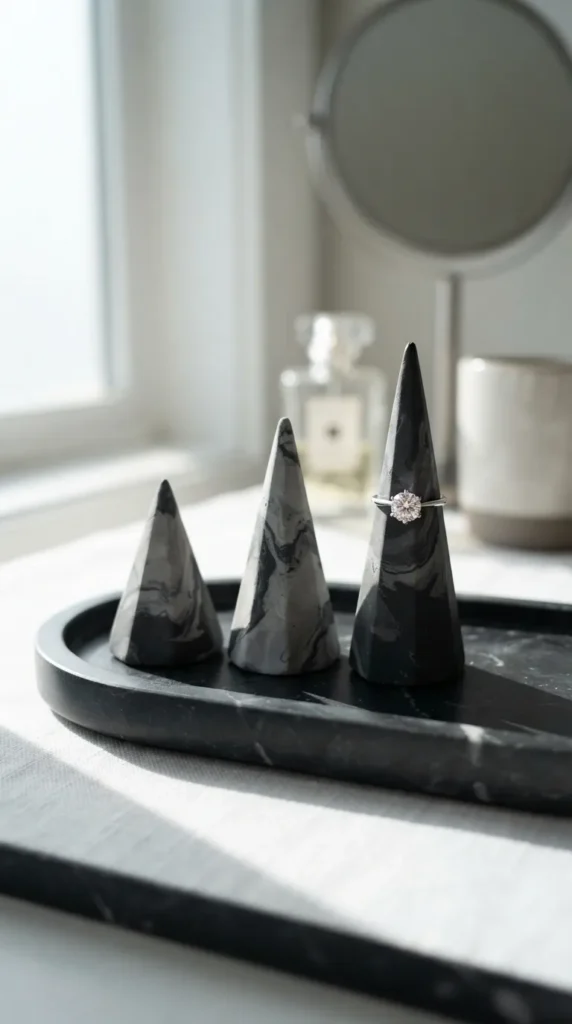
Introduction Minimalist ring cones are both functional jewelry organizers and compact vanity sculptures. By creating a set of three cones in varied heights with faceted, ribbed, or marbled details, you can display rings beautifully while keeping dressers tidy.
What This Idea Means Focuses on small-scale vertical hand-modeling, geometric faceting, and precision tip construction.
Materials Needed
- 300 g White and grey marbled air dry clay
- Clay cutting wire or scalpel
- Sandpaper (240 and 400 grit)
- Clear high-gloss or satin topcoat
How to Make It
- Divide clay into three portions of varying sizes (small, medium, large).
- Roll each portion between your palms into a tapered cone shape ranging from 6 cm to 10 cm in height, with a base diameter of 3 cm to 4 cm.
- Tap the bottom flat against a work surface at a 90-degree angle so the cones stand plumb.
- For a faceted look: Use a sharp scalpel or clay wire to slice clean vertical facets down the sides of the cone at geometric angles.
- For a smooth round look: Roll the cone gently on a smooth glass surface, smoothing the apex with a damp fingertip.
- Dry the cones upright for 36 hours.
- Sand the bottom base and side planes crisp and flat.
- Seal with a high-gloss ceramic clear coat to mimic polished marble or slip-cast porcelain.
Tips and Variations
- Apex Durability: Keep the very tip of the cone slightly rounded (approx. 2 mm diameter) rather than needle-sharp to prevent chipping during daily use.
- Variation: Dip the top third of each cone into metallic liquid copper or gold leaf paint for a two-tone dipped luxury aesthetic.
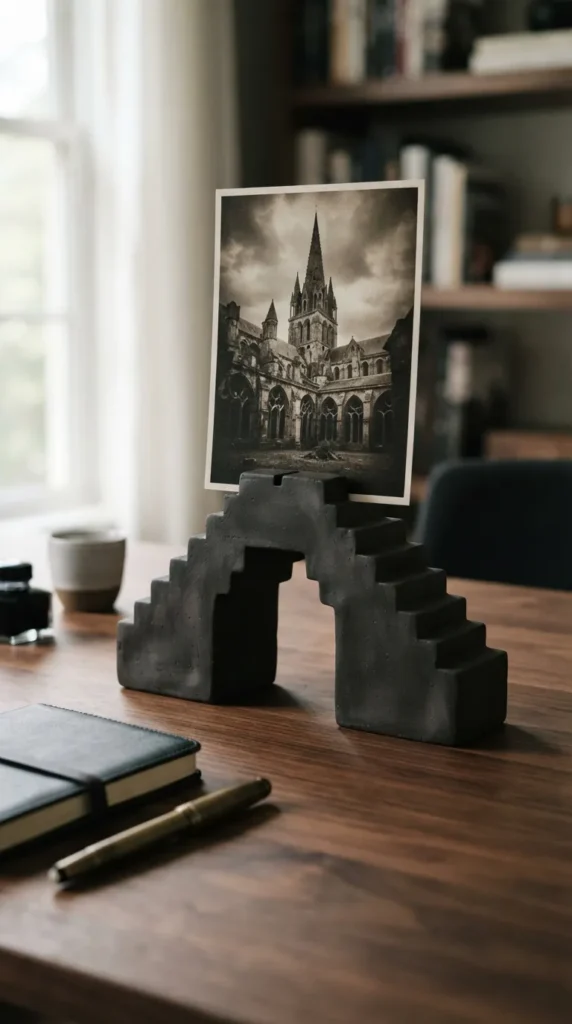
16. Architectural Stepped Arch Photo & Card Holder
Introduction A low-profile, stepped ziggurat arch card holder brings post-modern, art-deco architectural styling to desks and console tables. It elegantly displays postcards, business cards, art prints, or family photos within a sculptural base.
What This Idea Means This project requires razor-sharp stepped geometric cutting, uniform slot channel carving, and weighted desktop stability.
Materials Needed
- 400 g White or sandstone air dry clay
- Stepped acrylic block or ruler and scalpel
- 2 mm brass shim or craft blade (to cut the photo slot)
- 400-grit sandpaper
- Dead-matte natural stone sealer
How to Make It
- Form a dense, solid clay arch or half-moon block measuring 10 cm wide, 7 cm tall, and 3 cm deep.
- Using a scalpel and straight edge, carve stepped terraces along both curved sides, creating an architectural ziggurat or stepped arch profile.
- Across the center top apex, cut a clean, vertical 2 mm wide slot running 15 mm deep along the horizontal length.
- Insert a piece of thin cardboard or plastic shim into the slot while the clay dries to ensure the channel does not close up as the clay shrinks.
- Smooth all stepped flat facets with a firm plastic rib tool.
- Allow the block to dry for 48 to 60 hours, removing the plastic shim after 24 hours.
- Sand each stepped corner crisp with 400-grit sandpaper on a hard sanding block.
- Apply two coats of dead-matte clear sealer.
Tips and Variations
- Slot Alignment: Ensure the card slot is cut completely vertical; a tilted slot will cause displayed photos or prints to lean forward or backward awkwardly.
- Variation: Imprint fine horizontal reeding along the front face using a clay groover for rich Art Deco texture.
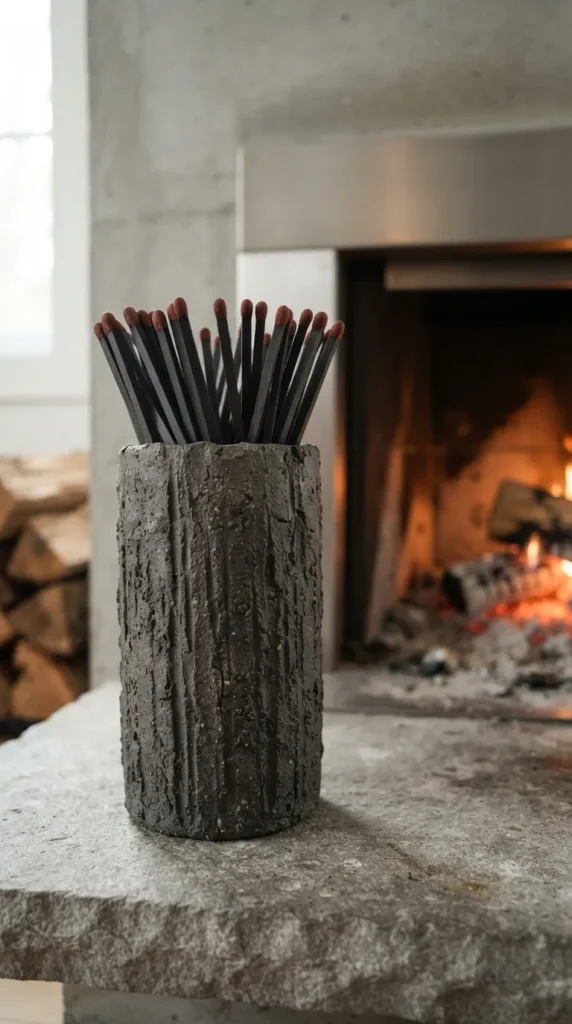
17. Hand-Built Textured Cylinder Match Vessel & Striker
Introduction A companion to modern fireplaces and candle displays, this hefty, textured cylinder holds extended hearth matches. Paired with a tactile raw exterior and a built-in striker plate, it replaces flimsy cardboard matchboxes with a permanent decor piece.
What This Idea Means A study in hollow-cylinder slab construction, durable base joining, and coarse exterior texturing.
Materials Needed
- 500 g Coarse or textured grog air dry clay
- Cylindrical template tube (approx. 5 cm diameter × 12 cm tall)
- Serrated scoring tool and slip
- Wire texture brush or coarse rasp
- Adhesive match striker paper
- Clear matte sealer
How to Make It
- Roll out a slab to a 6 mm thickness, cutting a rectangle measuring 16 cm wide by 12 cm tall.
- Roll a separate circular slab for the base (6 cm diameter, 8 mm thick).
- Wrap the rectangular slab around your cling-wrapped cylinder form, creating a vertical tube.
- Score and slip-join the vertical seam, blending it smooth.
- Score and slip the bottom rim of the tube and the circular base slab, joining them securely and smoothing the exterior junction.
- While still supported on the internal form, rake a wire texture brush or coarse rasp vertically down the exterior walls to create a heavily striated, stone-chiseled texture.
- Slide the internal form out and allow the vessel to cure for 48 hours.
- Sand any rough burrs off the top rim. Seal thoroughly with clear matte sealer.
- Affix a round strike-anywhere match paper disc to the recessed underside of the base.
Tips and Variations
- Internal Removal: Never leave cardboard or glass internal forms inside the clay for more than 6–8 hours; the clay will shrink around the rigid form and crack down the seam.
- Variation: Paint the interior with a glossy contrasting black glaze-style finish, leaving the grooved exterior completely raw and earthy.
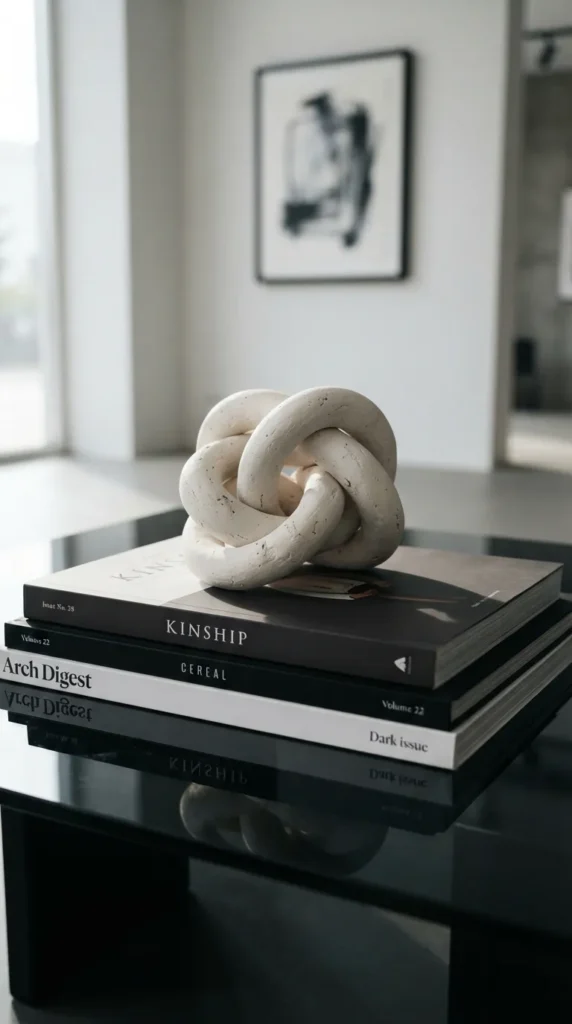
18. Minimalist Sculptural Knot Paperweight
Introduction The endless sculptural loop or sailor’s knot translates beautifully into fine clay. Displayed on top of stacked books, documents, or open shelving, its interwoven loops invite touch and exploration from every angle.
What This Idea Means Explores three-dimensional topological loops, hand-extrusion smoothing, and curing complex, overlapping geometry without flat-spot deformation.
Materials Needed
- 400 g High-elasticity nylon-reinforced air dry clay
- Smooth wooden rolling board
- Clay joining slip and needle tool
- 320-grit sandpaper
- Ultra-matte ceramic lacquer
How to Make It
- Thoroughly condition and roll a smooth, uniform clay coil (approx. 22 mm diameter and 40 cm length), ensuring no air pockets or surface cracks.
- Smooth the coil surface using a damp sponge before weaving.
- Gently weave the coil into a classic loose trefoil or pretzel knot, keeping the loops open and voluminous.
- Join the two ends together seamlessly, tucking the union into an underside curve where it is concealed from view.
- Score and slip the joined ends, smoothing the seam until it blends into the rest of the coil.
- Support overlapping loops with small pieces of foam or tissue paper to prevent them from flattening against the work surface while curing.
- Allow to dry slowly over 4 days, gently rotating the knot every 24 hours.
- Sand all interior and exterior curves to a smooth finish.
- Coat with an ultra-matte, non-reflective ceramic lacquer.
Tips and Variations
- Coil Uniformity: Roll the coil with light, even pressure using the flat of both hands, working from the center outward to keep the diameter uniform along its entire length.
- Variation: Create a double-knot or open figure-eight link for an elongated horizontal silhouette.
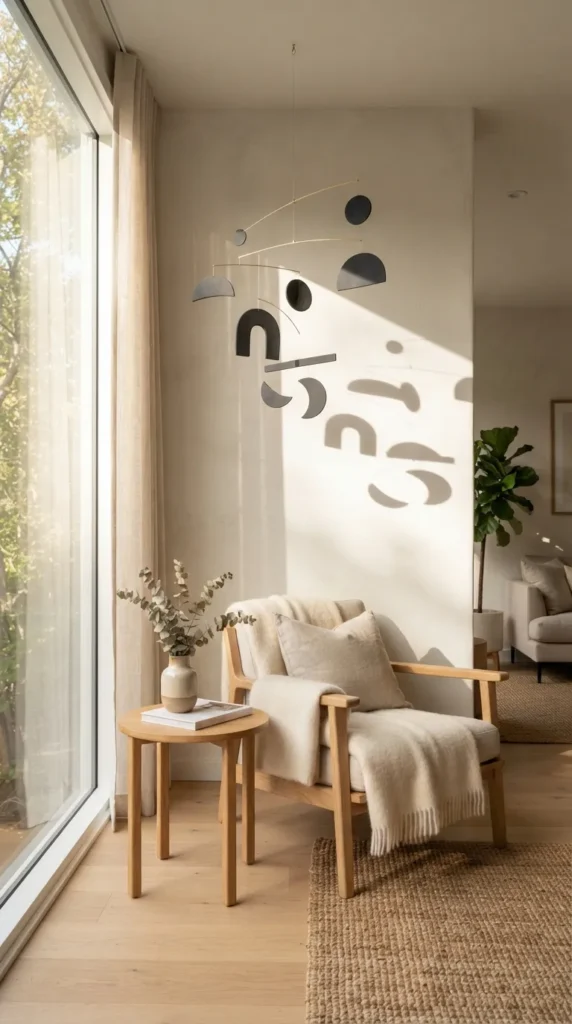
19. Scandinavian-Style Fluted Hanging Mobile
Introduction Mobiles are kinetic sculptures that bring gentle movement and modern Scandinavian calm to empty corners. Crafted with ultra-lightweight geometric clay discs, arches, and brass wire, this piece interacts with air currents to create shifting shadows.
What This Idea Means This project requires lightweight slab rolling, balance engineering, and clean wire articulation for kinetic movement.
Materials Needed
- 300 g Lightweight paper-based or mineral air dry clay
- Geometric clay cutters (circles, crescents, small arches)
- 1 mm rigid brass rod and needle-nose jewelry pliers
- Fine needle (to pierce hanging holes)
- Sandpaper (400 grit)
- Matte acrylic sealer
How to Make It
- Roll out an ultra-thin, uniform clay slab (approx. 3 mm thickness) using lightweight clay.
- Cut an assortment of complementary geometric shapes: two small arches, three hollow circles, and three solid crescent moons.
- Pierce small, clean 1.5 mm holes 3 mm from the top and bottom edges of each piece using a needle.
- Flute or groove selected pieces with a fine styling tool to add light-catching texture.
- Dry all flat shapes between sheets of parchment paper under light book weights for 36 hours to ensure they dry flat.
- Sand all edges and hole openings smooth with 400-grit paper. Seal with a clear matte coat.
- Assemble the mobile: Cut brass rods to various lengths, bend small loops at the ends and center balance points using jewelry pliers, and suspend the clay shapes with fine mono-filament or brass jump rings until the mobile balances.
Tips and Variations
- Weight Balance: Test balance points by holding each brass crossbar on the tip of a needle before securing connections permanently.
- Variation: Paint each geometric element in an earthy tonal gradient—from deep terracotta up to warm bone and linen white.
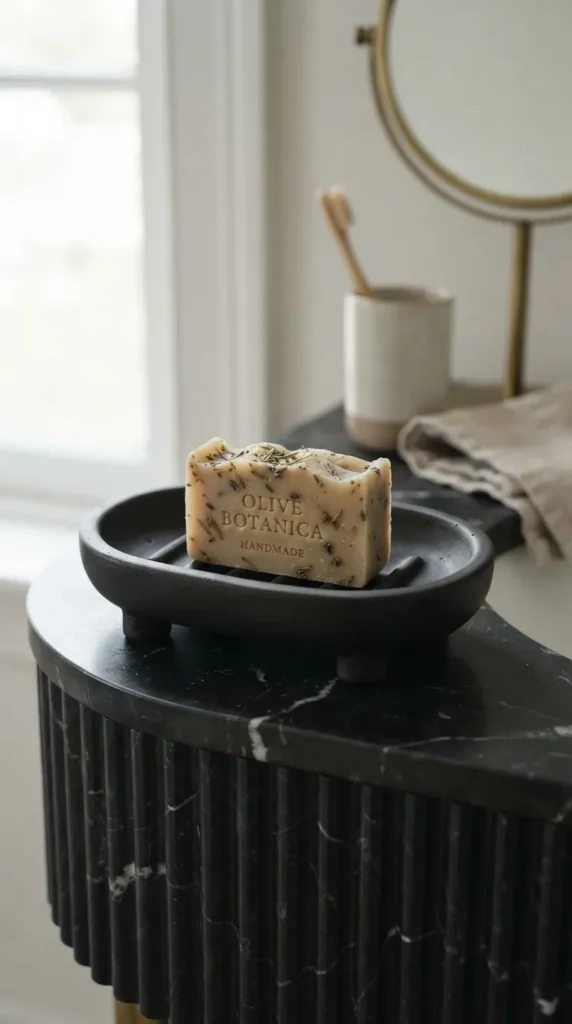
20. Modernist Oval Footed Soap & Sponge Dish
Introduction Elevating bathroom and kitchen sink styling, a footed oval soap dish keeps surfaces tidy and dry. Featuring raised drainage ridges and a self-draining footed base, it combines sanitary utility with bespoke spa luxury.
What This Idea Means Focuses on moisture-resistant sealing, drainage integration, and elevated footed stability for wet areas.
Materials Needed
- 400 g High-density mineral air dry clay
- Oval cutting template (approx. 14 cm × 9 cm)
- Triangular clay ridge tool or carved wooden strip
- Rolling pin with 6 mm depth guides
- Multi-surface waterproof epoxy sealer or clear polyurethane
- Fine sanding sponge
How to Make It
- Roll out an oval slab to a 6 mm thickness.
- Cut the slab into a clean 14 cm × 9 cm oval.
- Curve the outer rim slightly upward to create a shallow, water-retaining dish profile.
- Carve or score three to four parallel horizontal drainage ridges into the top center surface so soap bars sit elevated above resting moisture.
- Roll two small, thick rectangular strips (approx. 6 cm long × 8 mm tall) to serve as underside base runner feet.
- Score, slip, and join the runner feet along the underside base, ensuring the dish sits level and elevated 8 mm off the counter.
- Allow to dry thoroughly for 48 to 72 hours.
- Sand all ridges and rounded perimeters smooth with a fine sanding sponge.
- Seal with four thorough coats of high-grade clear polyurethane or water-resistant epoxy glaze, ensuring all pores are sealed against water infiltration.
Tips and Variations
- Waterproofing is Critical: Air dry clay softens if exposed to standing water. Pay special attention to coating the interior ridges and underside with multiple coats of waterproof sealer.
- Variation: Pierce three small drainage holes in the center channels for use with a secondary drainage basin underneath.
Finishing, Display, and Long-Term Care Guide
To keep your handmade air dry clay decor in pristine condition for years to come, follow these essential maintenance guidelines:
- Cleaning: Dust your sealed clay decor regularly with a soft, dry microfiber cloth or a dry natural bristle brush. For deeper cleaning, wipe gently with a barely damp cloth; never submerge air dry clay pieces in water or place them in a dishwasher.
- Water Exposure: Keep decorative vases, planters, and bowls intended for dry botanical use only. If displaying fresh floral arrangements, always insert a small glass test tube or concealed plastic liner inside the clay vessel cavity.
- Sunlight Protection: Direct, intense sunlight over long periods can cause certain sealants to yellow or subtle natural clay pigments to fade. Display your pieces in well-lit, indirect natural light for optimal longevity.
- Handling: Treat hand-built clay decor with the same care as fine porcelain. Lift pieces from their solid base rather than by delicate rims, handles, or decorative loops.