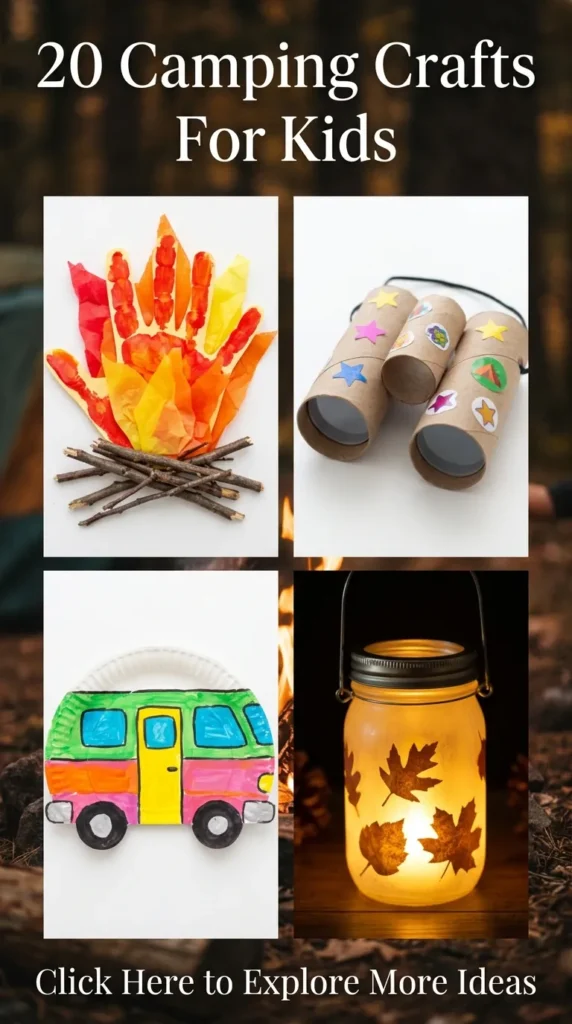
20 Camping Crafts For Kids
Camping with children creates some of the most enduring childhood memories, blending the raw simplicity of nature with boundless curiosity. Crafting outdoors enriches this experience, transforming natural finds—like smooth river stones, fallen birch bark, dried pinecones, and sturdy oak twigs—into timeless keepsakes.
Modern camping crafts move beyond basic paper cutouts. They emphasize organic textures, sustainable materials, minimalist design sensibilities, and hands-on engagement. Each project below blends outdoor exploration with tactile artistry, keeping young minds immersed in the beauty of the wild.
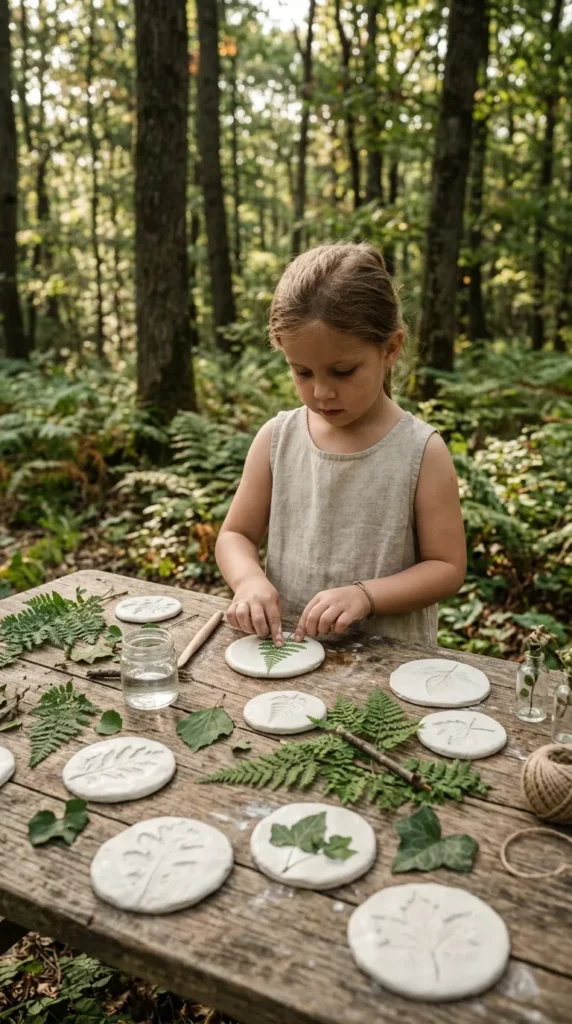
1. Minimalist Clay & Wildflower Botanical Imprint Medallions
Introduction Botanical imprinting captures the delicate architecture of forest flora into a permanent, tactile stone keepsake. Children search for ferns, wild clover, pine needles, and delicate blossom petals, pressing them directly into air-dry clay.
What This Idea Means This craft teaches children to observe the subtle micro-textures of forest plant life. It bridges transient nature with lasting design, creating small sculptural artifacts that celebrate natural geometry.
Materials Needed
- Natural white or terracotta air-dry clay (or non-toxic salt dough)
- Rolling dowel or smooth glass bottle
- Circular craft cutters or a wide camping mug rim
- Freshly gathered botanical specimens (ferns, leaves, petals, seed heads)
- Wooden skewer (for threading holes)
- Jute twine or untreated leather cord
How to Make It
- Roll out a walnut-sized ball of clay on a smooth, clean camping board until it is roughly 6 mm thick.
- Carefully arrange chosen leaves or blossoms face down across the clay surface.
- Gently roll the wooden dowel over the botanical elements with even pressure.
- Carefully peel away the plant material using tweezers or fingertips to reveal the detailed veining beneath.
- Cut the perimeter into a clean circle using the rim of a camping mug.
- Pierce a clean hole near the top edge using the wooden skewer.
- Let the medallion dry flat in the open air for 24 to 48 hours, flipping once halfway through.
- Thread with rustic jute twine to hang.
Tips and Variations
- Tip: Choose leaves with prominent, raised veins on their undersides (like sage, oak, or fern fronds) for the deepest imprints.
- Variation: Lightly brush dry metallic pigment, mica powder, or diluted watercolor wash over the dried medallion to highlight the crevices.
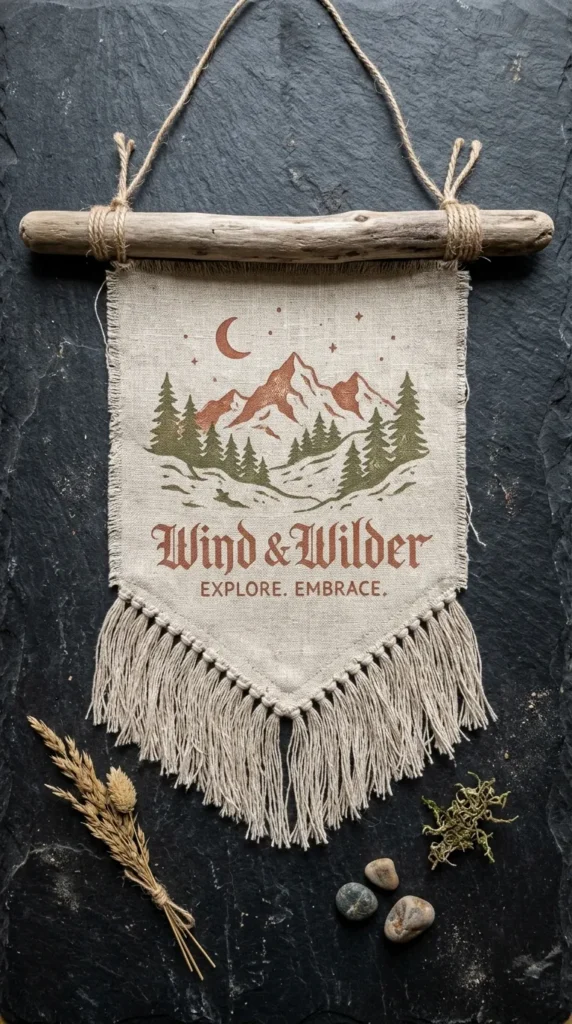
2. Modern Driftwood & Raw Linen Canvas Banners
Introduction Combining weather-worn driftwood with raw, fringed linen creates a piece of rustic wall art. Children paint minimalist outdoor silhouettes or natural landscape gradients directly onto fabric suspended from smooth river wood.
What This Idea Means It introduces children to textile art and balanced composition. Using unbleached natural fibers gives the project a gallery-inspired, earth-toned finish.
Materials Needed
- Smoothed pieces of fallen branches or beach driftwood (approx. 20–30 cm long)
- Natural unbleached linen or heavy cotton canvas scraps
- Non-toxic acrylic or textile paint in earth tones (terracotta, forest green, warm ochre)
- Flat-edged artist brushes
- Fabric glue or a basic needle and linen thread
- Braided cotton rope
How to Make It
- Cut the canvas or linen into a neat pennant or rectangle shape (roughly 15 cm wide by 25 cm long).
- Gently pull individual threads from the bottom edge to create a soft, intentional raw fringe.
- Fold the top 2 cm of canvas over the driftwood stick and secure it firmly at the back using fabric glue or simple hand stitches.
- Sketch a minimalist landscape on the canvas—such as mountain peaks, a crescent moon, or tall pine silhouettes.
- Paint the design with gentle, earthy strokes and allow it to dry thoroughly in the breeze.
- Knot braided cotton rope to both exposed ends of the driftwood stick for hanging.
Tips and Variations
- Tip: Press the canvas flat under a heavy camping book before painting to ensure a smooth working surface.
- Variation: Instead of paint, use collected leaves dipped in fabric ink as stamps across the linen surface.
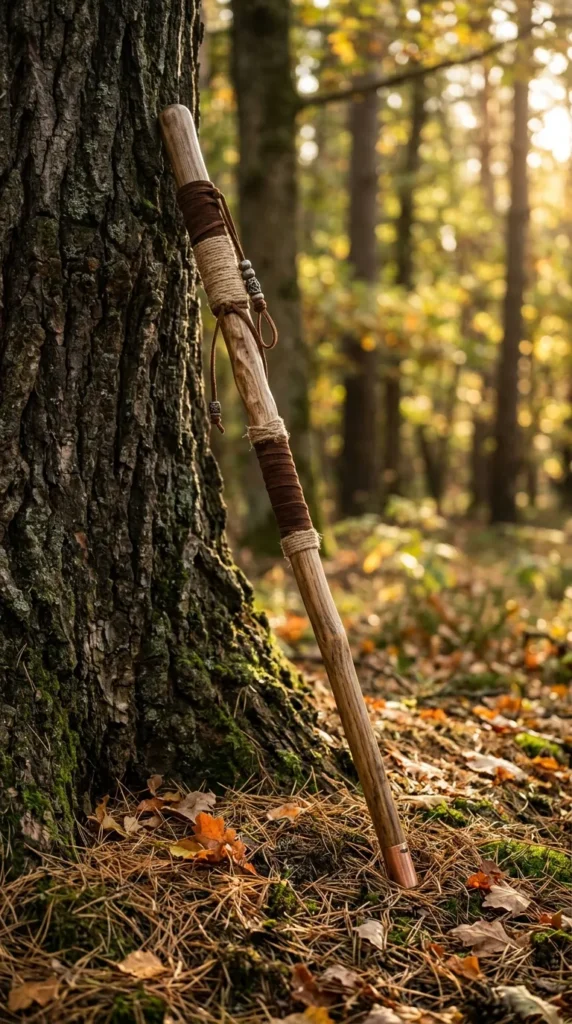
3. Hand-Carved & Whittled Forest Walking Sticks
Introduction A customized hiking stick is a classic outdoor rite of passage. Using safe wood-peeling techniques, children create custom patterns and ergonomic cord wraps on a fallen branch.
What This Idea Means This craft builds practical dexterity and patience while creating a functional, durable tool for future trail explorations.
Materials Needed
- Sturdy, seasoned fallen hardwood branches (chestnut, hazel, or maple)
- Safe whittling peelers or child-safe rounded safety carving knives
- Fine-grit sandpaper (120 and 220 grit)
- Multi-colored paracord, suede lacing, or jute twine
- Non-toxic bees-wax polish
- Clean cotton cloth
How to Make It
- Select a branch that stands roughly shoulder-height and is free from deep rot or large structural cracks.
- Under close adult supervision, strip off sections of the outer bark using smooth, downward strokes with a safety peeler to reveal the pale wood beneath.
- Smooth the entire surface with coarse sandpaper, finishing with fine grit for a silky feel.
- Tightly wrap the handle section (roughly 10 cm long where the child holds it) with suede cord or paracord, securing the ends with neat locking knots.
- Rub natural beeswax into the exposed wood using a clean cloth to seal and bring out the natural grain.
Tips and Variations
- Tip: Only use dead, seasoned wood collected from the ground; green wood will warp and crack as it dries.
- Variation: Burn subtle geometric lines into the wood using a small metal branding wire heated by an adult, or notch tally marks for every trail completed.
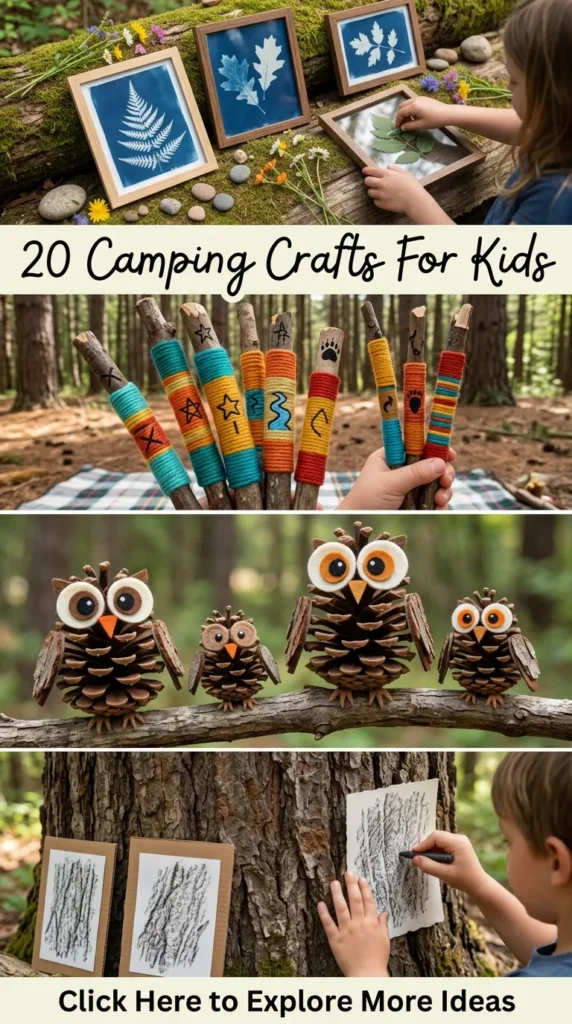
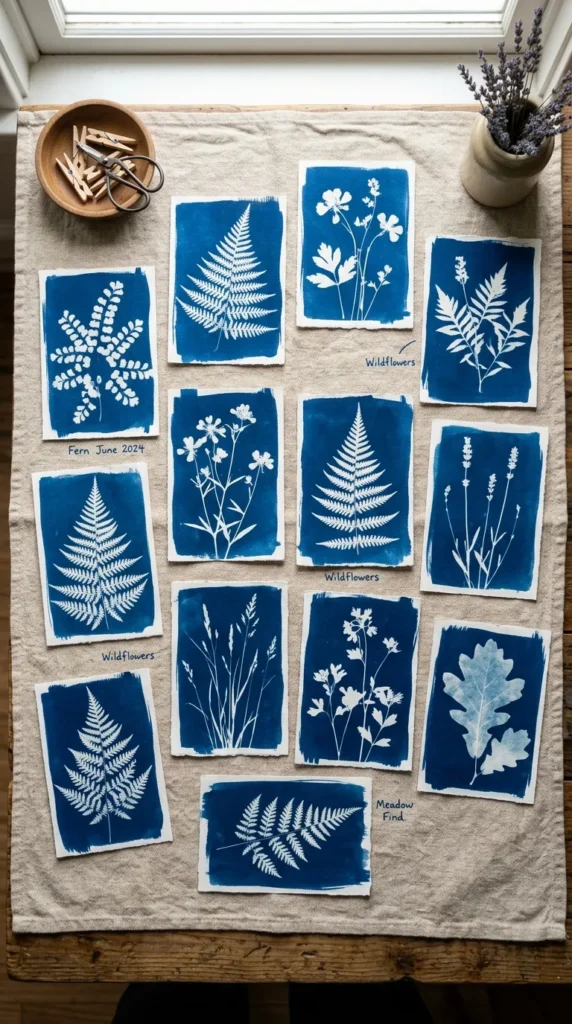
4. Solar Cyanotype Sun-Print Forest Postcards
Introduction Cyanotype printing harnesses the power of the sun to produce rich Prussian blue silhouette prints. Children capture the silhouettes of forest flora directly onto treated watercolor paper.
What This Idea Means Sun printing blends basic photographic chemistry with nature collection, allowing kids to explore negative space and shadow play.
Materials Needed
- Pre-treated cyanotype sun-print paper sheets
- Clear acrylic sheet or transparent camping plate
- Thick cardboard backing
- Wild foliage (delicate fern fronds, pressed clover, dandelion seed heads)
- A shallow tub of cool water
- Heavy cardstock or blank watercolor postcards
How to Make It
- Gather interesting natural shapes with distinct outer contours in a shaded area.
- In the shade, place the sun-print paper on the cardboard backing.
- Arrange the foliage directly on the paper, then cover it with the clear acrylic sheet to hold the plants flat.
- Expose the arrangement to direct sunlight for 2 to 4 minutes until the paper shifts to a pale bronze color.
- Remove the foliage and immediately submerge the paper in the shallow water bath for 5 minutes, rinsing until the water runs clear.
- Lay flat on a camp towel to dry in the shade; the background will turn deep Prussian blue as it dries.
Tips and Variations
- Tip: Do this craft around midday when the sun is directly overhead to eliminate long shadows.
- Variation: Mount the finished blue prints onto heavy recycled Kraft cardstock with double-sided tape to write postcards home from camp.
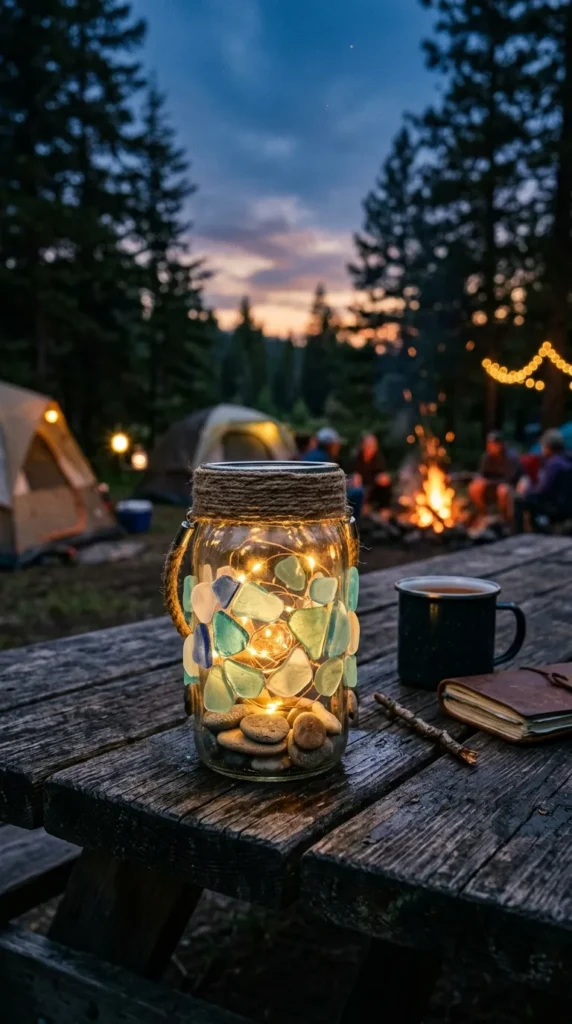
5. Terracotta & Glass Pebble Solar Lanterns
Introduction Children transform plain glass mason jars into warm camp lanterns using twine, river pebbles, and solar-powered LED cork lids.
What This Idea Means This craft turns everyday glassware into functional camp lighting, illuminating the campsite while teaching basic solar energy concepts.
Materials Needed
- Clean, clear wide-mouth glass jars (such as upcycled preserve jars)
- Solar-powered LED jar insert lids (or waterproof fairy lights)
- Smooth, translucent sea glass or flat river pebbles
- Clear all-weather craft adhesive or silicone glue
- Jute twine or natural hemp cord
How to Make It
- Clean and dry the exterior glass surface thoroughly.
- Apply small drops of craft adhesive to the flat backs of sea glass pieces or river stones.
- Press the stones onto the exterior base and midsection of the jar in geometric rows or freeform rings.
- Wrap natural twine tightly around the threaded glass collar multiple times, securing it with a sturdy square knot and creating a hanging handle loop.
- Screw the solar LED lid firmly onto the jar top.
- Set the lantern in direct sunlight during the daytime to charge for evening use.
Tips and Variations
- Tip: Space the glass pebbles a few millimeters apart so the light casts defined pebble shadows on the picnic table.
- Variation: Add a few drops of dried lavender or pine needles inside the jar for a subtle natural scent when the jar warms up.
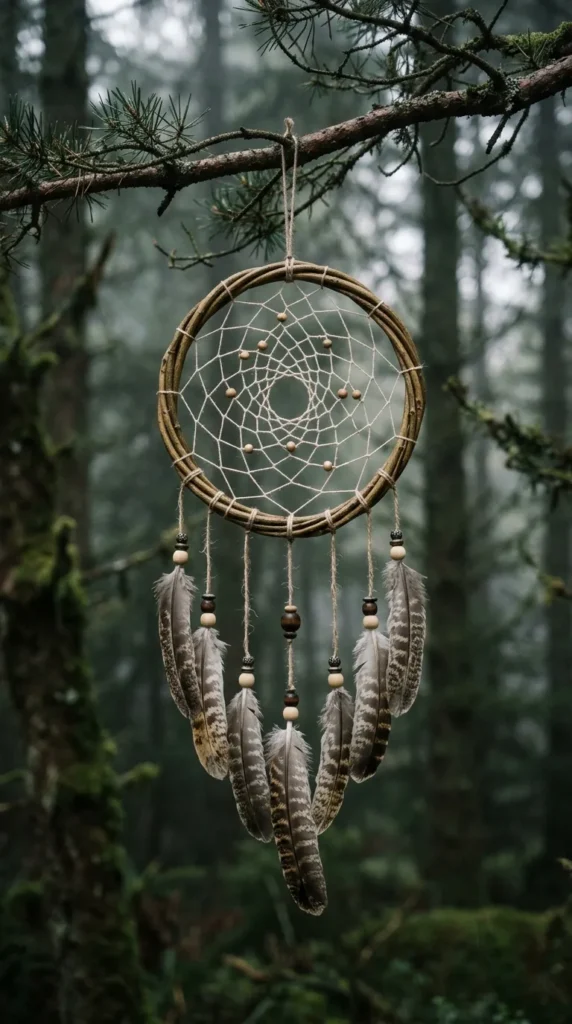
6. Minimalist Willow Hoop Dreamcatchers & Mobiles
Introduction Using flexible green willow or birch branches bent into organic circular hoops, children weave delicate web designs adorned with collected feathers and carved wooden beads.
What This Idea Means Weaving willow hoops promotes fine motor coordination, rhythmic patience, and an appreciation for traditional handmade structures.
Materials Needed
- Fresh, flexible green willow, birch, or grapevine runners (approx. 50–70 cm long)
- Waxed linen cord or natural unbleached cotton string
- Naturally shed bird feathers found on the ground
- Unpainted wooden beads
- Small floral scissors
How to Make It
- Gently bend a fresh willow branch into a neat circle (roughly 15–20 cm in diameter), overlapping the ends by 5 cm.
- Wrap thin twine or thread around the overlapping joint to secure the circular base.
- Tie one end of the linen cord to the hoop, looping it around the branch at equal intervals (roughly 6 to 8 anchor loops around the rim).
- For the second row, thread the cord through the center of each previous loop, continuing inward in a spiral.
- Pull the center tight and tie a final knot, optionally threading a wooden bead in the exact center.
- Tie three short lengths of cord to the bottom edge of the hoop, threading them with wooden beads and naturally shed forest feathers.
Tips and Variations
- Tip: Soak older or stiffer willow branches in water for an hour to make them pliable and prevent snapping.
- Variation: Weave a dried miniature pinecone or a pierced acorn cap into the center of the web.
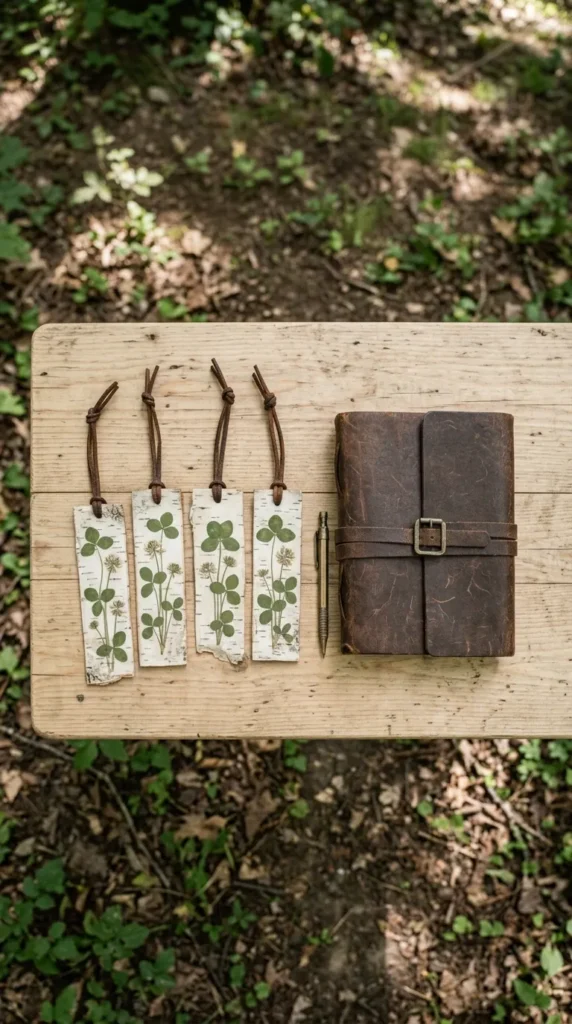
7. Birch Bark & Pressed Leaf Bookmarks
Introduction Fallen birch bark provides a paper-like canvas. When paired with pressed wild leaves, children create durable, earthy bookmarks for their camp reading.
What This Idea Means This project teaches respectful foraging—using exclusively fallen bark—while encouraging quiet reading time in nature.
Materials Needed
- Naturally shed, fallen white birch bark sheets (never stripped from living trees)
- Small, flat pressed leaves and wild flower petals
- Clear matte decoupage glue (Mod Podge)
- Soft flat brush
- Hole punch
- Thin leather strap or suede cord
How to Make It
- Clean the fallen birch bark with a soft brush to remove dirt and loose outer layers.
- Trim the bark into neat rectangular bookmark strips (approx. 5 cm wide by 15 cm long).
- Apply a thin, even coat of decoupage glue over the smooth side of the bark.
- Arrange the pressed leaves and petals flat onto the wet glue surface.
- Seal with a second, smooth topcoat of decoupage glue, brushing gently outward from the center to eliminate air bubbles.
- Allow to dry completely in the sun for 30 minutes until clear and matte.
- Punch a single clean hole at the top edge and tie a leather strap with a simple slip knot.
Tips and Variations
- Tip: Press small leaves between the pages of a heavy camp notebook for a few hours prior to gluing so they lie flat.
- Variation: Write the camping location and year onto the back of the bark with a fine-point archival ink pen before sealing.
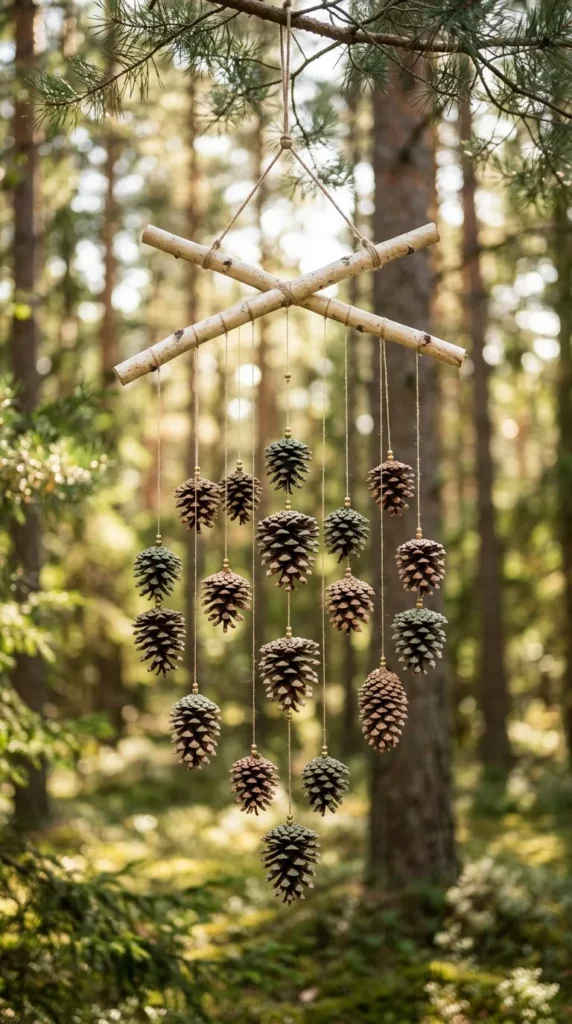
8. Geometric Pinecone Hanging Mobiles
Introduction Pinecones collected from the forest floor are sorted by size, dip-painted in modern Scandinavian-inspired pastel and neutral tones, and suspended from crossed birch sticks.
What This Idea Means Children practice sorting, spatial balance, and structural mechanics by crafting a kinetic mobile that moves with the campsite breeze.
Materials Needed
- Assorted clean pinecones of varying sizes (fir, pine, or spruce)
- Two sturdy sticks of equal length (approx. 25 cm long)
- Matte acrylic craft paints (muted sage, dusty rose, slate blue, warm white)
- Small paint dishes and sponge brushes
- Fine jute twine
- Small screw eyes (eyelet hooks)
How to Make It
- Gently brush out any loose dirt from the pinecones using an old toothbrush.
- Screw a small metal eyelet into the flat base of each pinecone (an adult can start the hole with a small nail).
- Dip just the bottom third of each pinecone into muted acrylic paint, or lightly coat the scale edges with a sponge brush.
- Set the pinecones on wax paper to dry.
- Cross the two sticks at a 90-degree angle and lash the center intersection firmly with jute twine using an X-pattern.
- Tie varying lengths of twine to each pinecone eyelet, then tie them to the four ends and center of the crossed sticks.
- Adjust the string lengths until the mobile hangs balanced from a central overhead string.
Tips and Variations
- Tip: If the mobile tilts to one side, balance it by tying a heavier pinecone closer to the center, or a lighter one farther out.
- Variation: Add small wooden or brass bells above each pinecone to catch the gentle wind.
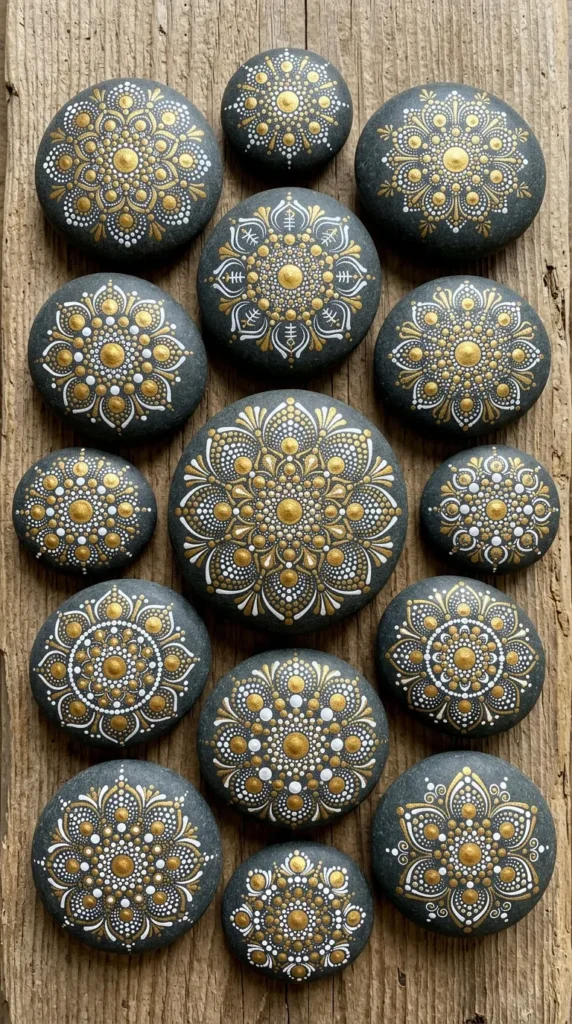
9. River Rock Mandala & Story Stone Painting
Introduction Flat, water-worn river rocks serve as the canvas for intricate geometric mandalas or storytelling icons.
What This Idea Means This craft fosters fine motor control, pattern repetition, and imaginative campfire storytelling through a tactile medium.
Materials Needed
- Ultra-smooth, flat, dark river stones
- Acrylic paint pens (fine and extra-fine tips in white, gold, and earthy tones)
- Circular dotting tools (or the blunt ends of wooden skewers and pencil erasers)
- Clear weather-resistant matte sealer spray (handled by an adult)
How to Make It
- Wash the river stones in camp water and dry them completely in the sun.
- For mandalas: Place a single, solid dot of paint in the exact center of the stone using a wooden skewer tip.
- Add symmetrical rings of smaller dots, petals, or geometric triangles radiating outward toward the rock’s edge.
- For story stones: Draw simple minimalist icons on separate rocks (a tent, a flame, a wolf, a canoe, a crescent moon, a pine tree).
- Allow the paint pens to dry for 15 minutes.
- Spray a light, even coat of matte sealer to protect the artwork against outdoor moisture.
Tips and Variations
- Tip: Start with lighter colors on darker stones for the highest, most vibrant visual contrast.
- Variation: Use the completed story stones around the evening campfire, having each child draw three stones from a pouch to build an original story.
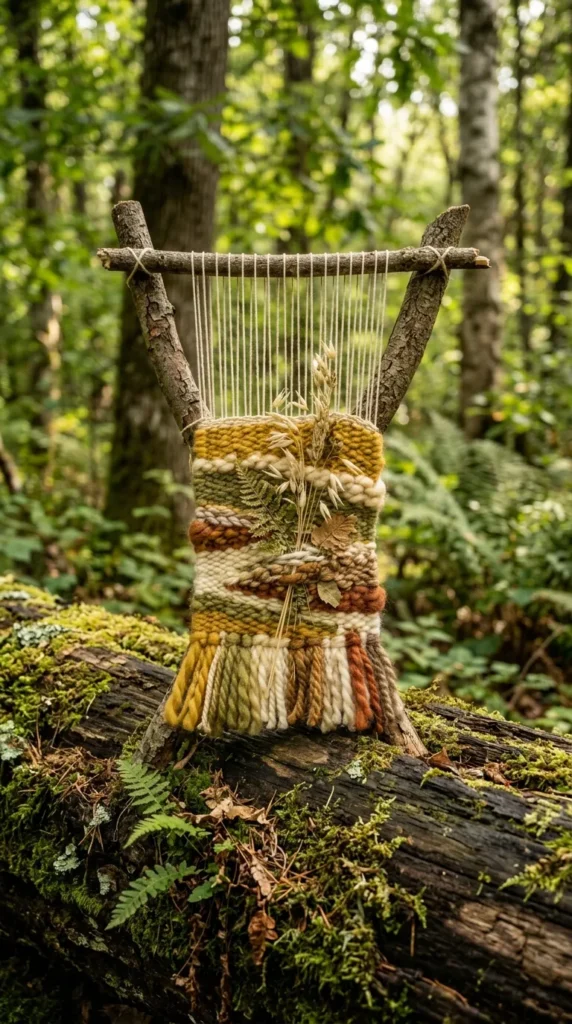
10. Natural Looped Twig & Wool Tapestry Weaving
Introduction A simple forked branch (Y-shaped twig) becomes an organic weaving loom. Children string cotton warp threads and weave soft wool yarns, grasses, and feathers into a miniature textile tapestry.
What This Idea Means Branch weaving teaches the fundamentals of loom textiles—warp and weft—while incorporating the natural shape of the branch into the artwork.
Materials Needed
- Sturdy Y-shaped forked branches (approx. 20–30 cm long)
- Sturdy neutral cotton string or baker’s twine (for the warp)
- Chunky wool yarn, roving, or thick embroidery threads in earthy colors
- Large plastic, blunt-tipped yarn needles
- Long wild grasses, thin pine sprigs, and small feathers
How to Make It
- Select a rigid forked branch with two arms forming a stable “V” shape.
- Tie the cotton string to the base of the fork and wrap it back and forth between the two branch arms at 1 cm intervals to create the vertical warp lines. Tie off securely at the top.
- Thread a length of chunky wool yarn onto the blunt needle.
- Weave the yarn over and under alternating warp strings across the fork width.
- Push each row down gently with fingers or a camping fork to keep the weave tight and even.
- Switch colors and textures by tying on new yarn lengths or weaving in wild grasses and feathers directly.
- Knot the final yarn strand cleanly onto the outer branch arm.
Tips and Variations
- Tip: Keep the warp tension firm but not overly tight, otherwise the branch arms may bend inward under the strain.
- Variation: Incorporate thin strips of torn vintage cotton fabric alongside chunky wool for mixed-media texture.
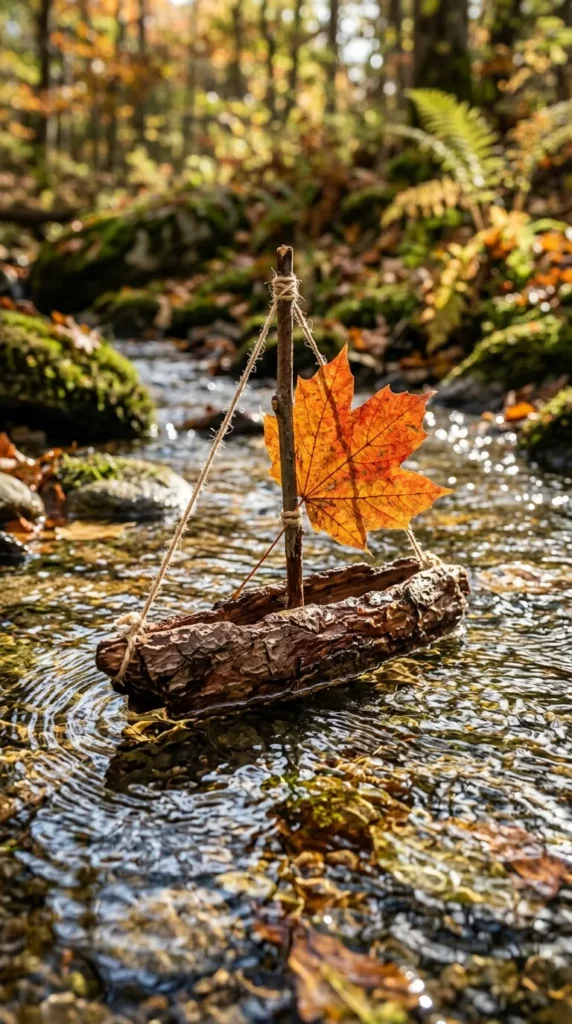
11. Miniature Forest Bark Sailboats & Rafts
Introduction Using thick bark, straight twigs, and dry pressed leaves, children build miniature, floatable rafts and sailboats designed to glide across calm stream currents or lake shallows.
What This Idea Means This craft introduces fundamental balance, buoyancy, and hydrodynamics while transforming natural debris into a classic, functional toy.
Materials Needed
- Thick, buoyant fallen bark chunks (pine or cottonwood) or bundles of dry reed stalks
- Straight slender twigs (approx. 10–12 cm long) for masts
- Broad, dry leaves (oak, maple, or magnolia) for sails
- Fine jute twine or thin raffia cord
- Small pocket knife (used with adult supervision) or awl
How to Make It
- Select a flat, buoyant piece of thick bark to serve as the hull (roughly 12–15 cm long). Alternatively, lash 5 to 6 dry twigs tightly side-by-side with twine to form a raft.
- With adult help, carefully bore a small 5 mm hole into the top center of the hull.
- Whittle the base of a straight twig into a point and press it firmly into the drilled hole to create a rigid, vertical mast.
- Select a broad, pliable leaf and pierce it carefully near the top and bottom with the mast twig to form a curved sail.
- Test the boat in a shallow bowl or camp stream eddy, adjusting the sail angle to catch the breeze.
Tips and Variations
- Tip: Test buoyancy in a camp washbasin before heading to moving water to ensure the hull remains level.
- Variation: Tie a long length of thin linen thread to the stern of the boat so kids can guide their vessels without losing them downstream.
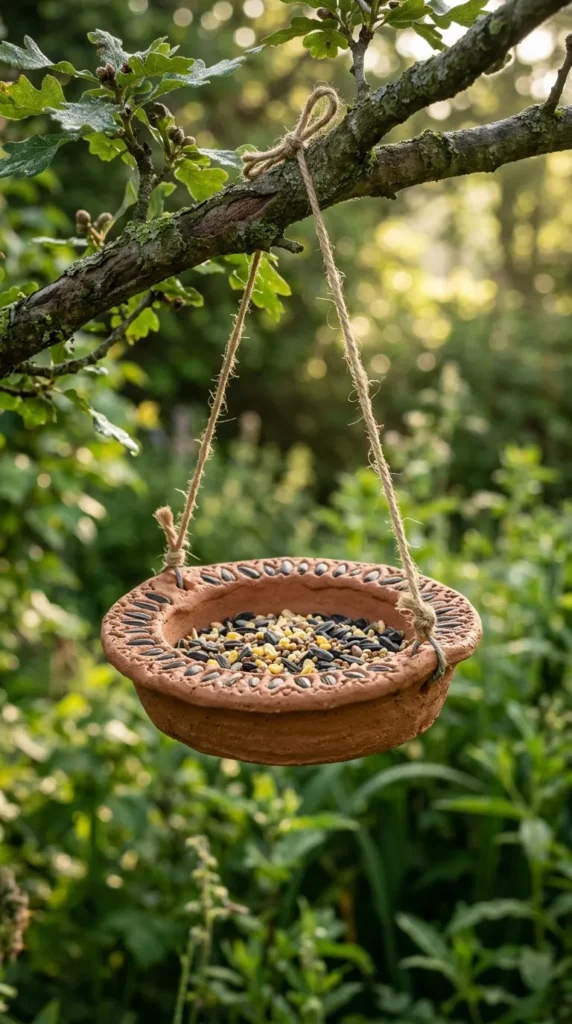
12. Clay Bird Feeders with Wild Seed Inlays
Introduction Using simple pinch-pot sculpting techniques, children shape small natural clay dishes, inlay them with geometric wild bird seed patterns, and hang them from low-hanging tree branches.
What This Idea Means This project fosters wildlife stewardship and patience, encouraging kids to quietly observe local bird species visiting the campsite.
Materials Needed
- Natural, non-toxic air-dry terracotta clay
- Assorted wild bird seed (sunflower, millet, cracked corn, safflower)
- Jute twine or untreated natural hemp rope
- Wooden skewer for shaping and piercing
- Small bowl of water to smooth clay
How to Make It
- Knead a palm-sized ball of terracotta clay until soft and pliable.
- Press a thumb firmly into the center of the ball and pinch the edges outward in a circle to form a shallow bowl with thick, sturdy walls (approx. 10 cm wide, 2 cm deep).
- Smooth the rim with a damp fingertip to prevent cracking.
- Pierce three equidistant holes through the rim using the wooden skewer.
- Press individual sunflower seeds and wild seeds firmly into the exterior rim pattern for visual texture.
- Allow the dish to dry completely in the sun for 24 to 48 hours until hardened.
- Cut three equal lengths of twine, knot them through each hole, and bring the strands together in a central top knot to hang from a branch, filling the dish with birdseed.
Tips and Variations
- Tip: Keep the bowl walls relatively thick (at least 8–10 mm) so the clay maintains structural strength once fully cured.
- Variation: Shape the dish as an organic oval leaf shape, using a real leaf to press an imprint into the interior basin.
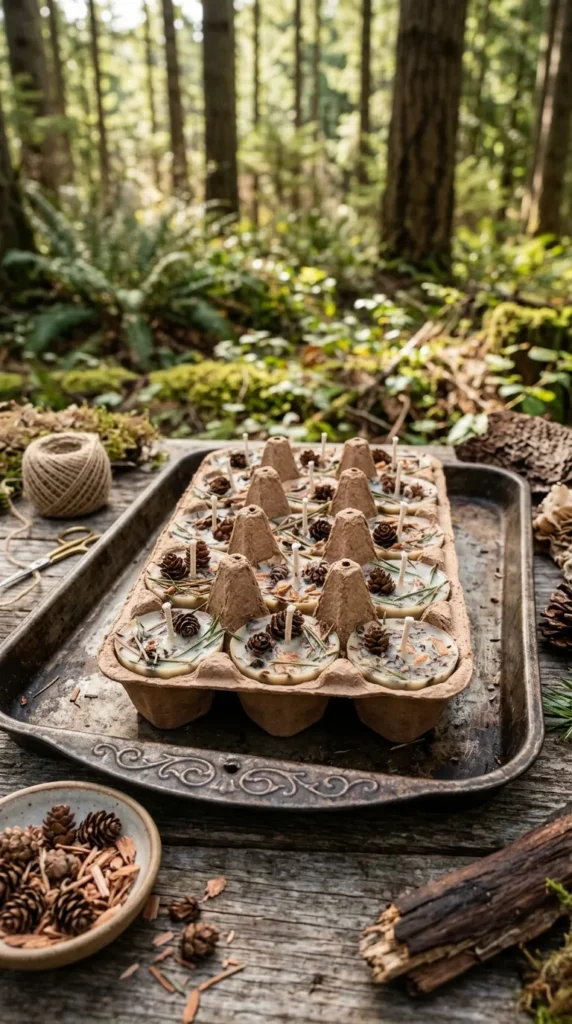
13. Eco-Friendly Soy & Crushed Pine Camp Wax Melts
Introduction Crafting natural fire starters or fragrant camp wax melts using soy wax, collected dried pine needles, crushed acorns, and cinnamon sticks provides a safe, sensory camp kitchen project.
What This Idea Means This craft turns forest floor scraps into practical camp resources, teaching kids safe melting methods and natural aromatics.
Materials Needed
- 100% natural soy wax flakes or beeswax pellets
- Cardboard egg carton cups or small silicone baking cups
- Foraged aromatics: dry pine needles, crushed cedar shavings, mini pinecones, dried orange peel
- Heat-safe camping pot and double-boiler setup (handled by adult)
- Cotton candle wicks or twisted natural twine
How to Make It
- Place individual cardboard egg cups onto a flat camping tray.
- Have children pack the cups with dry pine needles, tiny pinecones, and cedar shavings.
- Center a 5 cm piece of natural cotton wick in the middle of each cup.
- An adult carefully melts the soy wax in a double boiler over the camp stove until fully liquid.
- Slowly pour the warm liquid wax into each cup until the forest materials are three-quarters submerged.
- Allow the wax to cool and harden completely in the shade for 45 minutes.
- Trim the cardboard away or use the entire cup as an easy, clean campfire starter.
Tips and Variations
- Tip: Ensure the natural materials are completely dry before pouring wax; moisture can cause sizzling.
- Variation: Add a few drops of natural cedarwood or pine essential oil to the liquid wax for an enriched woodland aroma.
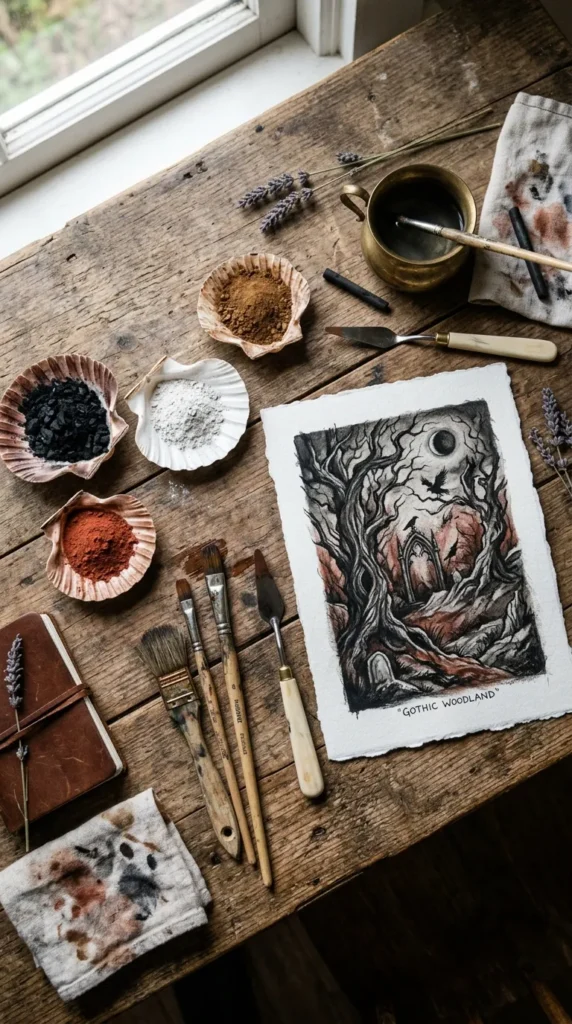
14. Campfire Ash & Natural Mineral Pigment Paints
Introduction Children become natural paintmakers by grinding soft shale, red clay soil, and cold wood ash from the campfire, mixing them with a natural binder to create authentic earth-tone paints.
What This Idea Means This craft connects kids to historical artistry, showing them that paint originates from the earth rather than a plastic bottle.
Materials Needed
- Natural raw pigments: cold white campfire ash, crushed red clay soil, ground soft charcoal, yellow sandstone dust
- Smooth river stones for grinding (mortar and pestle style)
- Natural binder: egg yolk and a splash of water (tempera style) or natural gum arabic dissolved in water
- Small oyster shells, flat bark, or tin lids for palettes
- Small coarse artist brushes
- Heavy rough watercolor paper
How to Make It
- Collect small samples of dry colored earth, cold charcoal chunks, and clean white wood ash.
- Grind each material into a fine powder against a flat rock using a smooth river stone.
- Transfer small pinches of each colored powder into individual seashell or tin cup palettes.
- Add a few drops of the egg-yolk-and-water binder to the dry powder.
- Mix thoroughly with a twig or brush until it forms a creamy, workable paint consistency.
- Paint abstract shapes or forest animal silhouettes onto heavy watercolor paper.
Tips and Variations
- Tip: Sift the ground powder through a fine camp mesh strainer to remove coarse grit before adding the binder.
- Variation: Use crushed wild berries (such as blackberries) to introduce vibrant purple and magenta tones to the earthy palette.
15. Geometric Willow & Tissue Paper Camp Lanterns
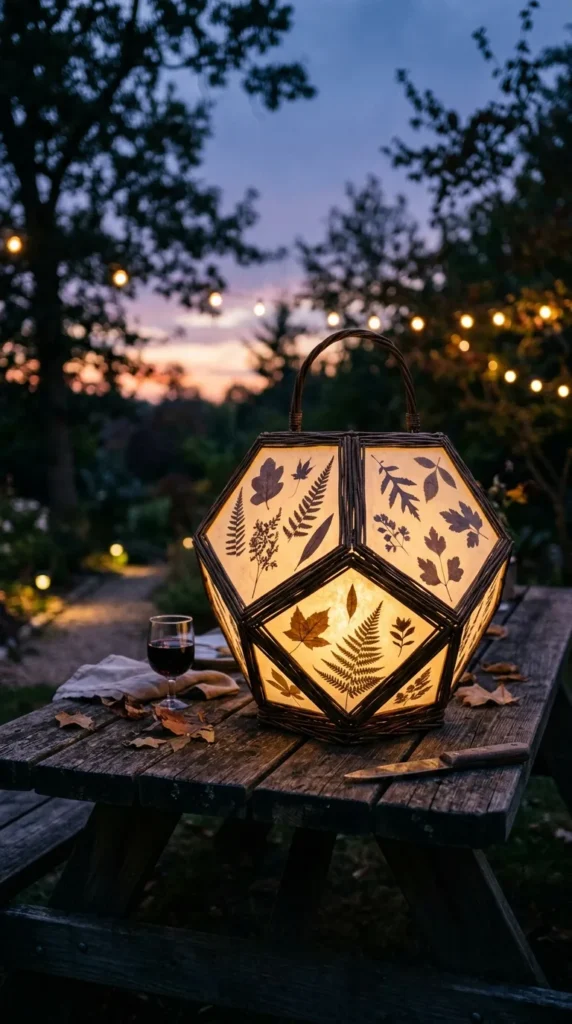
Introduction Using pliable green willow rods tied into three-dimensional geometric prisms and covered in oiled translucent tissue paper, children create glowing, architectural lanterns.
What This Idea Means This activity combines basic geometry, structural engineering, and light play, producing an elegant centerpiece for evening camp gatherings.
Materials Needed
- Thin, flexible green willow rods or peeled reed stalks
- Small natural rubber bands or fine craft wire
- White or unbleached translucent kite paper (or tissue paper)
- Plant-based cooking oil and a brush (to make paper translucent and water-resistant)
- Non-toxic glue stick
- Battery-operated LED tea light
How to Make It
- Cut six equal lengths of willow (approx. 20 cm) and bend/join them using small rubber bands or wire to form a 3D pyramid or prism frame.
- Cut tissue paper panels slightly larger than each triangular face of the willow frame.
- Glue the paper panels firmly over the frame faces, trimming away excess edges with scissors.
- Lightly brush the exterior paper surfaces with a thin film of vegetable oil; this renders the paper translucent and glowing when backlit.
- Let the oil absorb and dry for 20 minutes.
- Rest the frame over a battery-operated LED tea light in the center of the picnic table.
Tips and Variations
- Tip: Work on one face at a time, keeping the paper taut while the glue sets to avoid sagging panels.
- Variation: Press flat, dried clover leaves between two thin layers of tissue paper before attaching them to the frame.
16. Rustic Twig & Split-Wood Minimalist Picture Frames
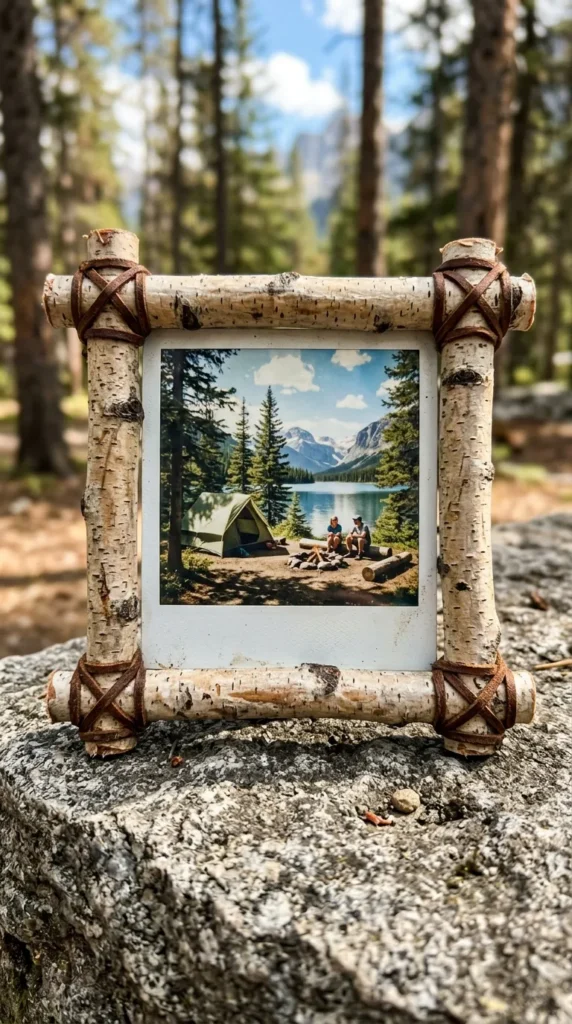
Introduction A simple way to frame a favorite camp photo or a pressed botanical specimen is with a square frame crafted from straight birch twigs lashed with leather cord.
What This Idea Means Framing teaches precise measuring, right-angle alignment, and secure joinery using classic cord-lashing techniques.
Materials Needed
- Four straight, dry fallen twigs of equal diameter (approx. 1 cm thick, 18 cm long)
- Thin leather thonging, suede cord, or waxed linen thread
- Heavy recycled Kraft cardstock (for the backing)
- Small utility craft scissors or pruning shears (adult supervision)
- All-purpose glue or double-sided tape
How to Make It
- Trim the four twigs to equal lengths using hand shears.
- Lay two vertical twigs parallel on the table, then place the two horizontal twigs across them, overlapping at the corners by roughly 2 cm to form a square.
- Tightly bind each overlapping corner intersection using a traditional diagonal square lash: wrap the leather cord diagonally across the joint 4–5 times, switch to the opposite diagonal, and tie off with a square knot at the back.
- Cut a square piece of Kraft cardstock to fit the rear opening and attach it with glue to the back of the twigs.
- Mount a camp drawing, instant photo, or pressed flower inside the frame.
Tips and Variations
- Tip: Choose twigs with textured bark (such as alder or birch) to add natural visual character.
- Variation: Glue small acorn caps or dried lichen rosettes at the corner joints for extra texture.
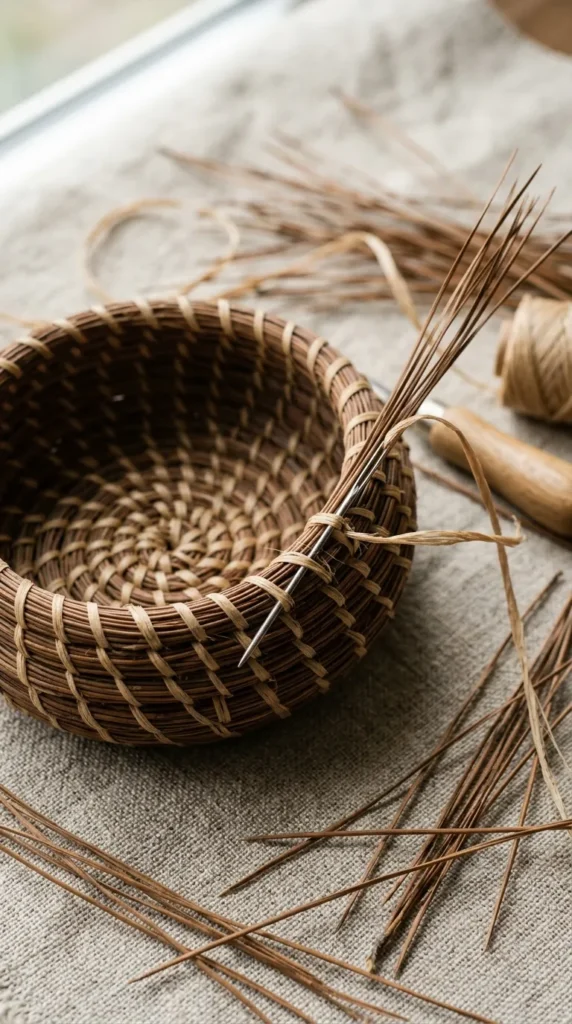
17. Dried Pine Needle & Raffia Coil Baskets
Introduction Pine needle basketry is one of the oldest textile arts. Using long fallen pine needles and natural raffia, kids learn to build small, spiral-coiled trinket bowls.
What This Idea Means Coil basketry promotes deep concentration, rhythmic hand movements, and appreciation for traditional indigenous crafts.
Materials Needed
- Long fallen pine needles (such as Longleaf, Ponderosa, or White Pine; approx. 15–25 cm long)
- Natural dried raffia (or waxed linen thread)
- Large, blunt metal tapestry needles
- Warm water basin (for soaking needles)
- Clean cloth towel
How to Make It
- Soak the pine needles in warm water for 15–20 minutes to make them soft and pliable, then pat them dry with a towel.
- Gather a small bundle of pine needles (about the thickness of a pencil) and wrap the end tightly with raffia.
- Bend the wrapped bundle tightly back on itself to form a tiny central circle (the base spiral).
- Thread raffia onto the tapestry needle and begin stitching around the coil, looping through the previous row at regular intervals to lock the coils together.
- Continue wrapping and coiling in a spiral, feeding new pine needles into the center of the bundle as the coil progresses.
- Slowly angle the coils upward to build the shallow walls of the bowl.
- Taper off the final bundle and weave the remaining raffia firmly into the rim to tie off.
Tips and Variations
- Tip: Remove the brown caps (sheaths) from the pine needle bases before coiling for a smooth, uniform appearance.
- Variation: Alternate between natural raffia and dyed forest green or terracotta raffia to create subtle spiral color patterns.
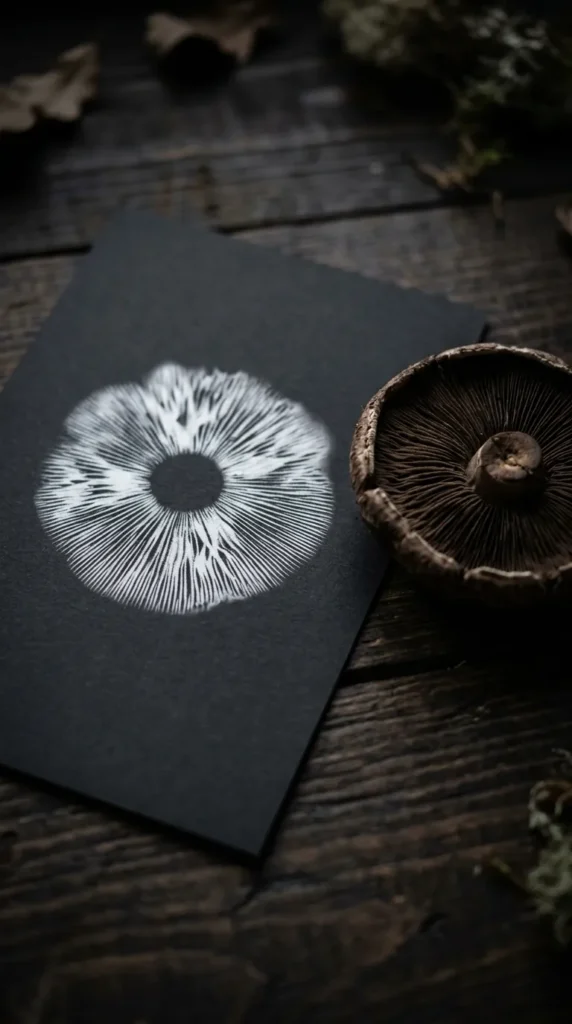
18. Organic Mushroom Spore Prints on Dark Cardstock
Introduction By placing harvested mushroom caps face-down on dark cardstock overnight, kids unveil the intricate, starburst spore patterns produced by different fungi.
What This Idea Means This craft combines biological discovery with natural graphic design, revealing microscopic patterns through simple observation.
Materials Needed
- Freshly foraged mature mushrooms with open, exposed gills (store-bought Portobello/Cremini work equally well and safely)
- Heavy black, white, and kraft paper cardstock sheets
- Clear glass camping bowls or wide drinking tumblers
- Non-aerosol hairspray or fixative spray (handled by adult)
How to Make It
- Carefully remove the stem from the mushroom cap using a clean cut right at the base of the gills.
- Place the mushroom cap gill-side down onto the cardstock (use black paper for white-spored mushrooms, white paper for dark-spored ones).
- Place a single drop of water on top of the mushroom cap to encourage spore release.
- Cover the cap with a glass bowl to prevent drafts from disturbing the falling spores.
- Leave undisturbed overnight (roughly 8 to 12 hours).
- Carefully lift the bowl and mushroom cap straight up to reveal the geometric spore pattern on the paper.
- Allow the paper to air-dry for 10 minutes, then have an adult lightly mist it with fixative spray from 30 cm away to permanently lock the spores in place.
Tips and Variations
- Tip: Cut a sheet of paper half black and half white and place the mushroom directly over the split line if you are unsure of the spore color.
- Variation: Frame the spore print inside a rustic split-wood twig frame for modern camp art.
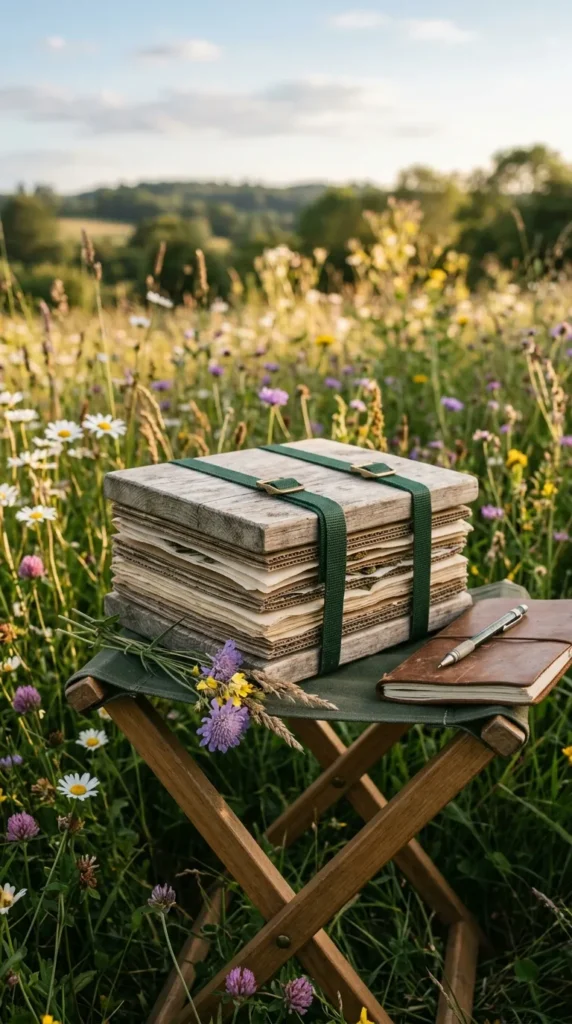
19. Natural Linen & Wood Camp Herbarium Presses
Introduction Children build their own functional field herbarium press using two flat wood panels, cardboard layers, watercolor blotting paper, and adjustable buckle straps.
What This Idea Means This project equips young naturalists with a practical tool that preserves botanical specimens cleanly for future identification and journaling.
Materials Needed
- Two lightweight wooden boards (plywood or pine, approx. 15 cm x 20 cm, 8 mm thick)
- Sandpaper (180 grit)
- Corrugated cardboard sheets cut to match board dimensions (6–8 pieces)
- Thick watercolor or blotting paper sheets (10–12 pieces)
- Two adjustable utility buckle straps or wide elastic luggage bands
- Acrylic paint or wood burner (for decorating the front cover)
How to Make It
- Sand the wood boards smooth along the faces and rounded edges.
- Have children paint or draw their name and minimalist camp graphics onto the top cover board.
- Layer the press contents alternately: cover board, cardboard sheet, blotting paper, plant specimen, blotting paper, cardboard sheet, repeating the sequence.
- Place the bottom wooden board in position.
- Wrap the two buckle straps around the wooden sandwich and pull them completely tight to apply even, firm pressure.
- Check specimens every few days, replacing damp blotting paper until plants are completely dry and flat.
Tips and Variations
- Tip: Drill a grid of small 4 mm ventilation holes through both wood boards to allow moisture to escape faster during drying.
- Variation: Write the Latin names, collection dates, and GPS coordinates directly on the blotting sheets beside each specimen.
20. River Pebble & Natural Resin Mosaic Coasters
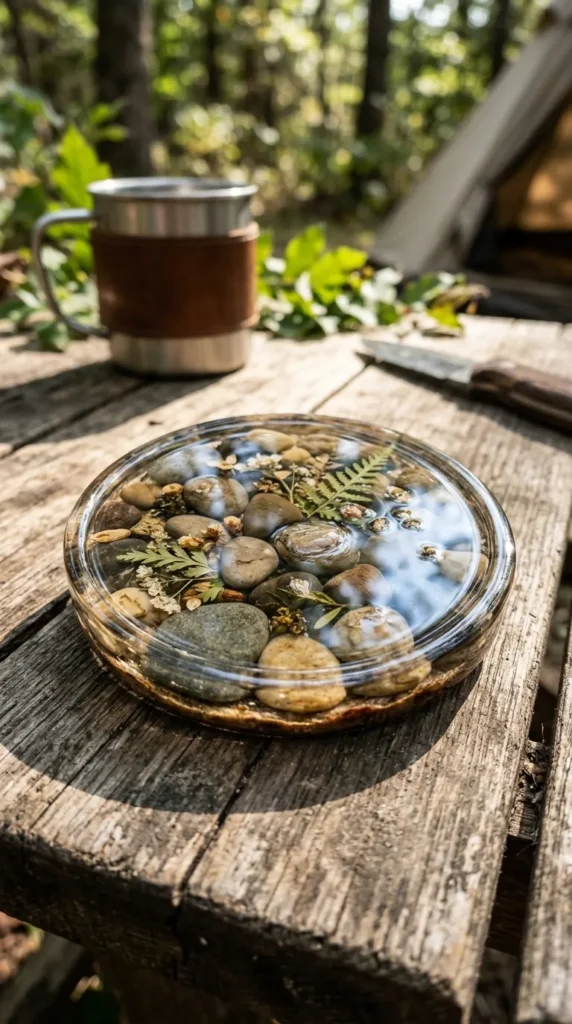
Introduction Tiny, flat pebbles, coarse sand, and dried botanical flecks are set into circular silicone molds with non-toxic, clear bio-resin (or thick craft casting plaster) to create smooth, durable campsite coasters.
What This Idea Means This craft introduces material casting and mosaic composition, turning miniature outdoor treasures into functional, polished home objects.
Materials Needed
- Tiny, flat river pebbles, smooth sea glass shards, and dried moss fragments
- Round silicone coaster molds (approx. 10 cm diameter)
- Non-toxic clear eco-resin or white casting plaster (handled with adult supervision)
- Wooden mixing sticks and paper cups
- Fine-grit wet/dry sandpaper (400 and 800 grit)
How to Make It
- Children arrange their collected river pebbles, sea glass, and dried moss into a mosaic pattern inside the base of the silicone mold.
- An adult assists in measuring and gently mixing the clear eco-resin or fine casting plaster to avoid air bubbles.
- Slowly pour the mixture over the arranged stones until the mold is filled to a depth of roughly 8 mm.
- Use a wooden toothpick to adjust any stones that shift during the pour and pop any small surface bubbles.
- Allow the coasters to cure undisturbed on a flat camp table for 24 hours.
- Demold the coasters and smooth the bottom edges with wet fine-grit sandpaper.
Tips and Variations
- Tip: Ensure all river stones and plant materials are completely dry before casting to prevent clouding in the resin.
- Variation: Stamp the campsite initials and year into the bottom rim of the coaster before the plaster fully cures.