20 Aesthetic Candle Painting Ideas
Candle painting has emerged as one of the most mesmerizing, therapeutic, and visually captivating trends in DIY home decor. While pastel florals and soft watercolor motifs often dominate social feeds, infusing candles with the dramatic grandeur, intricate geometry, and dark romanticism of Gothic design transforms humble wax pillars into museum-worthy art pieces. Gothic aesthetic candle painting blends rich, moody color palettes—matte blacks, deep oxblood reds, metallic antique golds, midnight blues, and ghostly alabasters—with iconic historical motifs like pointed lancet arches, stained glass tracery, skeletal flora, celestial phases, and Victorian lace.
Painted candles serve as extraordinary centerpieces for dark academia studies, moody gothic dining tables, altar spaces, or elegant fairytale mantle displays. Because painting on wax requires specific techniques, pigments, and sealing methods to ensure safe burning or long-lasting decorative appeal, this comprehensive guide breaks down 20 unique Gothic-style candle painting ideas. Each concept includes a detailed artistic introduction, design philosophy, step-by-step creation guide, burning tips, and decorative variations.



1. The Obsidian & Antique Gold Lancet Arch Pillar
Introduction
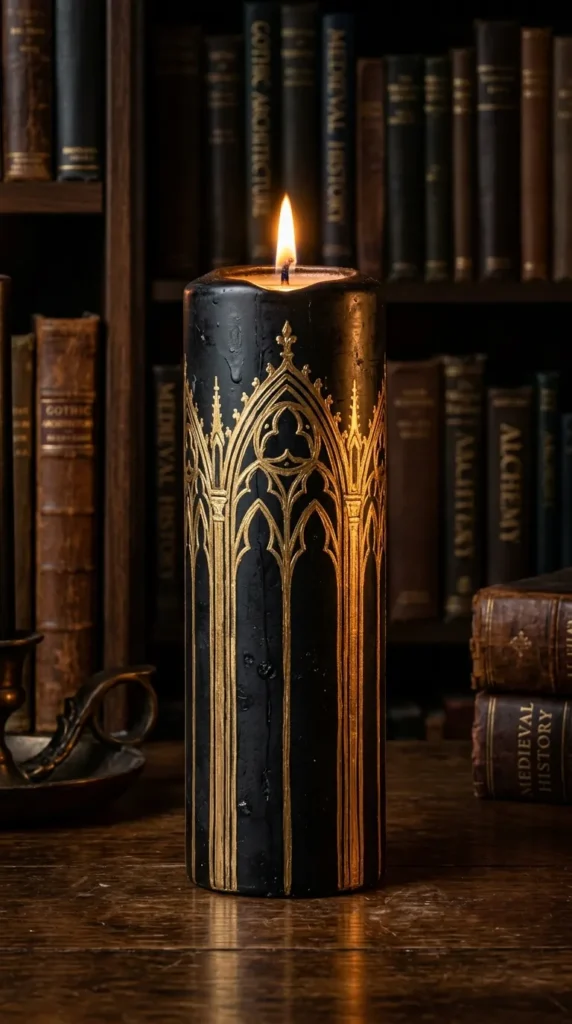
The Obsidian & Antique Gold Lancet Arch Pillar captures the structural majesty of medieval cathedral facades. Set against a sleek, matte black wax background, this design features crisp, pointed Gothic lancet arches painted in metallic antique gold, creating a regal, high-contrast look suitable for dark academia and gothic interiors.
What This Idea Means
This concept leverages extreme visual value framing. Matte black wax absorbs room light, forcing the reflective gold metallic paint to pop off the cylindrical surface like illuminated cathedral windows glowing in the night sky.
Needs to Make That Thing
- Base Candle: Smooth matte black pillar candle (wax or soy).
- Paints: Non-toxic metallic antique gold acrylic paint or liquid gilding wax mixed with melted wax/acrylic medium.
- Tools: Flexible cardstock stencil or painter’s tape, fine-tip synthetic detail brush (size 0 or 1), soft flat blending brush.
- Sealer: Water-based non-toxic candle sealer or decoupage medium suitable for wax.
How to Make It
- Clean the exterior wax pillar surface with a drop of rubbing alcohol to remove dust and oils.
- Measure equal intervals around the candle body and map out repeating pointed lancet arch shapes using a flexible cardstock stencil or light pencil outline.
- Paint inside the arch outlines using metallic antique gold acrylic paint, applying two thin coats for opaque, reflective coverage.
- Detail the inner arch borders with ultra-thin black accent lines to create faux stone molding depth.
- Seal the painted sections lightly with a thin layer of water-based candle-safe sealer to prevent metallic flaking.
Tips & Variations
- Gilded Top Rim: Paint the top circular edge of the candle pillar entirely in antique gold to frame the arch design cleanly.
- Distressed Antique Finish: Lightly dab dark brown paint with a sea sponge over the dry gold arches to simulate aged, tarnished bronze metal.
- Safe Burning Tip: Keep painted sections thin and away from the central wick pool area to ensure a clean melt.
2. The Oxblood Velvet & Black Lace Taper
Introduction
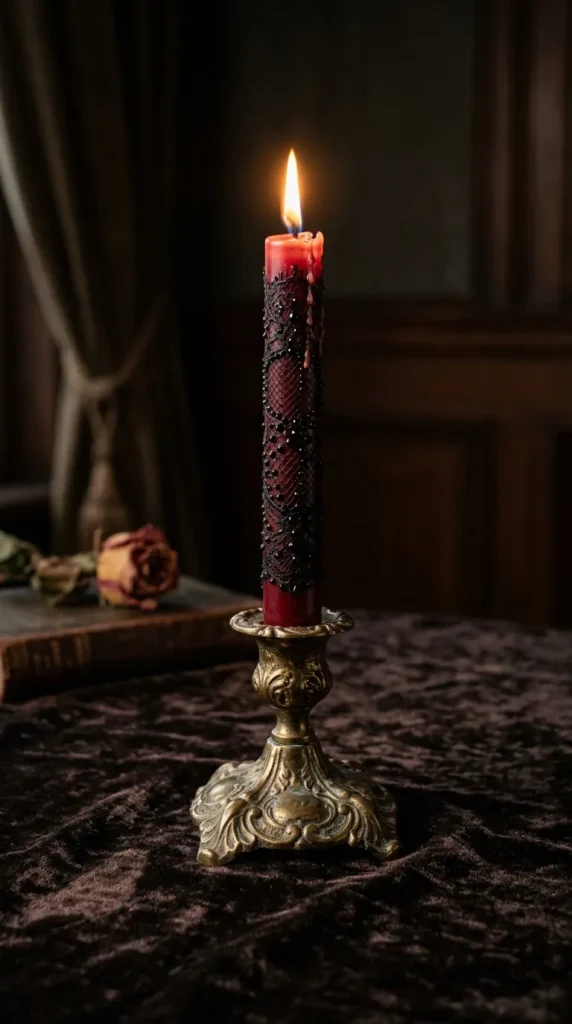
Evoking the moody luxury of Victorian mourning fashion, the Oxblood Velvet & Black Lace Taper combines deep blood-red taper candles with intricate, hand-painted black lace trim and delicate netting patterns running down the stem.
What This Idea Means
Lace motifs represent historical elegance, privacy, and dark romanticism. When painted over deep oxblood red wax, it creates an opulent “vampiric elegance” aesthetic perfect for candlelit dinner settings.
Needs to Make That Thing
- Base Candle: Deep oxblood red or burgundy taper candles.
- Paints: Matte black acrylic paint or black liquid candle wax paint.
- Tools: Fine-tip liner brush (size 00), flexible lace stencil, sea sponge.
- Sealer: Candle-safe matte varnish.
How to Make It
- Secure the red taper candle horizontally in a holder or clamp to keep it steady while painting.
- Wrap a thin piece of lace around the candle stem to use as a stencil, dabbing black paint through the mesh with a sea sponge.
- Alternatively, hand-paint cascading lace fans, scalloped borders, and netting dots along the length of the taper using a 00 liner brush.
- Add small black teardrop motifs along the lower rim of each lace pattern to mimic jet beaded embroidery.
- Allow the paint to dry completely before applying a light spray coat of matte candle sealer.
Tips & Variations
- Velvet Gradient: Dry-brush dark mahogany paint along the bottom half of the taper before painting the lace to create an ombre velvet gradient.
- Double Lace Banding: Paint two thick bands of lace around the upper and lower portions of the taper, leaving the middle red wax open.
3. The Celestial Silver Moon Phase Pillar
Introduction
The Celestial Silver Moon Phase Pillar blends nocturnal gothic mysticism with elegant astronomical art. Painted over a dark midnight blue or matte black pillar candle, it showcases glowing iridescent silver moon phases linked by delicate constellation filigree.
What This Idea Means
Celestial bodies are central symbols in nocturnal gothic lore. This idea transforms a basic candle pillar into a glowing astronomical relic that evokes quiet starry nights and lunar magic.
Needs to Make That Thing
- Base Candle: Midnight blue or dark navy wax pillar candle.
- Paints: Iridescent silver acrylic paint, metallic pewter paint, pearlescent white paint.
- Tools: Circular stencil set, fine detail brush, paint pen (silver).
- Sealer: Satin candle sealer.
How to Make It
- Clean the candle surface and position it vertically.
- Paint a vertical line of moon phases running down the center face: full moon in the middle, flanked by waxing and waning crescents.
- Use metallic pewter for subtle shading along the dark side of the moon phases, layering pearlescent white on highlighted edges.
- Connect the moon shapes with delicate starbursts, tiny stellar dots, and fine geometric constellation lines using a silver paint pen.
- Seal the design with a satin finish to catch ambient flame reflections.
Tips & Variations
- Gold & Silver Mix: Alternate moon phases between metallic gold and metallic silver for a sun-and-moon celestial duality.
- Nebula Wash: Sponge subtle purples and teals around the background before painting silver moon shapes to simulate a deep space nebula.
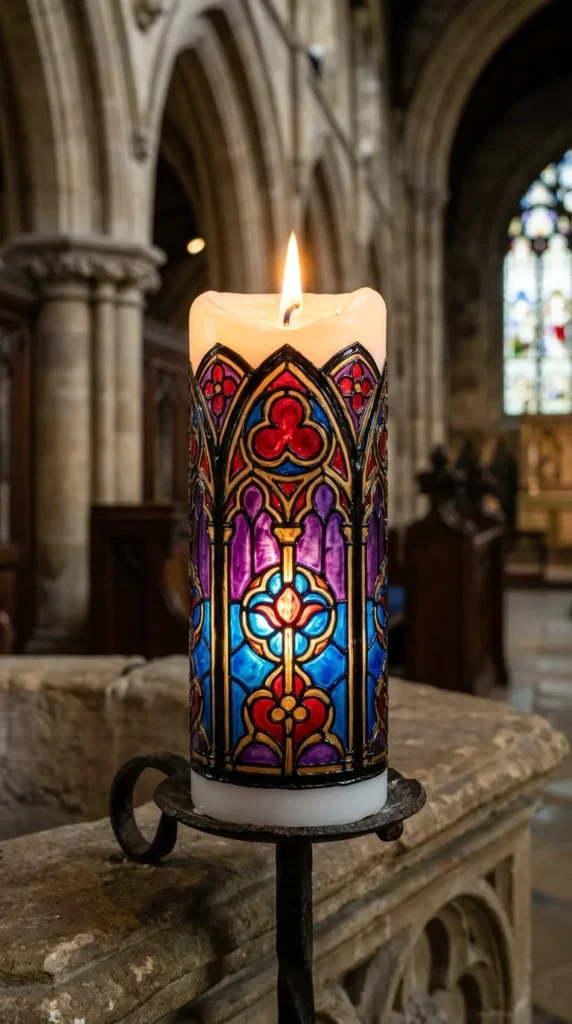
4. The Cathedral Stained Glass Window Candle
Introduction
Inspired by the brilliant circular and lancet windows of medieval cathedrals, the Cathedral Stained Glass Window Candle uses vibrant, glossy jewel-toned paints outlined by thick, raised black lead lines to simulate authentic glass artwork.
What This Idea Means
Stained glass transforms raw light into colorful spiritual storytelling. Recreating this on a white or pillar candle allows the flame’s inner glow to illuminate jewel-toned paint panels, mimicking real sunlit cathedral glass.
Needs to Make That Thing
- Base Candle: White or pale ivory pillar candle (preferably wide for maximum surface area).
- Paints: High-gloss jewel-toned acrylics (ruby red, sapphire blue, emerald green, amethyst purple), black dimensional puffy paint or liquid lead.
- Tools: Fine liner brush, tracing paper, watercolor pencil.
- Sealer: High-gloss wax sealer.
How to Make It
- Lightly trace a Gothic rose window or pointed arch window design onto the wax using a pale watercolor pencil.
- Outline all the geometric window segments using black dimensional fabric paint or liquid lead to create raised divider lines.
- Allow the raised black lines to dry completely, creating contained cells for the color fill.
- Paint inside each cell using high-gloss translucent jewel tones, filling petals and panes with ruby, emerald, and sapphire shades.
- Once dry, seal the entire candle with a glossy clear coat to enhance the glass-like shine.
Tips & Variations
- Metallic Lead: Substitute black liquid lead with dark pewter or antique silver dimensional paint for an aged metal frame look.
- Clear Wax Glow: Use semi-translucent paraffin candles so light shines through the painted glass panels when burned.
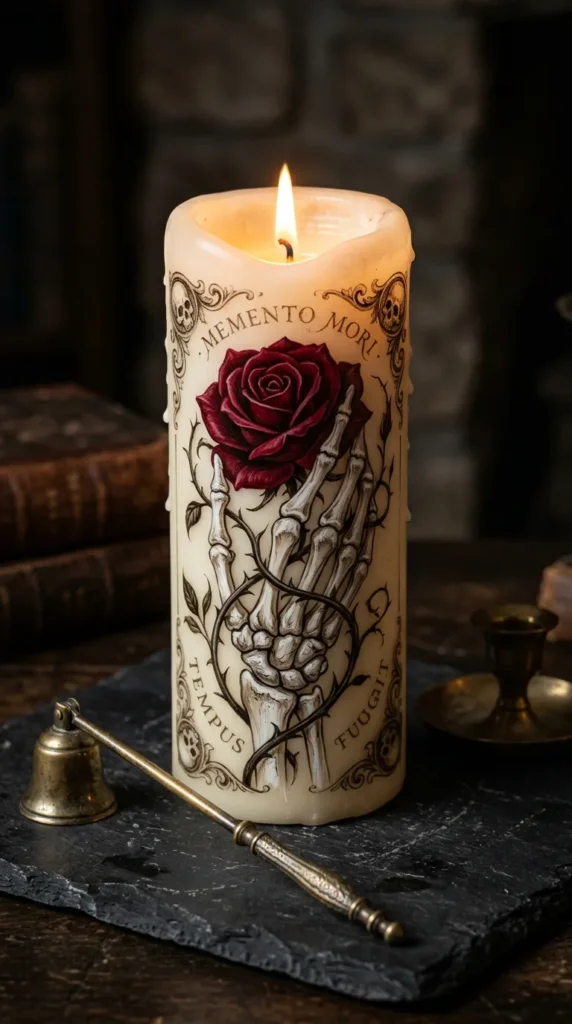
5. The Memento Mori Skeleton & Rose Pillar
Introduction
The Memento Mori Skeleton & Rose Pillar merges historical death-and-decay symbolism with dark romanticism. Featuring detailed anatomical skeletal hands holding black or deep red roses, this pillar honors classic 19th-century gothic art themes.
What This Idea Means
Memento Mori (“remember you must die”) reminds viewers of life’s brevity. Pairing skeletal imagery with lush roses explores the timeless gothic balance between beauty and mortality.
Needs to Make That Thing
- Base Candle: Cream, bone white, or pale grey pillar candle.
- Paints: Off-white, dark charcoal, raw umber, crimson red, jet black acrylics.
- Tools: Detail round brush (size 0), flat shader brush, fine liner brush.
- Sealer: Antique matte varnish.
How to Make It
- Paint an off-white bone-toned base shape of skeletal hand bones wrapping around the front face of the candle.
- Add anatomical depth using dark charcoal and raw umber paint washes to shade finger joints and carpals.
- Paint a large, multi-layered crimson or black rose bloom resting inside the skeleton hand grip.
- Add dark green and black thorny vines winding upward around the rest of the candle cylinder.
- Apply a light brown wash over the entire painted skeleton to give it an aged, antiqued bone patina before sealing.
Tips & Variations
- Gilded Skull: Paint a small skull motif at the base of the candle with gold leaf accents on the eye sockets.
- Withered Petals: Paint falling red rose petals dropping down toward the candle base to emphasize the passage of time.
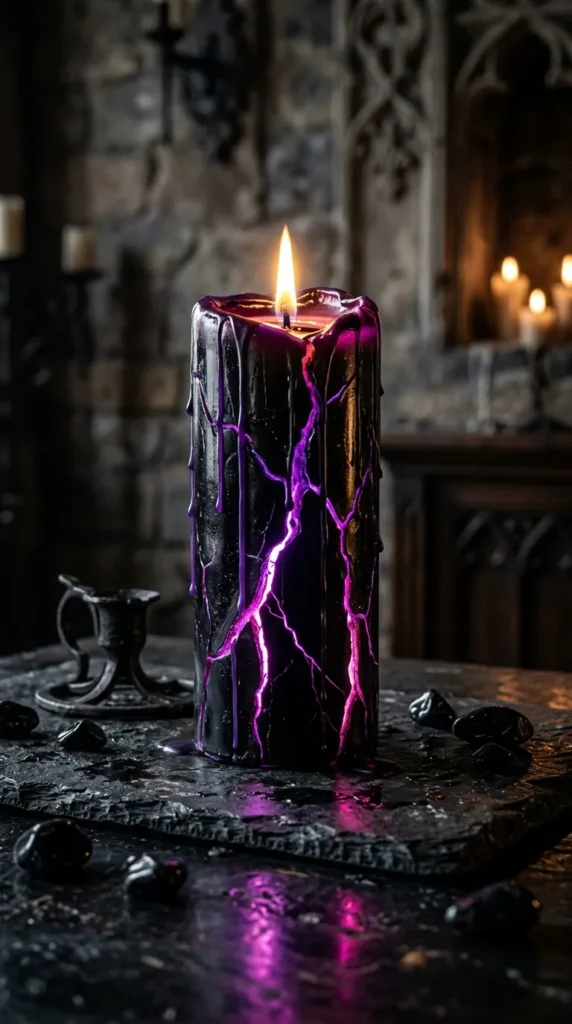
6. The Crying Obsidian & Magenta Fissure Candle
Introduction
Inspired by magical fantasy lore, the Crying Obsidian & Magenta Fissure Candle features a high-gloss pitch-black wax surface broken by weeping purple and glowing magenta fissure lines running down its sides.
What This Idea Means
This concept taps into mystical shadow magic aesthetics. The stark contrast between glossy black surface texture and vibrant, glowing violet fluid lines creates an ethereal, cosmic atmosphere.
How to Make It
- Base Candle: High-gloss black wax pillar candle.
- Paints: Neon magenta, deep purple, violet, white acrylic paints.
- Tools: Palette knife or stiff fan brush, liner brush, gloss varnish.
- Sealer: High-gloss epoxy-safe or acrylic varnish.
How to Make It
- Ensure the black candle surface is clean and free of oil prints.
- Paint irregular vertical cracks and “weeping” fissure lines running down from the top rim using deep purple paint.
- Layer bright neon magenta along the interior center of the purple cracks to create an illuminated glowing effect.
- Add tiny pure white hairline highlights inside the bright magenta centers to simulate intense inner light energy.
- Finish with a thick gloss varnish applied strictly over the fissure lines to make them look like liquid glass.
Tips & Variations
- UV Glow: Mix fluorescent or glow-in-the-dark purple pigment into the fissure paint so the candle glows under blacklight.
- Gold Fissure (Kintsugi): Swap purple paint for metallic gold to create a Japanese Kintsugi-inspired gothic repaired wax pillar.
7. The Victorian Funeral Crepe & Jet Bead Taper
Introduction
Drawing inspiration from Victorian mourning rituals, the Victorian Funeral Crepe & Jet Bead Taper incorporates draped black fabric textures, cascading ribbons, and high-shine black bead motifs over alabaster wax tapers.
What This Idea Means
Victorian mourning attire relied on strict fabric aesthetics—matte crepe silk paired with reflective jet jewelry. Translating this contrast to candles offers subtle, refined gothic sophistication.
Needs to Make That Thing
- Base Candle: Alabaster, pale ivory, or white taper candles.
- Paints: Flat matte black acrylic, high-gloss black dimensional paint.
- Tools: Flat angle brush, fine-tip dotting tool, soft blending cloth.
- Sealer: Dual matte and gloss sealers.
How to Make It
- Paint diagonal black fabric swaths draping around the taper stem using matte black paint.
- Shade along the folds of the painted fabric swaths using dark grey tones to create realistic 3D textile folds.
- Use a fine-tip dotting tool dipped in high-gloss black dimensional paint to place raised, shiny dots along fabric borders, mimicking jet beadwork.
- Paint delicate black ribbon ties with fluttering tails near the upper neck of the taper candle.
- Apply matte sealer over the fabric areas, keeping the raised bead dots glossy for visual texture contrast.
Tips & Variations
- Pewter Accents: Add subtle silver-grey metallic highlights along ribbon edges for extra dimension.
- Single Swath Wrap: Paint one continuous spiral ribbon wrapping down the entire length of the taper candle.
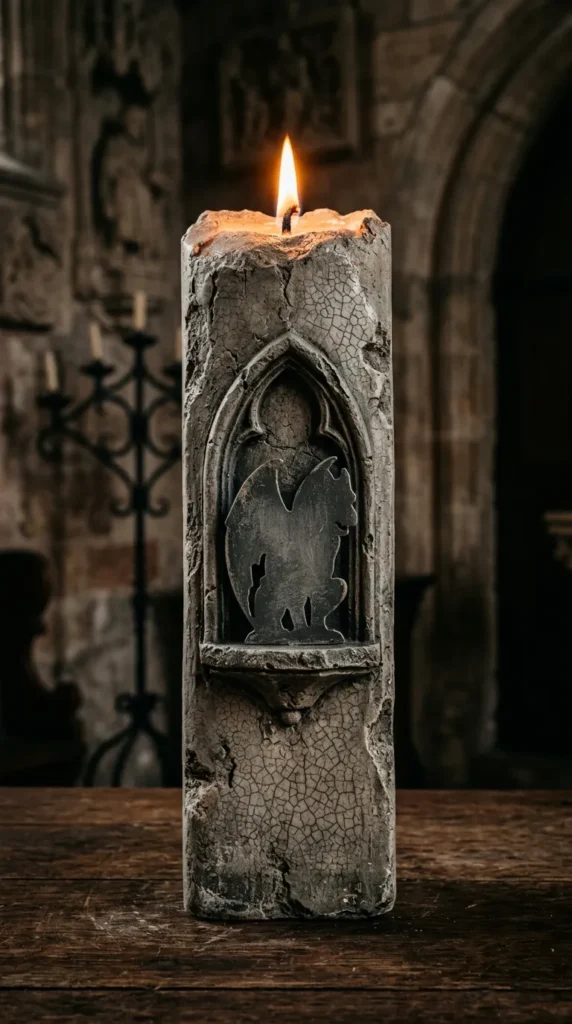
8. The Weathered Stone & Gargoyle Relief Pillar
Introduction
Recreating the dramatic stone architecture of ancient cathedrals, the Weathered Stone & Gargoyle Relief Pillar combines stone-grey textured paints, dark crackle glazes, and stoic carved gargoyle silhouettes.
What This Idea Means
This design brings outdoor monument art indoors. It simulates centuries of rain, wind, and atmospheric aging on carved cathedral stone, giving simple wax pillars a heavy, historical weight.
Needs to Make That Thing
- Base Candle: Dark grey or stone-colored wax pillar candle.
- Paints: Medium grey, charcoal, raw umber, white acrylics, crackle medium.
- Tools: Natural sea sponge, stiff bristle brush, fine liner brush.
- Sealer: Ultra-matte candle sealer.
How to Make It
- Stipple medium grey and charcoal paint unevenly across the candle using a natural sea sponge to build rough stone texture.
- Apply a thin layer of crackle medium over select areas, painting over it with light grey once dry to form aged stone cracks.
- Wash dark raw umber and black watercolor into the cracks and surface low points, wiping away excess highlights with a damp cloth.
- Paint a detailed black or dark grey silhouette of a winged gargoyle perched on a pointed arch ledge across the center face.
- Dry-brush white paint along structural stone edges to highlight stone contours before applying an ultra-matte sealer.
Tips & Variations
- Moss Accents: Dab tiny flecks of olive green paint into lower stone cracks to simulate moss growing on ancient stone.
- Bas-Relief Effect: Use heavy acrylic modeling paste to build a 3D raised gargoyle shape on the wax before painting.
9. The Nocturnal Botanical Nightshade Pillar
Introduction
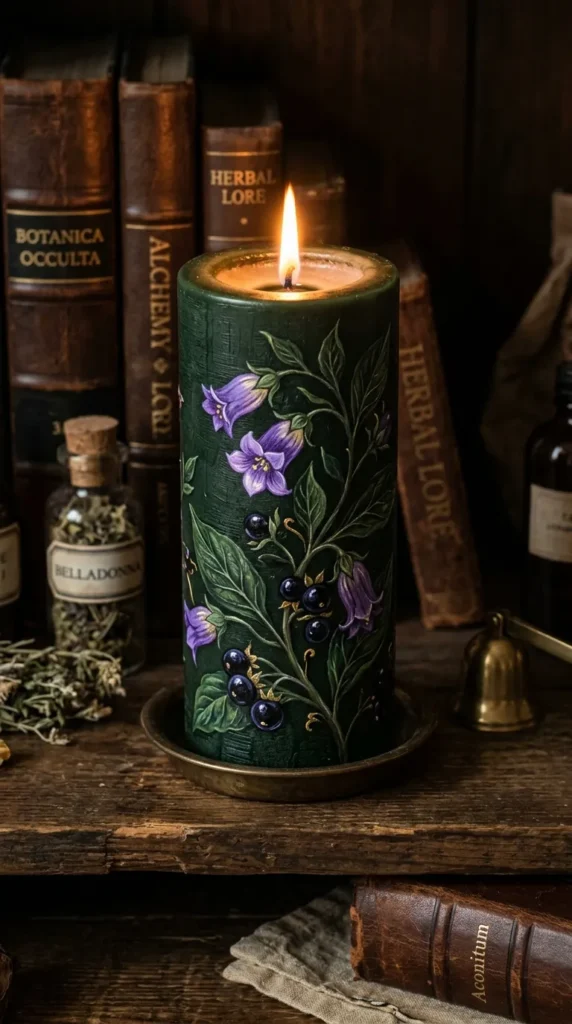
Highlighting deadly poisonous plants, the Nocturnal Botanical Nightshade Pillar features detailed illustrations of Belladonna berries, spiky thorn vines, and dark purple blossoms cascading over deep forest green or charcoal wax.
What This Idea Means
This concept celebrates dark apothecary lore and moody botanical illustration. It frames nature not as bright and sunny, but as mysterious, potent, and nocturnal.
Needs to Make That Thing
- Base Candle: Forest green, dark olive, or charcoal pillar candle.
- Paints: Deep violet, dark magenta, sap green, black, white acrylics.
- Tools: Round detail brush (size 1), liner brush, blending stump.
- Sealer: Satin wax finish.
How to Make It
- Clean the candle surface and set up your botanical reference sketches.
- Paint winding dark green and black stems spiraling around the candle body.
- Paint small five-pointed violet and dark purple nightshade flowers along the stems, adding tiny yellow center pistils.
- Add glossy dark purple and black Belladonna berries hanging in small clusters beneath the floral blooms.
- Highlight berry surfaces with tiny white dots to simulate light reflections on smooth poisonous fruit skin.
Tips & Variations
- Apothecary Label: Paint an aged parchment paper label on the front reading “Atropa Belladonna” in gothic calligraphy script.
- Thorny Rose Hybrid: Mix black rose blooms into the nightshade vines for an elaborate dark floral arrangement.
10. The Gold Leaf & Oxblood Baroque Scroll Pillar
Introduction
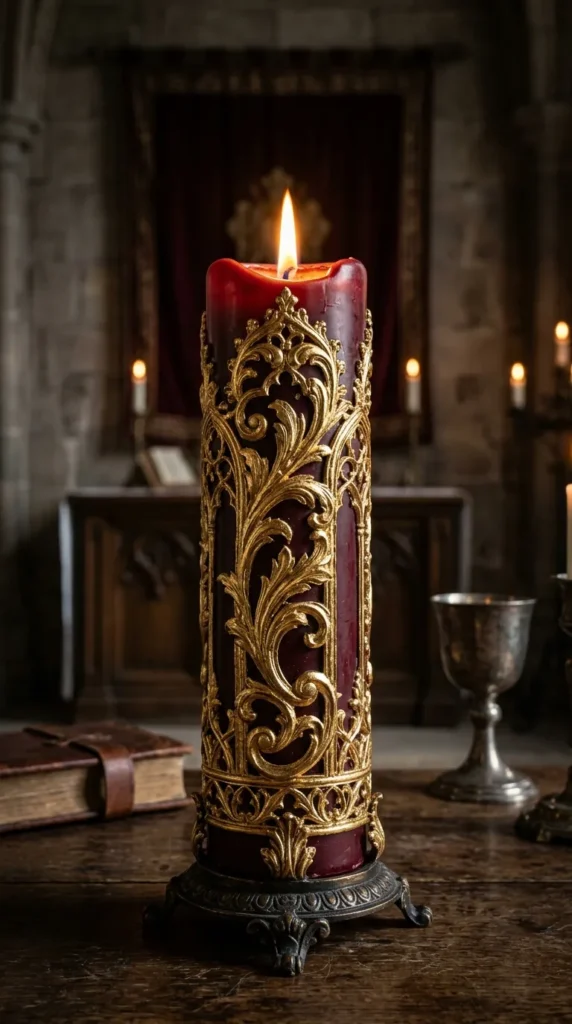
Exuding high theatrical extravagance, the Gold Leaf & Oxblood Baroque Scroll Pillar features sweeping acanthus leaf scrollwork hand-painted or leafed in genuine gold over a deep oxblood red wax pillar.
What This Idea Means
Baroque design emphasizes dramatic motion, rich ornament, and royal luxury. Pairing ornate gold scrollwork with deep red wax produces a museum-worthy statement centerpiece.
How to Make It
- Base Candle: Deep oxblood red or dark burgundy pillar candle.
- Paints/Leaf: Gold leaf foil or metallic antique gold acrylic paint, dark brown shade wash.
- Tools: Water-based gilding size (leaf adhesive), soft mop brush, fine detail brush.
- Sealer: Dedicated gold leaf sealer or satin acrylic varnish.
How to Make It
- Sketch swirling acanthus leaf curves and baroque scroll framing onto the red candle face using a pale watercolor pencil.
- Apply a thin layer of gilding size over the pencil lines using a fine detail brush and let it turn tacky.
- Gently lay gold leaf sheets over the tacky lines, pressing them down smooth with a soft makeup brush.
- Brush away excess leaf flakes, leaving crisp, gleaming metallic gold scrollwork across the red wax surface.
- Brush a thin antique brown glaze wash over the gold leaf to settle into crevices, giving it an aged heirloom finish.
Tips & Variations
- Painted Alternative: If gold leaf is unavailable, paint scrollwork using high-pigment metallic gold acrylic paint.
- Distressed Edges: Rub fine steel wool gently over sections of the gold leaf to reveal small hints of red wax underneath.
11. The Raven Feather & Iron Chain Taper
Introduction
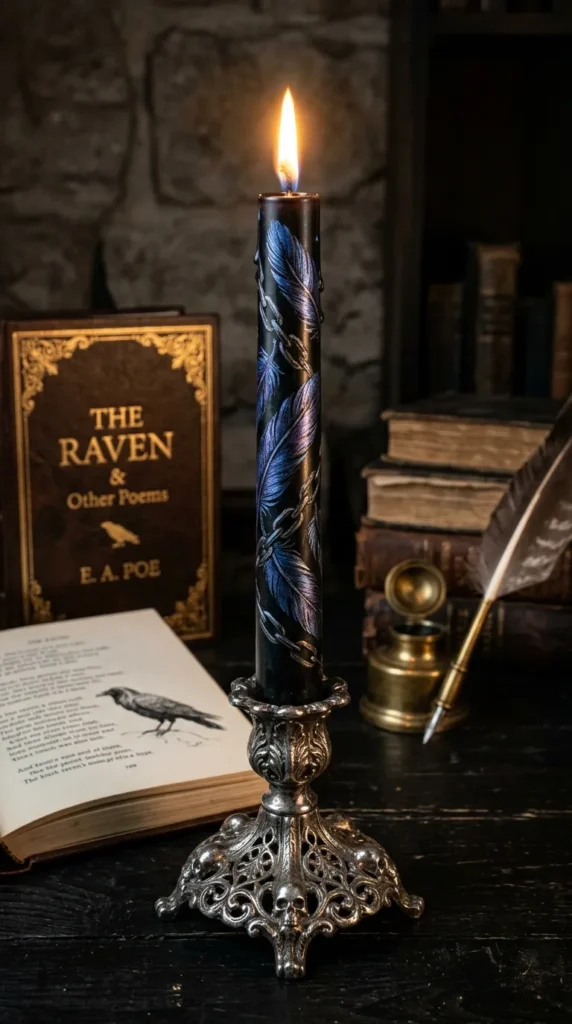
Inspired by Edgar Allan Poe’s iconic dark romanticism, the Raven Feather & Iron Chain Taper features painted iridescent black feather patterns layered beneath hanging gunmetal iron chains.
What This Idea Means
Ravens represent wisdom, mystery, and gothic poetry. This design balances soft organic feather textures with rigid industrial chain link patterns for dark visual harmony.
Needs to Make That Thing
- Base Candle: Matte black, dark slate grey, or silver taper candles.
- Paints: Jet black, midnight blue, metallic purple mica powder/paint, gunmetal grey, white.
- Tools: Detail liner brush, small flat brush, makeup sponge.
- Sealer: Satin clear sealer.
How to Make It
- Paint overlapping raven feather silhouettes along the candle stem using flat black paint.
- Dry-brush metallic blue and purple mica paint over feather edges to capture the natural iridescent sheen of raven wings.
- Paint 3D-style gunmetal iron chain links draping diagonally around the upper taper stem.
- Add dark grey shadow lines under each chain link and tiny white highlight dots along upper metallic curves.
- Seal with a satin finish coat to protect the metallic iridescence.
Tips & Variations
- Real Feather Stamp: Dip the edge of a small feather into paint to stamp natural feather textures directly onto the wax surface.
- Key & Lock Accent: Paint a small hanging vintage iron skeleton key dangling from the lowest chain link.
12. The Poison Apple & Apothecary Drip Pillar
Introduction
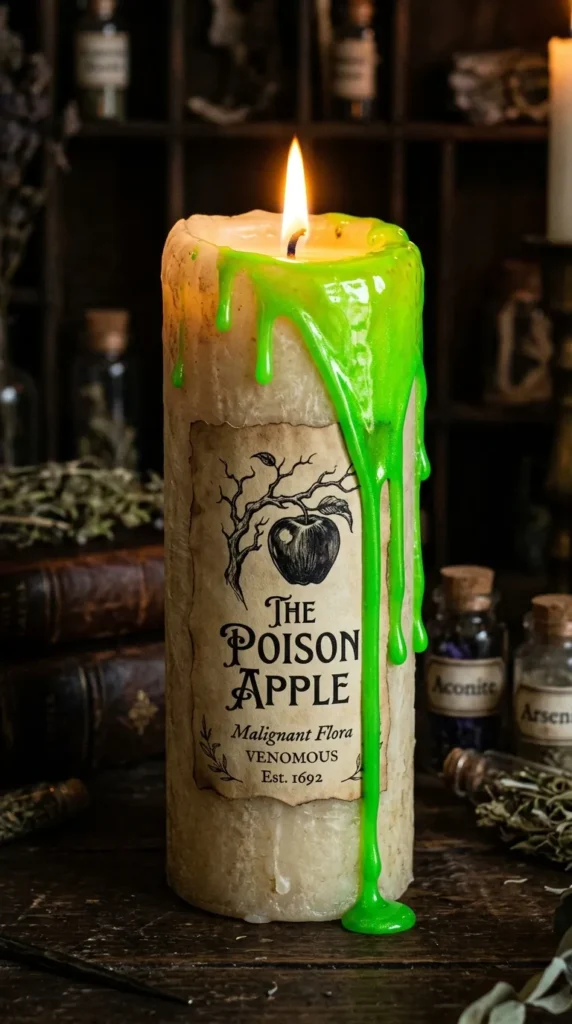
Drawing from dark fairytale folklore, the Poison Apple & Apothecary Drip Pillar features an aged ivory base painted with dripping toxic neon green or black slime accents and vintage apothecary markings.
What This Idea Means
This concept brings dark fairytale storytelling to candle craft. It transforms everyday candles into mysterious potion ingredients from an ancient forest witch’s cottage.
Needs to Make That Thing
- Base Candle: Aged ivory, parchment white, or cream pillar candle.
- Paints: Neon lime green, dark forest green, raw umber, black high-gloss paint.
- Tools: Squeeze bottle or eyedropper, flat wash brush, liner brush.
- Sealer: Matte sealer for base, gloss sealer for drips.
How to Make It
- Wash the ivory candle with diluted brown paint, wiping it back with a rag to create an aged parchment texture.
- Paint a vintage apothecary border frame on the front, lettering “Poison Apple Essence” inside using black ink.
- Using a squeeze bottle or eyedropper filled with thick high-gloss neon green or black paint, apply paint drops along the top rim.
- Allow the paint to naturally drip down the sides of the candle pillar, forming thick, irregular fluid runs.
- Seal the body with a matte finish, leaving the dripping runs glossy for textural contrast.
Tips & Variations
- Melting Wax Synergy: As the candle burns down, real melting wax will mix with painted drip channels for dynamic burning visuals.
- Skull & Crossbones: Add a small hand-painted poison symbol on the apothecary label.
13. The Gothic Lattice & Climbing Ivy Pillar
Introduction
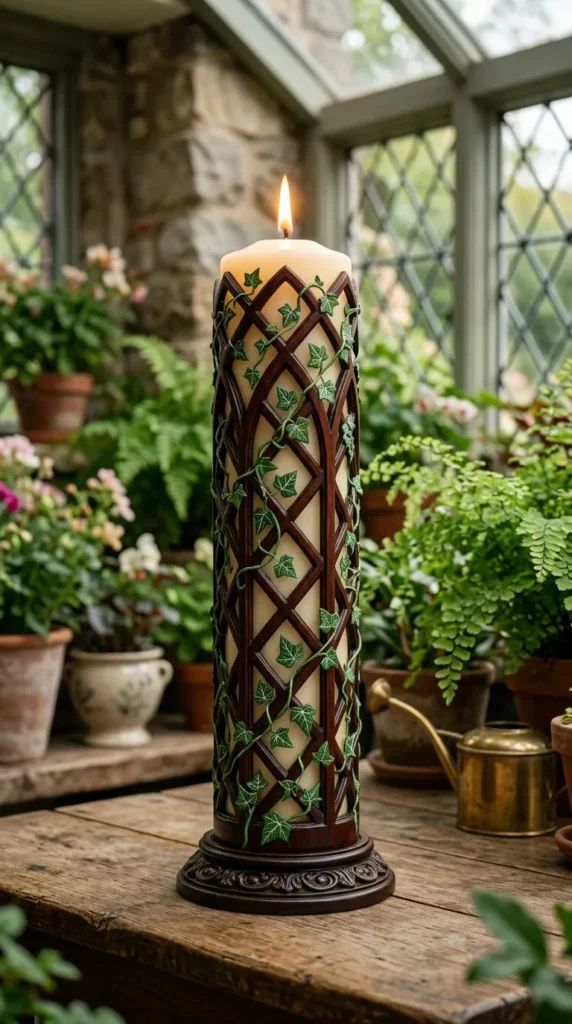
Recreating Victorian estate garden trellises, the Gothic Lattice & Climbing Ivy Pillar combines dark wooden diagonal lattice patterns with hand-painted deep green ivy vines scaling pointed arch frames.
What This Idea Means
This idea scales garden architecture down to candle surfaces. It creates spatial depth by weaving organic climbing foliage through structured geometric trellis lines.
Needs to Make That Thing
- Base Candle: Dark brown, warm terracotta, or charcoal pillar candle.
- Paints: Dark mahogany brown, emerald green, sap green, black, white acrylics.
- Tools: Fine painter’s tape (1/16 inch), detail round brush, liner brush.
- Sealer: Satin finish sealer.
How to Make It
- Map out a diagonal diamond lattice grid around the candle using narrow painter’s tape or light pencil lines.
- Paint the lattice bars in dark mahogany, adding black drop-shadow lines underneath one edge to create 3D depth.
- Remove tape guides and paint green climbing ivy stems winding up and through the lattice openings.
- Add small heart-shaped ivy leaves using emerald green, highlighting leaf veins with fine white brush strokes.
- Apply a satin clear coat overall to protect the delicate vine artwork.
Tips & Variations
- Variegated Ivy: Paint pale cream edges on select leaves to simulate variegated Hedera helix species.
- Pointed Arch Tops: Shape the upper boundary of the painted lattice into pointed gothic arch peaks around the top candle rim.

14. The Obsidian Dragon Scale Taper
Introduction
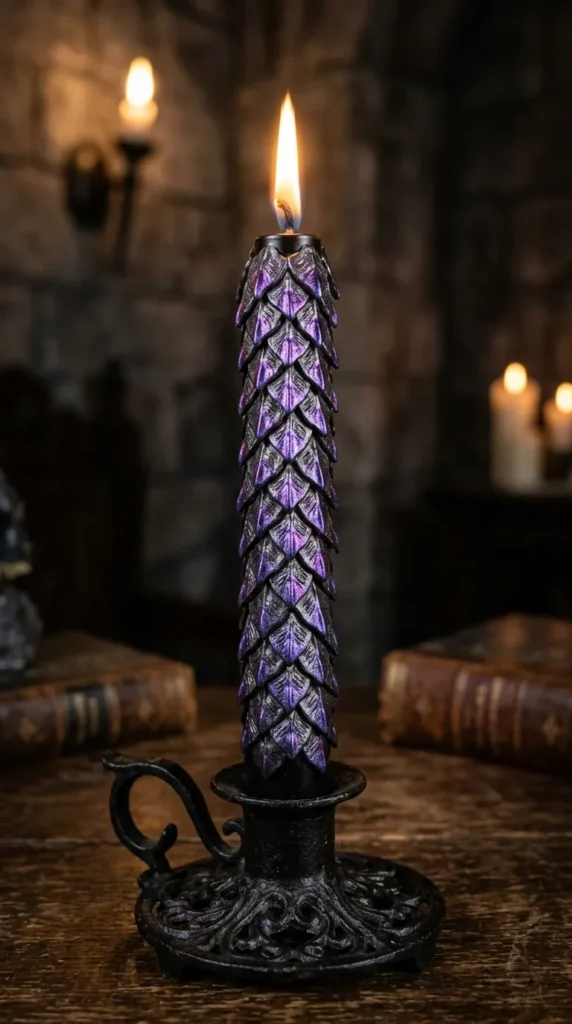
Channeling dark fantasy armor and dragon lore, the Obsidian Dragon Scale Taper features multi-layered, textured dragon scale patterns painted in metallic gunmetal, black, and chameleon shift colors.
What This Idea Means
Dragon scales provide dynamic geometric texture that catches light across every curved tile edge, turning slender tapers into mythical protective artifacts.
Needs to Make That Thing
- Base Candle: Black or dark grey taper candles.
- Paints: Matte black, metallic gunmetal, chameleon shift paint (teal/purple), white.
- Tools: Scalloped stencil or round detail brush, palette knife.
- Sealer: High-gloss sealer.
How to Make It
- Starting from the bottom base of the taper, paint overlapping semi-circular scale shapes in rows working upward.
- Shade each individual scale with a gradient: dark black at the top curve, blending into metallic gunmetal near the bottom edge.
- Highlight the lower rounded tip of each scale with chameleon shift paint that flips between teal and purple under light.
- Add tiny white highlight flecks on scale tips to make them look wet and reflective.
- Seal with a high-gloss coat to maximize reptilian armor sheen.
Tips & Variations
- Fiery Ember Rim: Paint the bottom taper base in fiery glowing red and orange gradients beneath the lowest scale row.
- Gold Scale Tips: Use bright gold leafing on scale tips for an ornate imperial dragon theme.
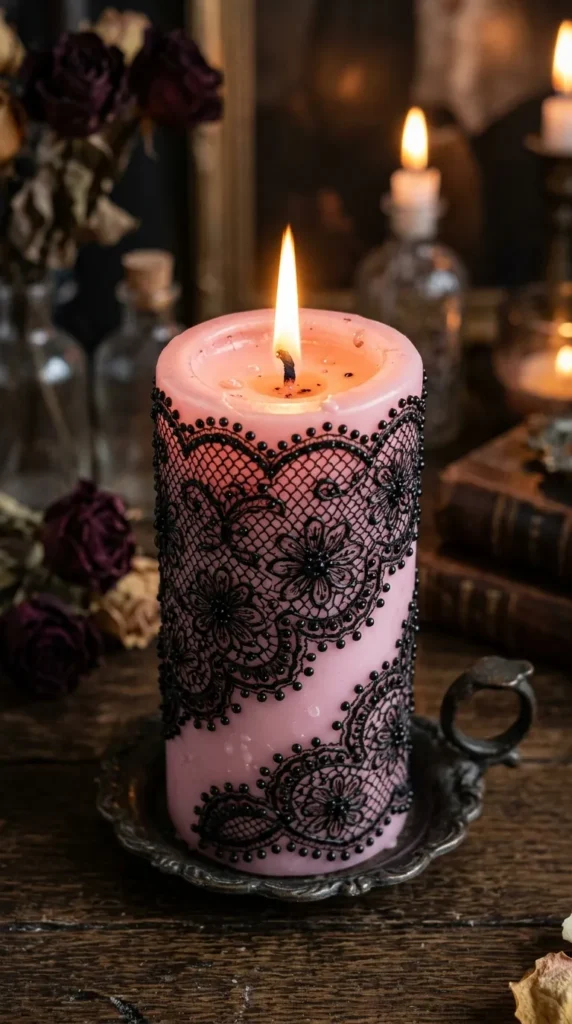
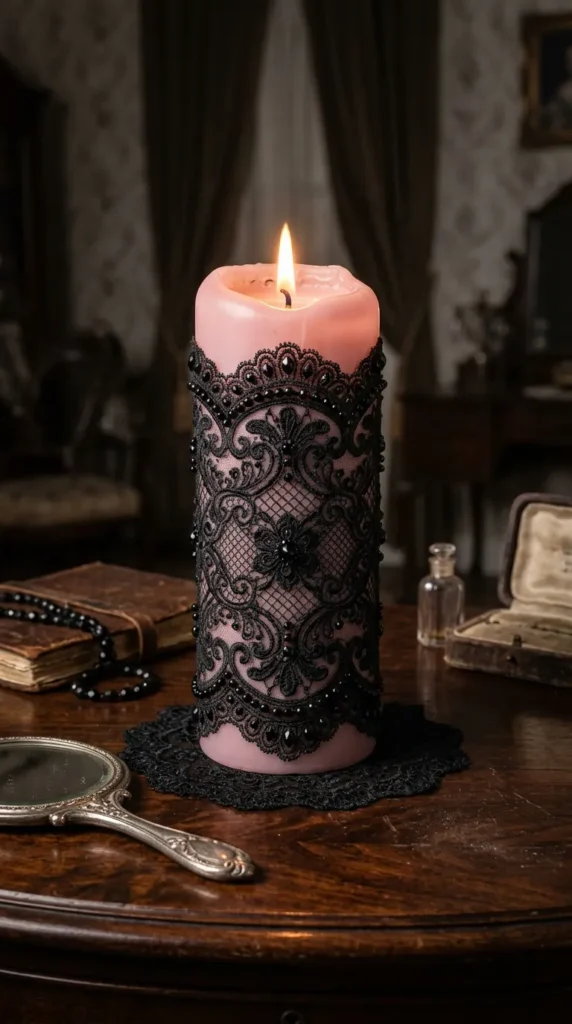
15. The Victorian Funeral Veil Lace Pillar
Introduction
Inspired by 19th-century mourning veils, the Victorian Funeral Veil Lace Pillar incorporates intricate black lace mesh, draped fabric textures, and jet-black bead accents over a pale pink wax pillar.
What This Idea Means
Pastel Goth aesthetics merge soft pink tones with dark gothic elements. Wrapping pale pink wax in dense black mourning lace produces a striking romantic aesthetic.
Needs to Make That Thing
- Base Candle: Pale pastel pink or rose wax pillar candle.
- Paints: Flat matte black acrylic, high-gloss black dimensional paint.
- Tools: Real lace fabric (for stenciling), sea sponge, fine 00 detail brush.
- Sealer: Dual matte and gloss sealers.
How to Make It
- Wrap a piece of detailed black lace tightly around the pink candle pillar.
- Sponge matte black paint gently over the lace stencil, removing it carefully to reveal crisp lace patterns on pink wax.
- Hand-paint delicate fabric drape lines and ribbon bows along the top rim using a 00 detail brush.
- Add dots of high-gloss black dimensional paint along lace borders to simulate jet beadwork.
- Seal the pink base and lace in matte varnish while preserving gloss dots for texture pop.
Tips & Variations
- Black-on-Black: Paint matte black lace over a glossy black candle for subtle monochrome elegance.
- Rose Motifs: Integrate tiny hand-painted black rose heads inside the lace mesh patterns.
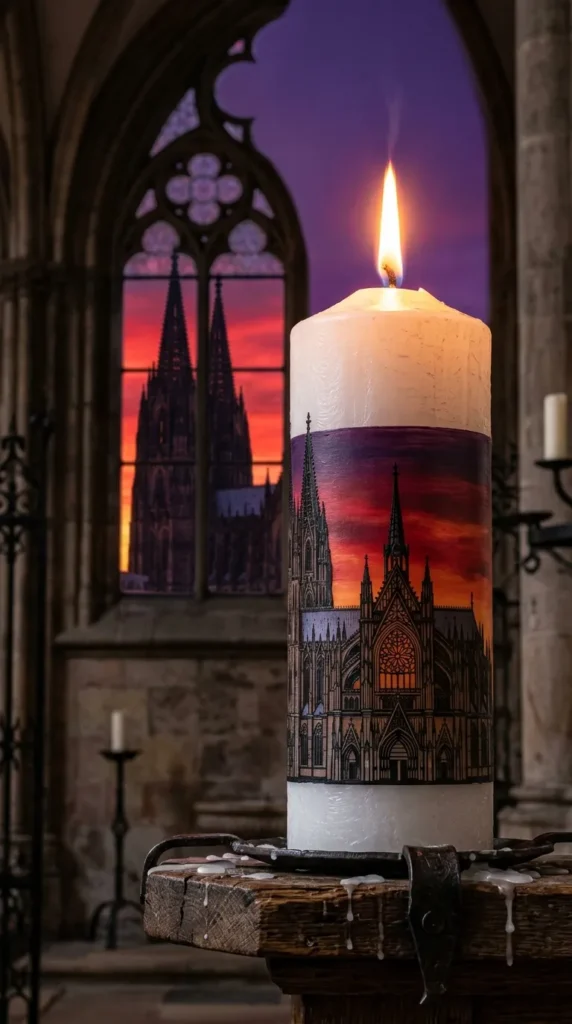
16. The Gothic Cathedral Skyline Silhouette Pillar
Introduction
The Gothic Cathedral Skyline Silhouette Pillar showcases a dramatic silhouette of sharp cathedral spires, flying buttresses, and clock towers set against a moody sunset sky gradient.
What This Idea Means
This idea treats the candle as a panoramic canvas. It uses dramatic sky gradients (crimson, violet, deep orange) to make sharp architectural silhouettes pop dramatically.
Needs to Make That Thing
- Base Candle: White or light cream wax pillar candle.
- Paints: Crimson red, magenta, violet, midnight navy, jet black acrylics.
- Tools: Makeup sponge (for blending), fine detail brush, liner brush.
- Sealer: Satin finish sealer.
How to Make It
- Sponge a horizontal sky gradient around the candle midsection: crimson at the bottom blending up into magenta, violet, and dark navy at the top.
- Allow the sky gradient to dry completely.
- Paint a detailed city skyline of gothic cathedral spires, gargoyles, pointed roofs, and flying buttresses along the lower third in black paint.
- Fill in the cathedral shapes completely with flat matte black paint.
- Paint a soft yellow full moon and tiny white stars in the upper violet sky section.
Tips & Variations
- Silver Storm Sky: Replace colorful sky gradients with a metallic silver-and-grey stormy sky palette.
- Double Silhouette: Paint city skylines around both the top and bottom borders, leaving a starry sky channel in the middle.
17. The Dark Academia Book Spine Pillar
Introduction
Appealing to dark academia literature lovers, the Dark Academia Book Spine Pillar paints the candle body to resemble antique leather-bound book spines stacked around the cylinder, accented with gold leaf lettering.
What This Idea Means
This design celebrates classical literature, dark libraries, and historic scholarship. It transforms everyday candles into bookish decor ideal for study desks.
Needs to Make That Thing
- Base Candle: Wide dark brown, tan, or white wax pillar candle.
- Paints: Forest green, oxblood red, navy blue, mahogany, antique gold acrylics.
- Tools: Flat shader brush, fine liner brush, gold metallic pen.
- Sealer: Antique matte varnish.
How to Make It
- Divide the candle circumference into vertical rectangular panels representing individual book spines.
- Paint each spine panel in rich historical colors: deep burgundy, dark forest green, navy blue, and mahogany brown.
- Apply a thin wash of raw umber paint across all painted spines to simulate worn, aged leather textures.
- Paint raised horizontal leather ribs across the top and bottom spine sections using thin acrylic lines.
- Letter classic gothic titles (Frankenstein, Dracula, The Raven) vertically along spines using metallic gold paint.
Tips & Variations
- Page Edges Top: Paint the top circular edge of the candle pillar in off-white with fine brown lines to look like antique book pages viewed from above.
- Bookmark Ribbons: Paint thin crimson satin bookmark ribbons dangling down between book spines.
18. The Hourglass & Winged Skull Pillar
Introduction
Centering on classic philosophical themes of time and mortality, the Hourglass & Winged Skull Pillar features detailed paintings of wooden hourglasses with black sand, winged skulls, and fading candle flames.
What This Idea Means
Memento Mori art reminds viewers of time’s passing. Translating this theme onto a burning candle creates deep symbolic harmony, as the candle itself melts away over time.
Needs to Make That Thing
- Base Candle: Cream, bone white, or grey wax pillar candle.
- Paints: Antique bronze, bone white, dark charcoal, orange, black acrylics.
- Tools: Detail round brush, liner brush, blending stump.
- Sealer: Antique matte sealer.
How to Make It
- Paint a central brass or dark wood hourglass structure on the front face of the candle pillar.
- Fill the glass bulbs with black and white sand textures, painting individual sand grains dropping through the narrow neck.
- Paint a winged skull perched on top of the hourglass frame using bone-white and charcoal shading.
- Add a flickering candle flame alongside the hourglass with thin grey smoke trails curling up around the pillar rim.
- Hand-letter Latin phrases like Tempus Fugit (Time Flies) or Memento Mori along the upper border.
Tips & Variations
- Glowing Sand: Paint the falling sand grains with neon or glow-in-the-dark paint for a magical nocturnal effect.
- Falling Rose Petal: Paint a single withered red rose petal dropping alongside the hourglass frame.
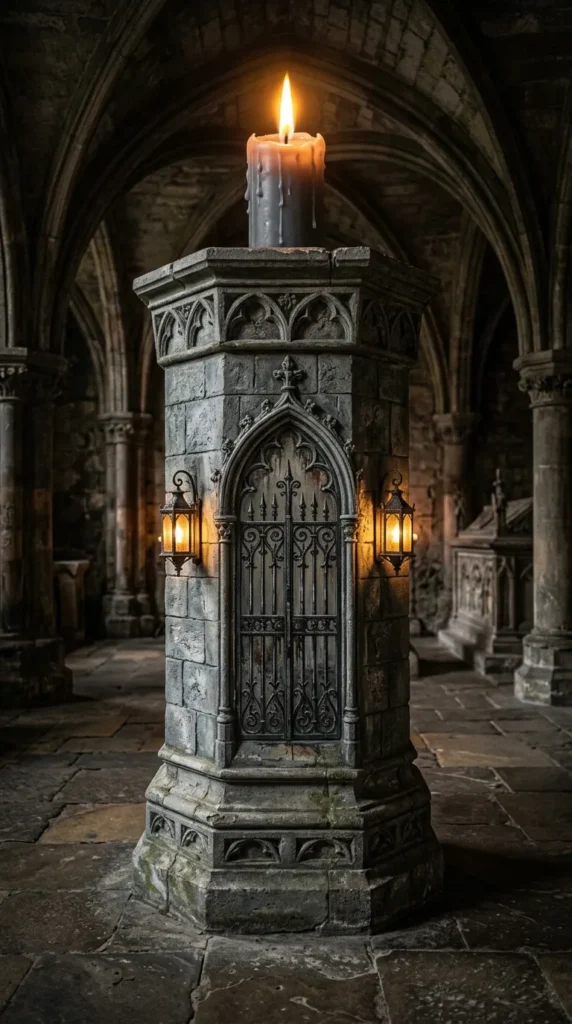
19. The Wrought Iron Crypt Gate Pillar
Introduction
Recreating the entrance to an overgrown gothic mausoleum, the Wrought Iron Crypt Gate Pillar features hand-painted stone block masonry, heavy iron gate doors, and glowing hanging lanterns.
What This Idea Means
This concept brings historic cemetery architecture down to micro candle scale. It creates rich storytelling depth, making the flame look like a beacon atop an ancient crypt spire.
Needs to Make That Thing
- Base Candle: Light grey or stone-colored wax pillar candle.
- Paints: Dark grey, charcoal, black, bright yellow, olive green acrylics.
- Tools: Flat wash brush, fine liner brush, sea sponge.
- Sealer: Ultra-matte sealer.
How to Make It
- Paint a light grey stone block pattern around the candle body, using dark grey lines to define masonry seams.
- Sponge dark charcoal and green washes over the stone blocks to add atmospheric weathering.
- Paint double-door wrought iron crypt gates in the center using black paint, detailing pointed arch tops and padlocks.
- Paint glowing yellow lanterns hanging from iron brackets on either side of the crypt door.
- Add climbing green moss and dark vines creeping up around the gate base and stone wall seams.
Tips & Variations
- 3D Padlock Accent: Glue a tiny vintage craft key or miniature brass padlock over the painted gate doors for fun 3D texture.
- Crypt Inscription: Paint a custom family crest or gothic inscription (Rest in Peace, Ad Astra) over the archway.
20. The Velvet Rose & Thorny Vine Pillar
Introduction
Focusing on dark floral romance, the Velvet Rose & Thorny Vine Pillar showcases oversized, deep crimson and black velvet roses tangled in spiky thorny vines wrapped around a matte charcoal pillar candle.
What This Idea Means
The rose is the ultimate symbol of gothic romance—combining delicate velvet petals with sharp, protective thorns. This design wraps candles in timeless dark floral sophistication.
Needs to Make That Thing
- Base Candle: Matte charcoal or solid black wax pillar candle.
- Paints: Deep crimson, dark burgundy, sap green, black, white acrylics.
- Tools: Round detail brush (size 2), liner brush, soft blending brush.
- Sealer: Satin clear sealer.
How to Make It
- Clean the candle surface and set up your floral composition outline.
- Paint large multi-petaled rose blooms around the midsection using deep crimson and dark burgundy paints.
- Layer rose petals using soft shading: black in shadow recesses, shading up to vibrant crimson on petal edges for 3D depth.
- Paint thick dark green and black thorny vines twisting diagonally around the pillar, connecting rose blooms.
- Highlight sharp vine thorns with fine white brush lines and paint tiny red dew drops dripping from select thorns.
Tips & Variations
- Velvet Shimmer: Dust subtle red mica powder over rose petal edges while paint is tacky to give blooms a velvety sheen under room light.
- Black Rose Variant: Paint the roses entirely in jet black with dark silver edge highlights for a rare, moody botanical look.